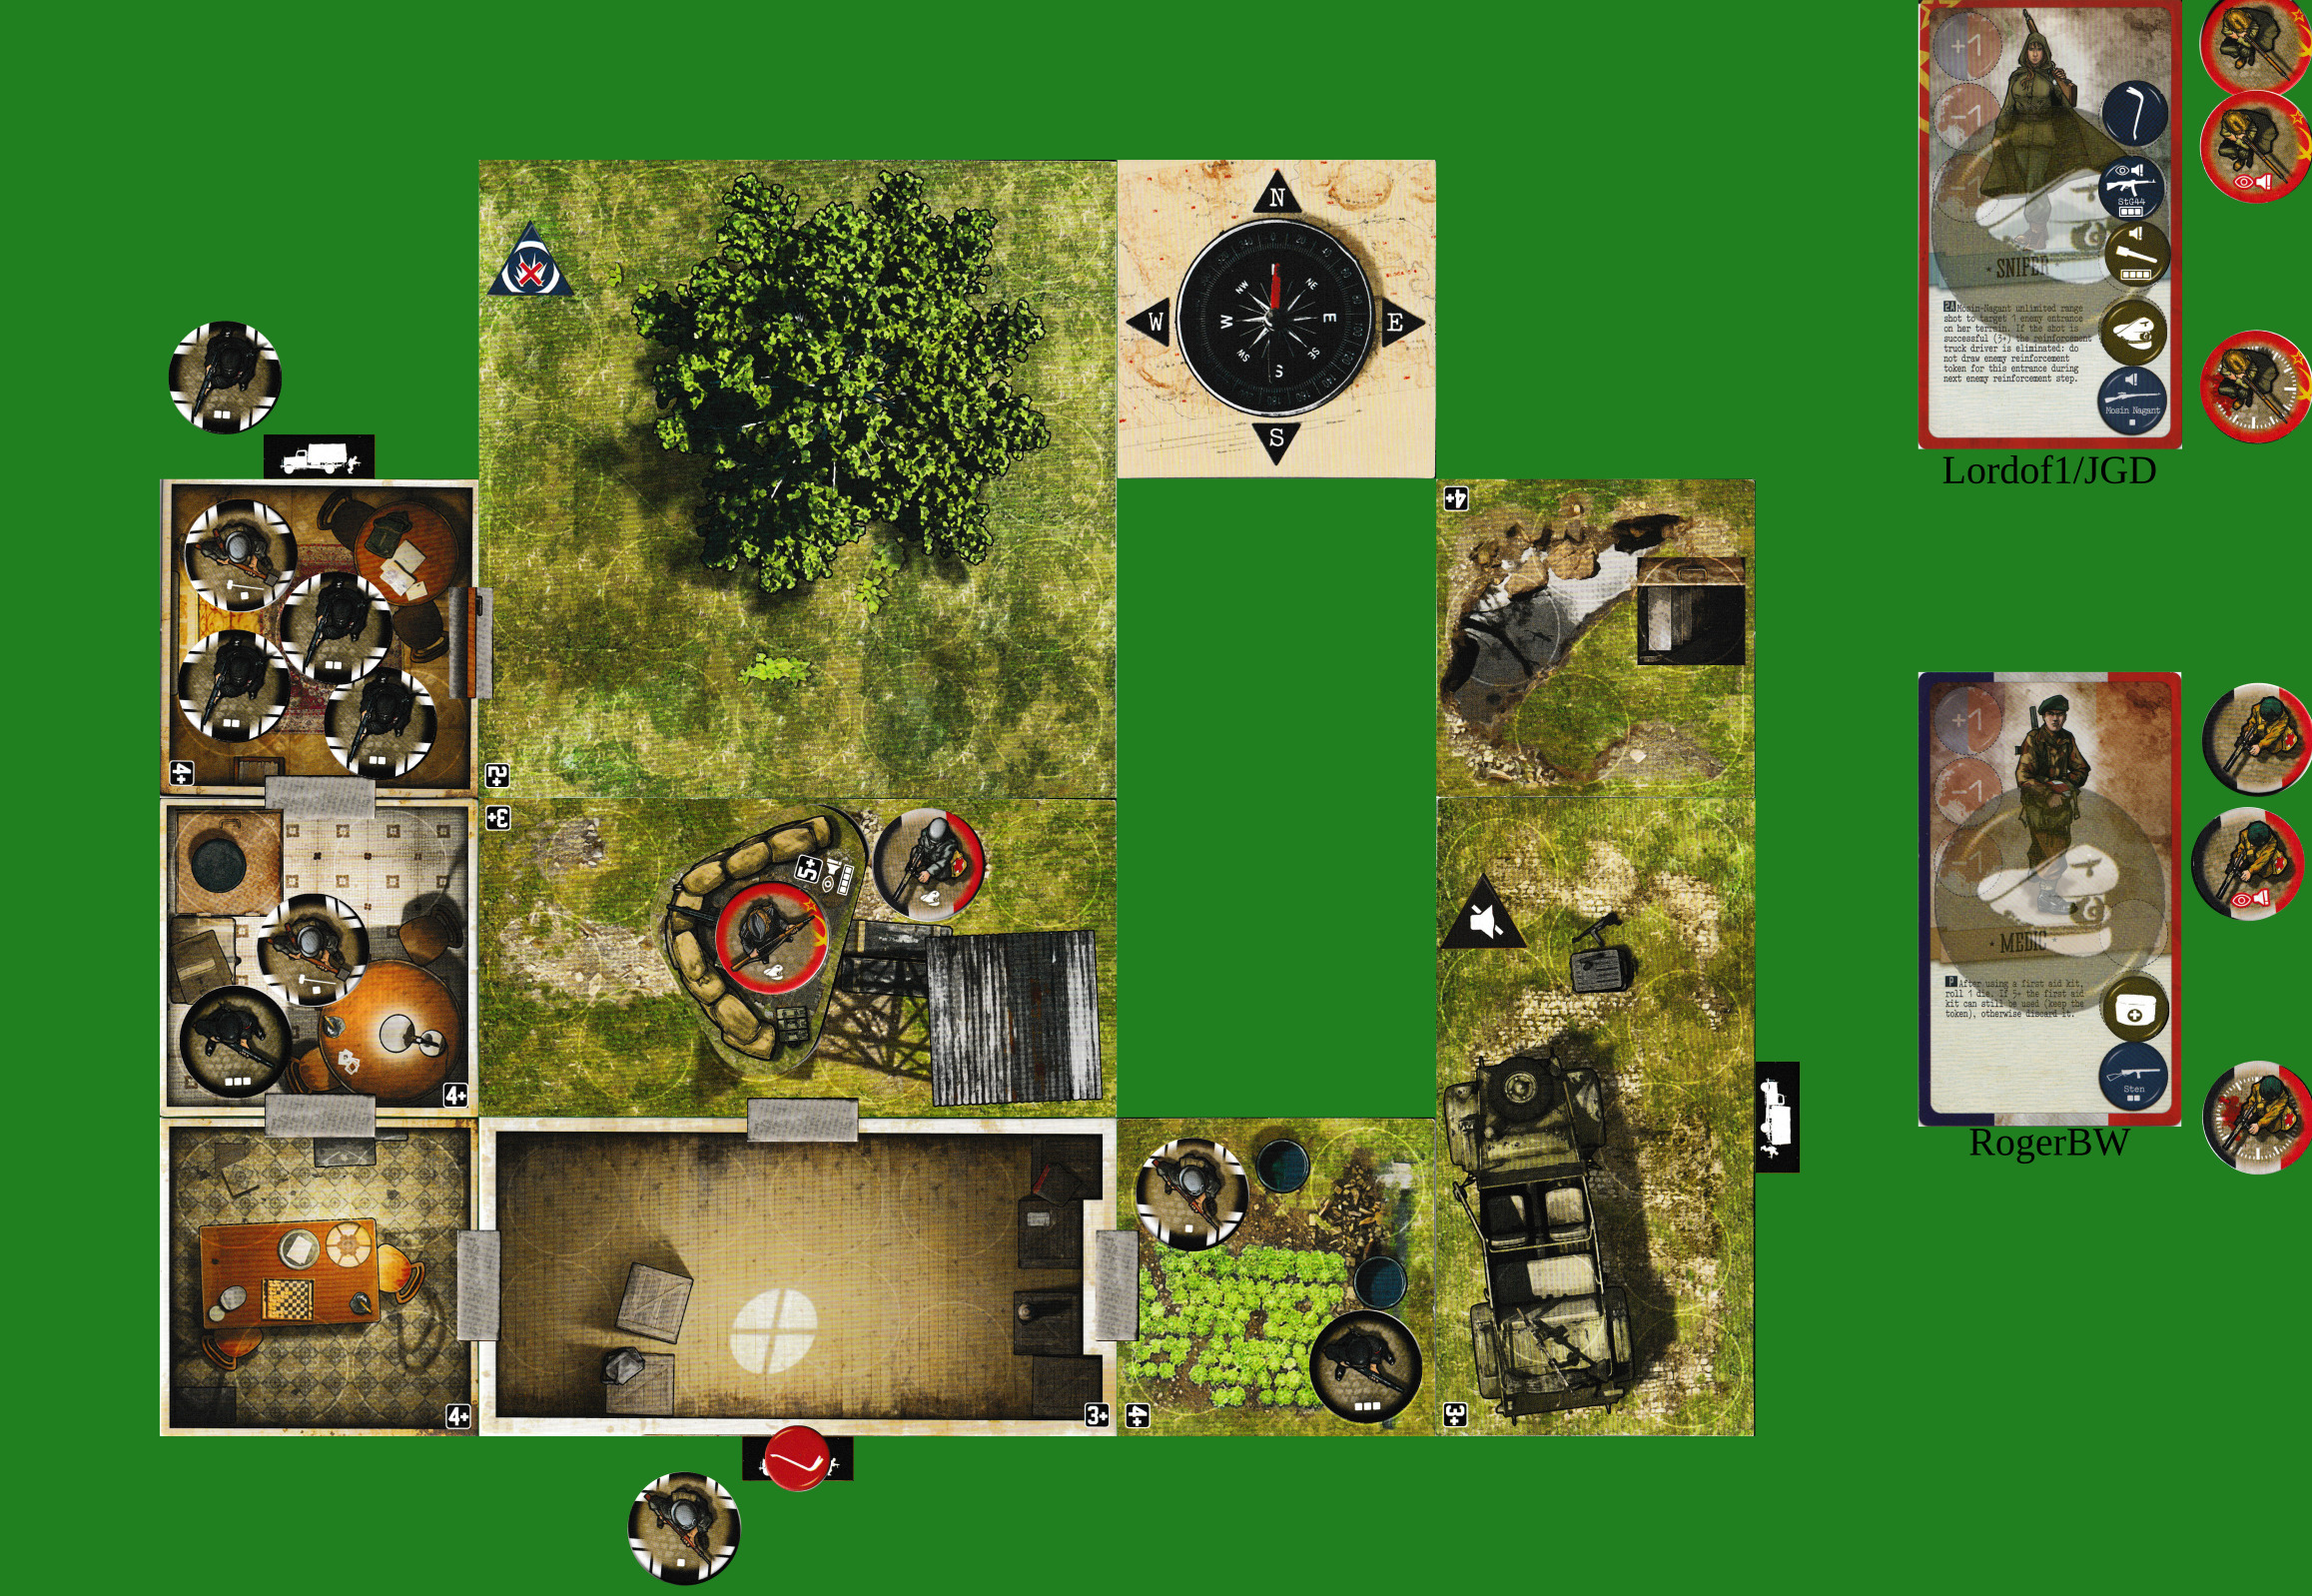
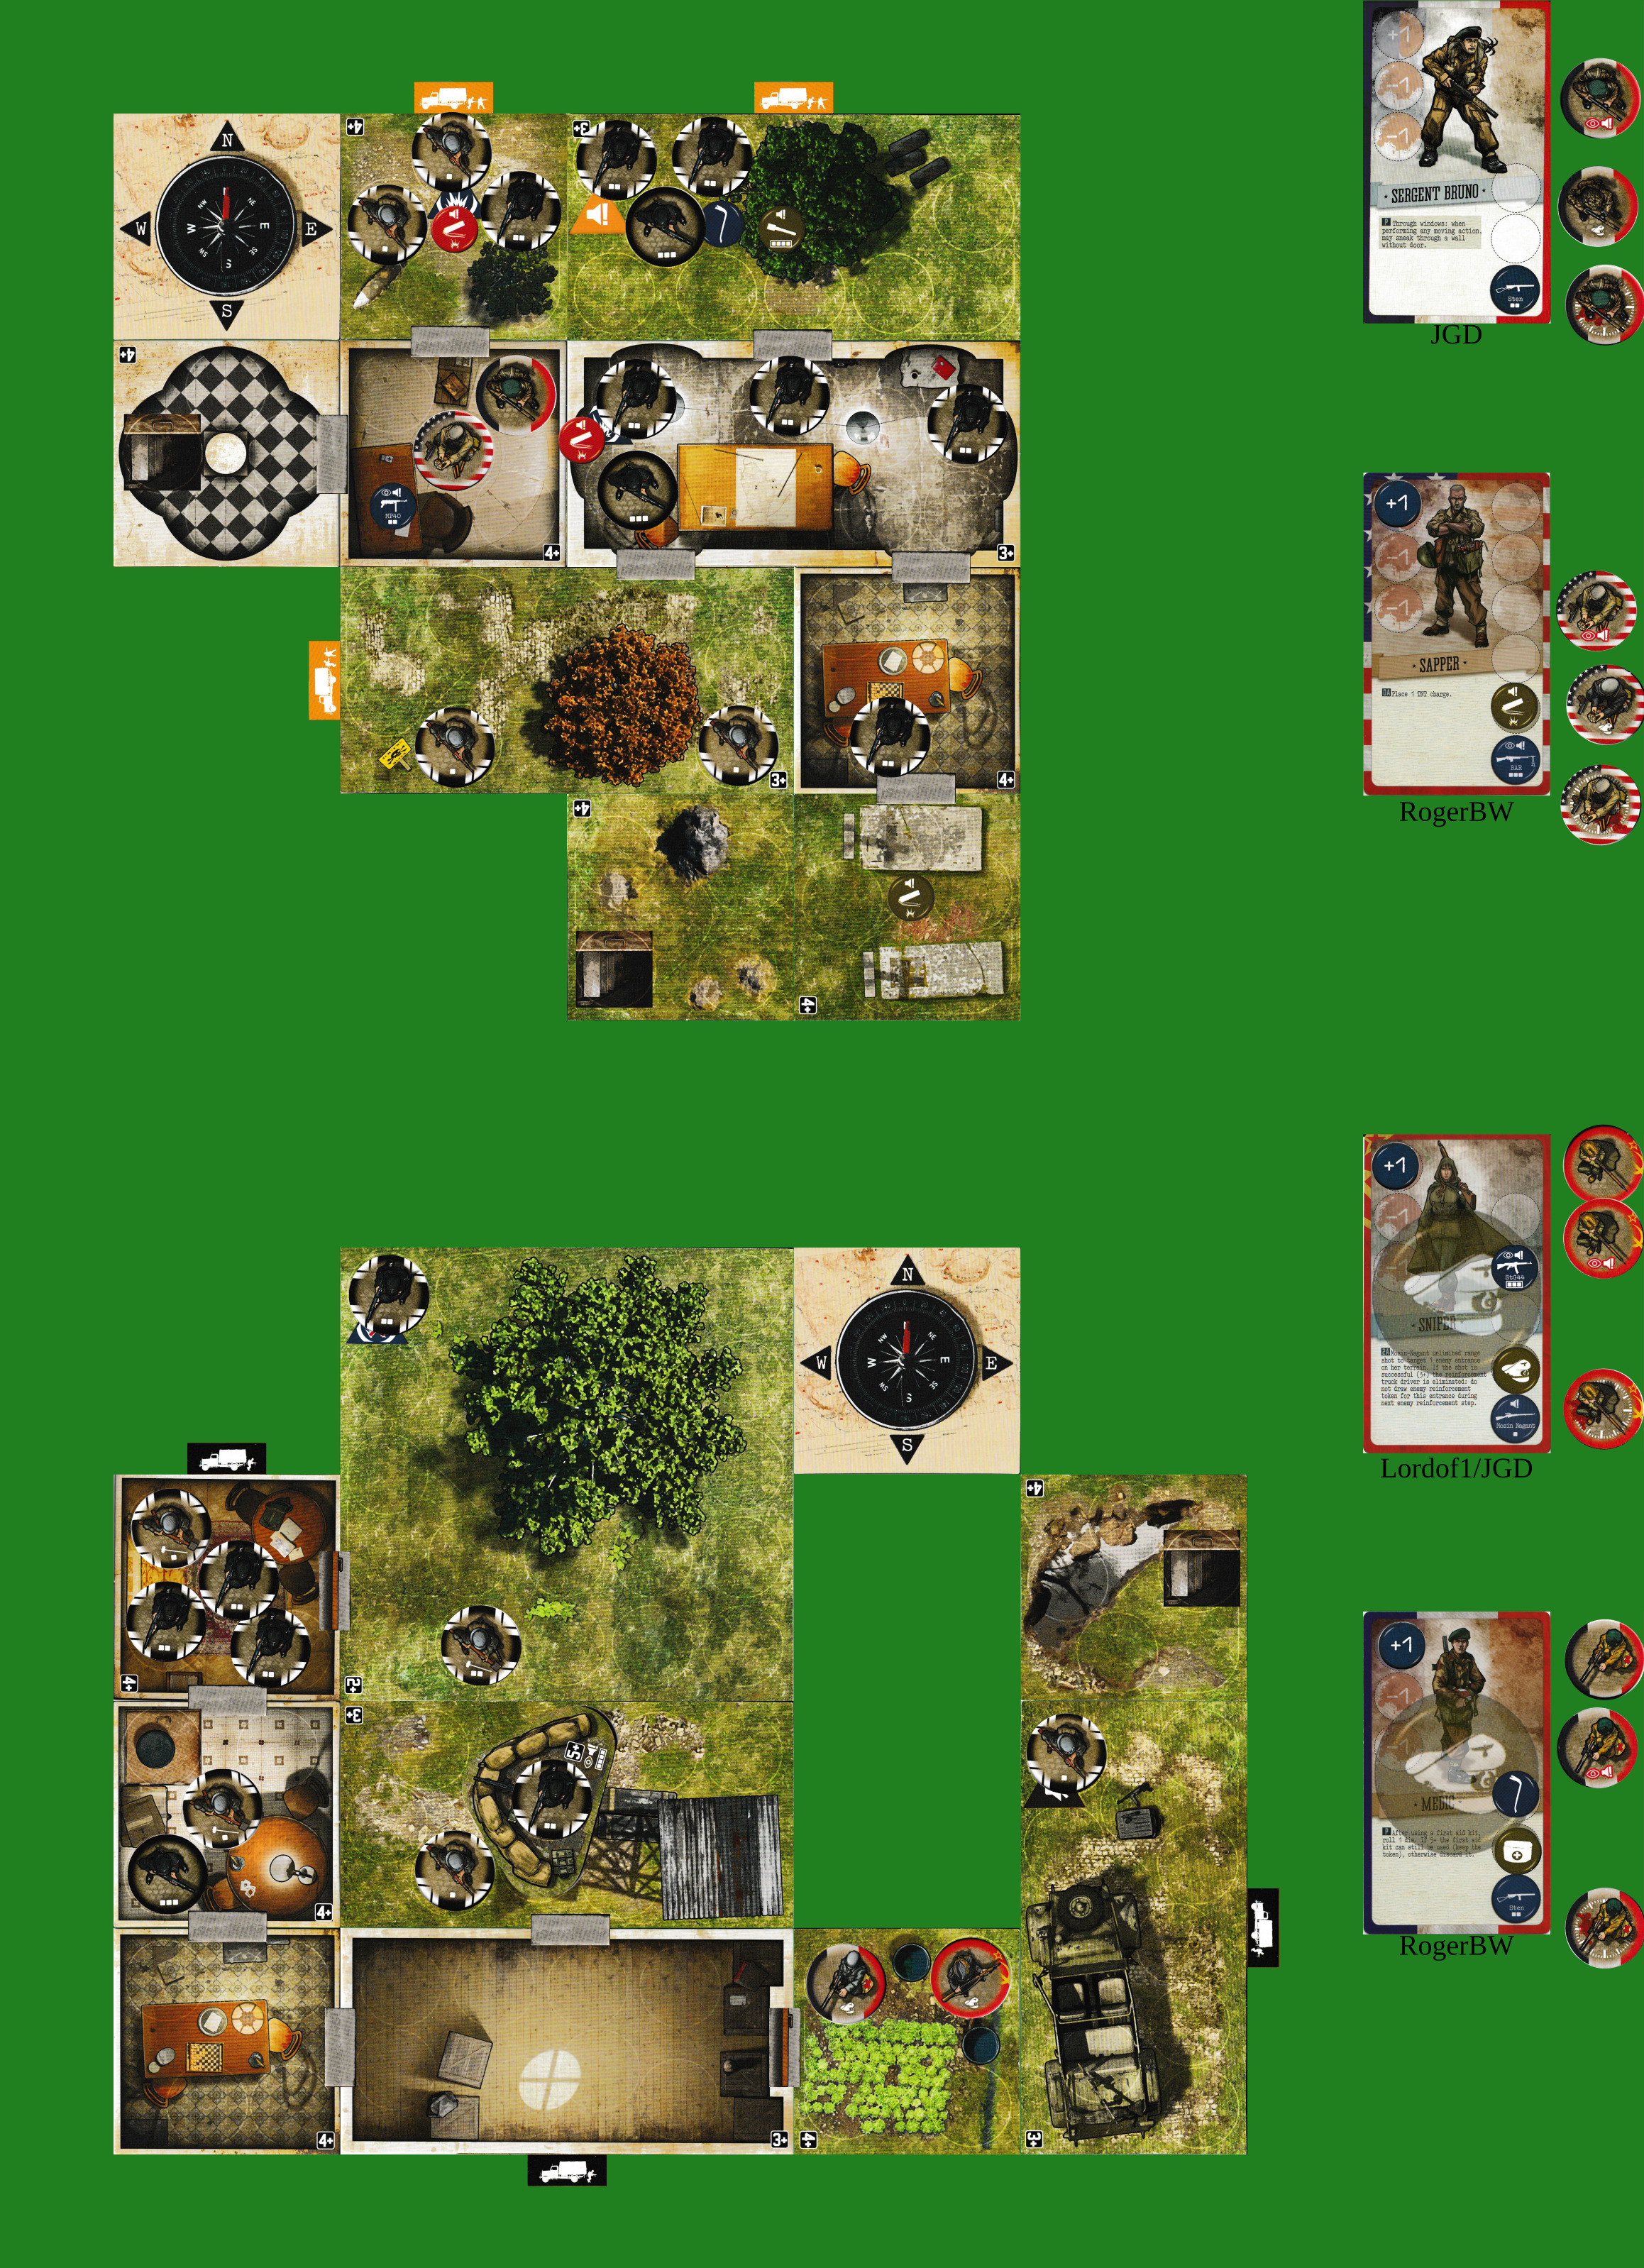
That would mean that the entering reinforcement gets two chances to spot us before we can shoot/CC him; if he spots either of us, the people from the NE shoot us. (And the enemy-3 from the objective room moves north and shoots at us.) A saved BAR shot on 3+ might take out all three of the enemy who’ll be there, but it’s not great odds.
OK, that’s a poor plan. How about this:
Bruno shoots N, twice if necessary, and saves. Next turn, When the enemy enters on that tile, shoot him with the saved action. Then we have that tile clear, and he can move N and grenade to the East. That sets off the alarm, but Sapper can move there and turn it off. It relies on the grenade taking out all the guards on a medium tile, and we won’t know how many of them there will be until next turn.
Still not good, but better. Any ideas?
That does work better, and Sapper can do some shooting, but where does Bruno end up after all this? On an entry tile, with two new enemies coming in? That’s why I was originally proposing a wall-hop, because it means he doesn’t have to be stuck waiting to be spotted.
If Bruno had a saved action, he could wall-hop south blatantly, then grenade north and move north… but there’ll be three more enemies coming in at the end of the turn.
Wall-hop E blatantly, grenade (risking damage to self if there are hits left over when the enemy are dead), plant, W?
5, 1, 1, 2
One hit takes down the enemy-3. Plant, wall-hop back, if I still have the actions after getting shot at.
You don’t get shot at until you try to leave (or you’re there at the end of the turn in the enemy fire phase).
Drops: first aid.
When departing, enemy shoots for 3+:
@discobot roll 2d6
Sapper will take that first aid kit, and heal.
In the south: up to two shots from the medic, need a 3+.
@discobot roll 4d6
First aid kit; I’ll have that. Move stealthily S [1], W [1]. I assume the sniper follows. (Save an action or crowbar the entrance? I think blocking the S entrance may be more valuable.)
- Enemy reinforcements
- North
enemy-1
enemy-2
enemy-2
enemy-3
enemy-3
enemy-2 - South
enemy-2
enemy-1
enemy-1
- North
- Enemy movement: all free enemies move N.
- No enemy fire.
Turn 18
North event:

South event:
We can ignore the north event as there will be no visible commandos (or any on the map by the end of the commando phase). Might be a good time for a bit of a massacre in the south, though - open door, charge for the machine-gun nest?
Might look like:
Medic: crowbar door open [1], W [1], crowbar entrance closed [1], save
Sniper: W [1], noisily shoot N [1-2] with 3d6 for 3+, move N and take the nest [1]
Medic might also go N at that point, or keep the saved AP.
I like that plan. Off to work now, but go ahead with it.
John
North first: set off charges, both go W, out, save. We can’t bring them back in the south without setting off the alarm – but let’s remember that that’s an option if the alarm does start.
Sniper’s shots with StG44, looking for 3+/5+:
@discobot roll 6d6
Perfect! Drops: crowbar, grenade.
Is it worth the sniper taking an MG shot to the north (two enemies, 2+) while we can do it with impunity? I think it probably is.
Medic follows north.
OK, will do.
@discobot roll 4d6.
OK, that’s cleaned the place up a little.