@RogerBW asked for a die roll:
Drops: TNT, MP40, first aid kit.
I’ll take a shot with the medic:
2d6: 2 + 1 = 3 for 4+
@RogerBW asked for a die roll:
And again:
2d6: 3 + 5 = 8 for 4+
Drops: Spotted token. With their third action, Medic moves into the space.
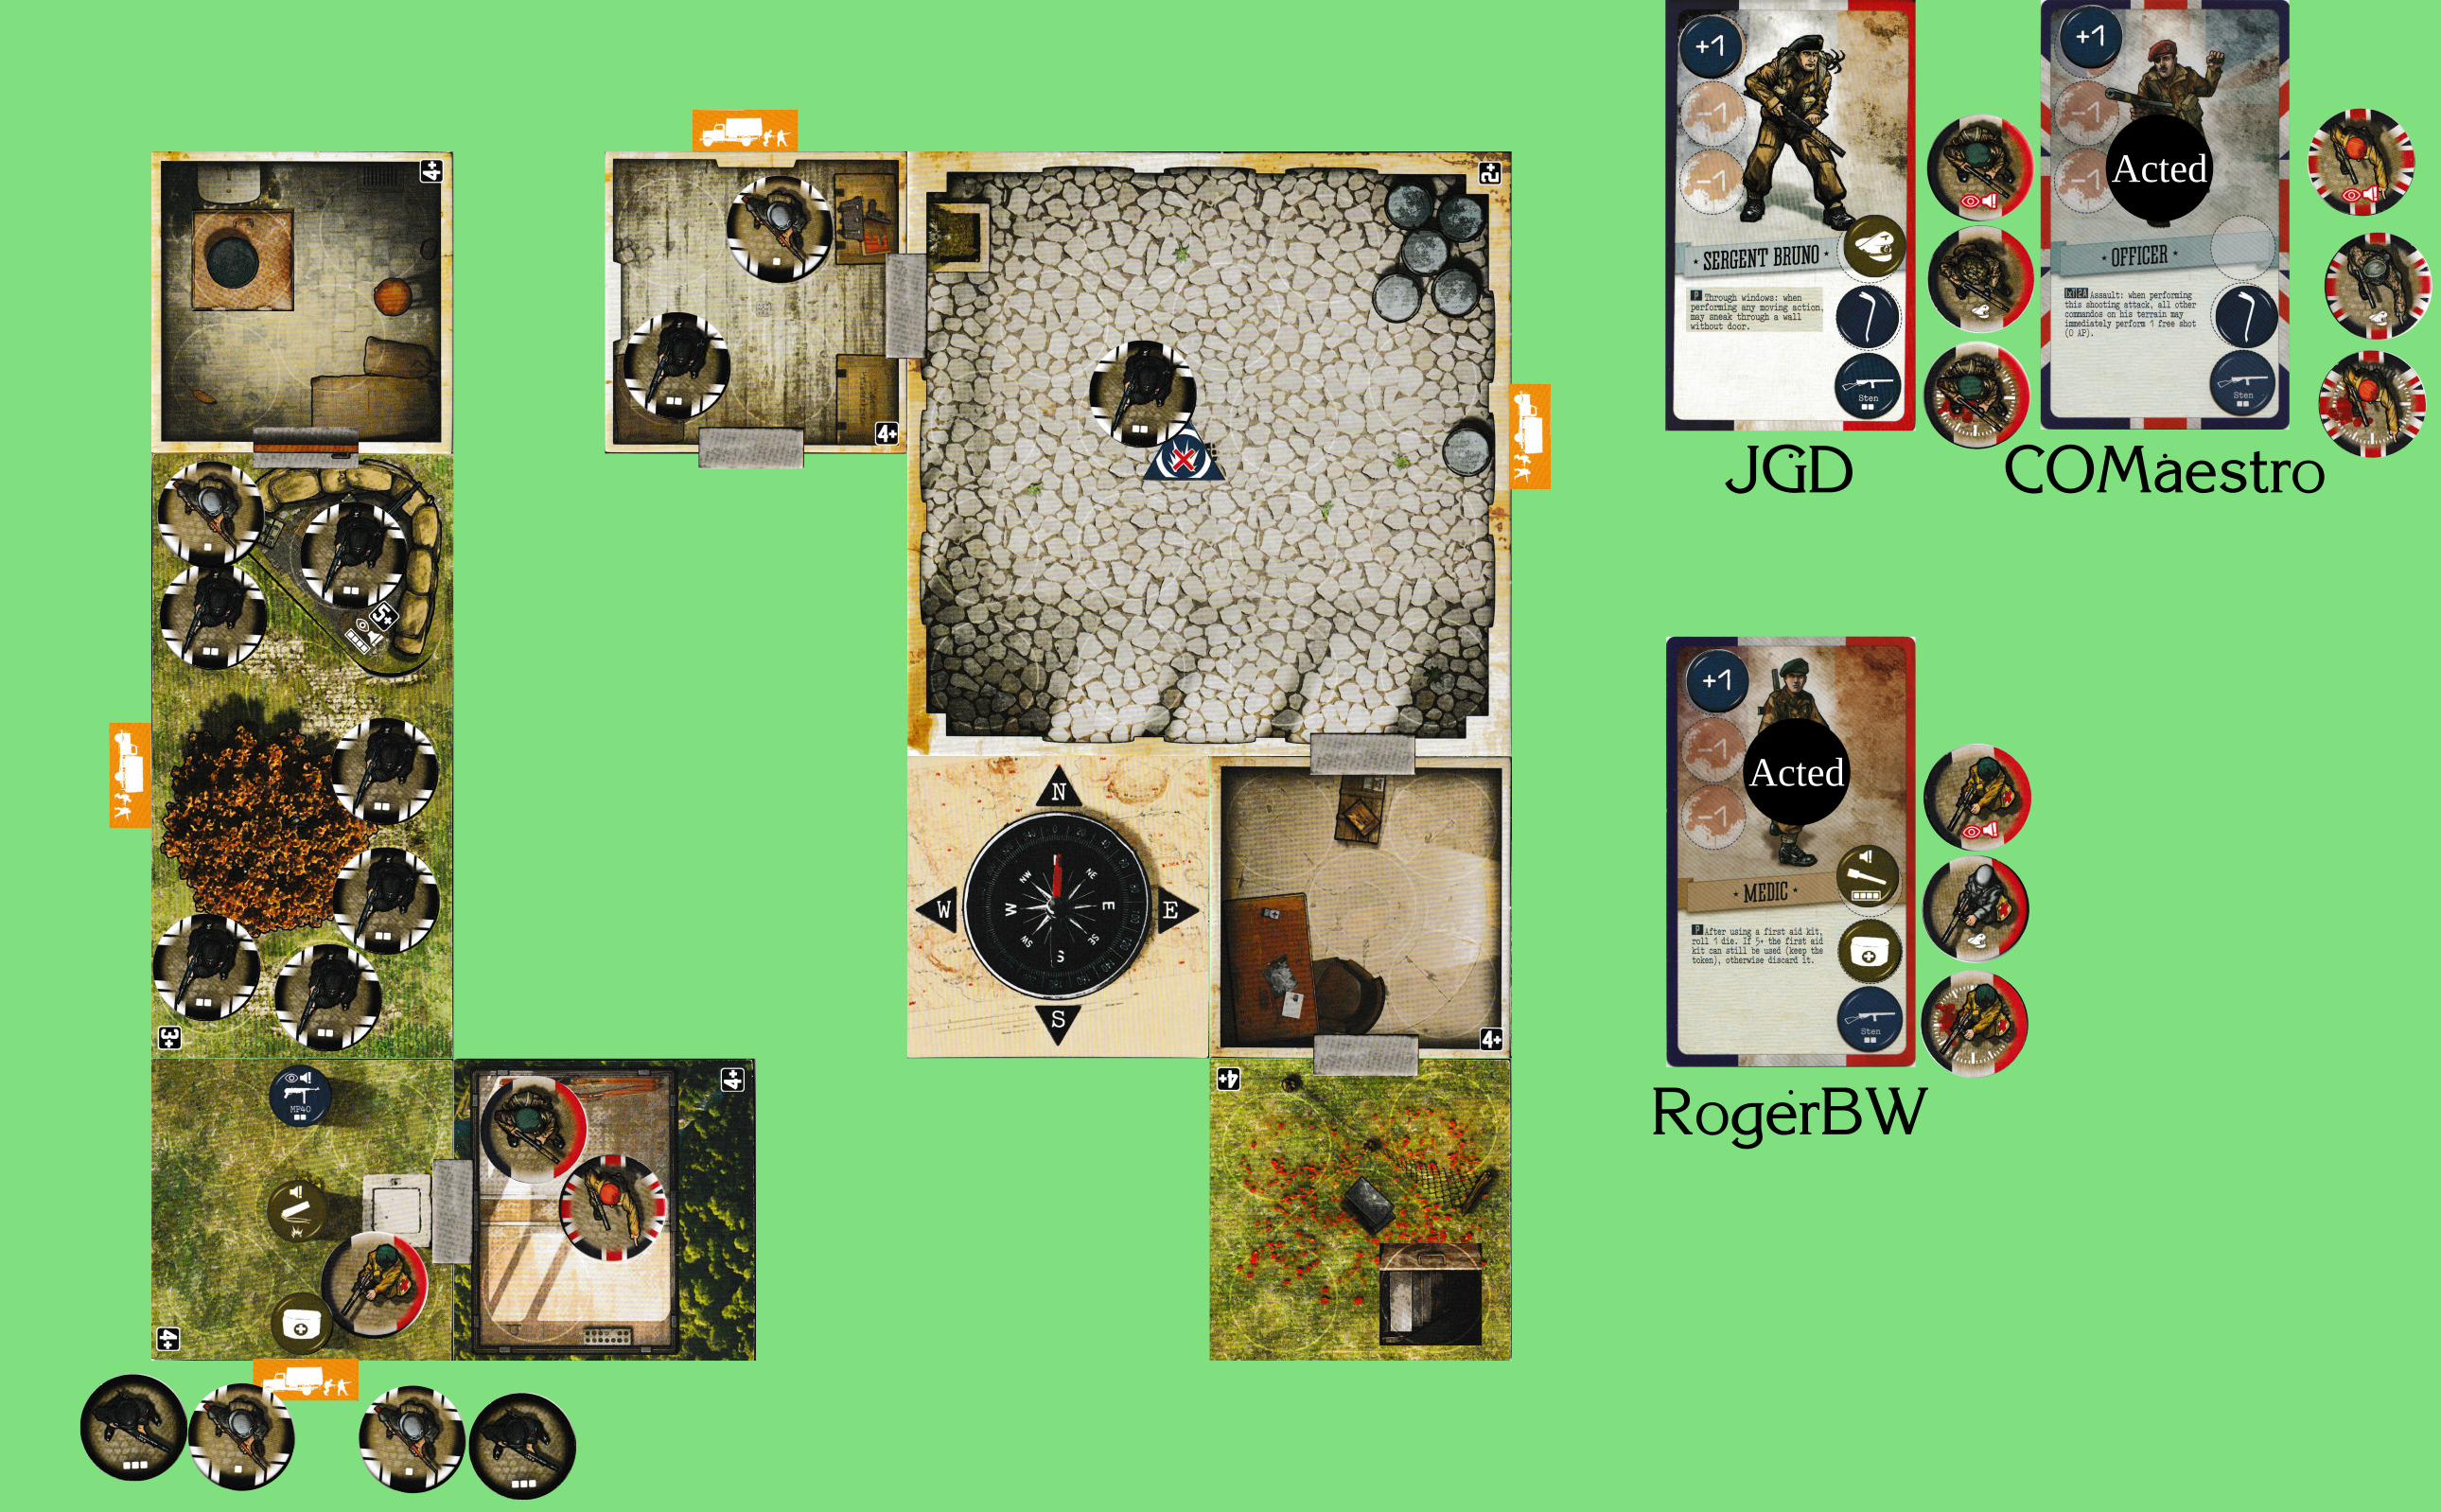
The MP40 is useless to us. A second first aid kit is probably useful; TNT is definitely useful.
Bruno? It may be worth burning an action to don the enemy uniform, if only to free up an equipment slot.
(I note that there are 11 Spotted tokens still in the equipment bag, out of 52 chits.)
I think it’s better not to don yet. I’m thinking of moving W, taking the grenade and using it N, then shooting and hopefully saving. Does that work?
Makes sense to me
@RogerBW asked for a die roll:
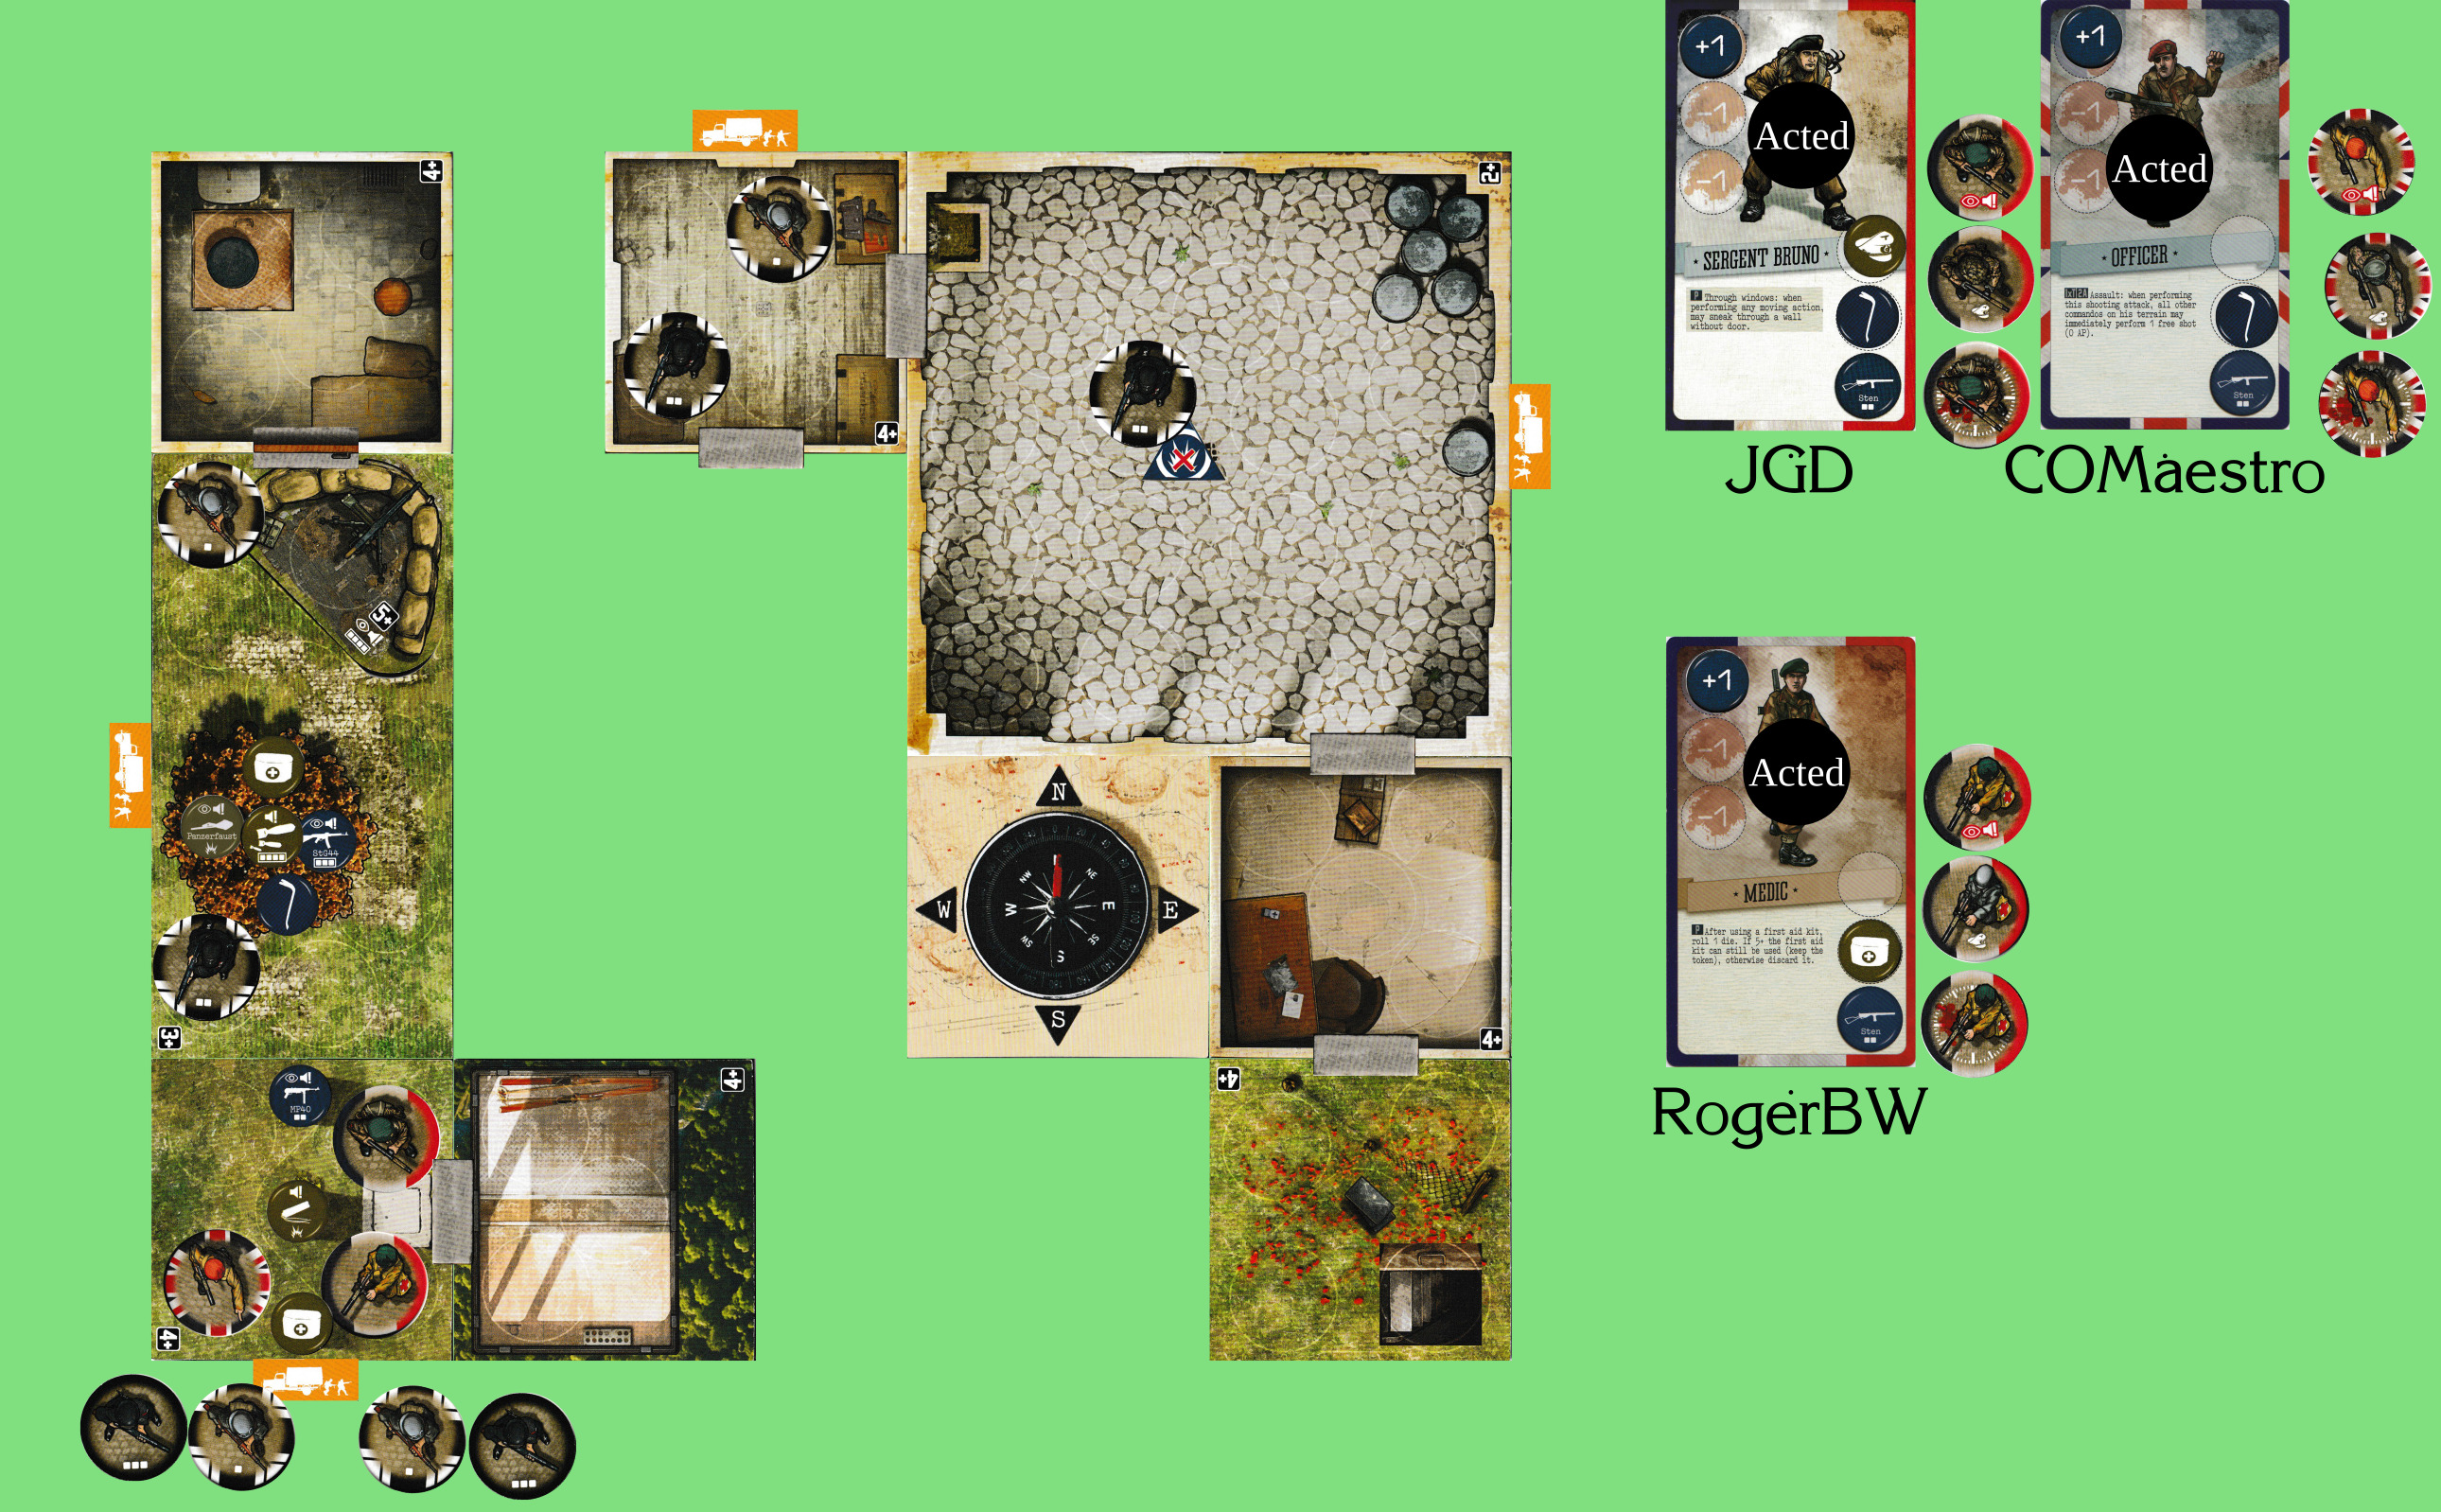
OK, Bruno moves W, grenades N:
4d6: 6 + 2 + 6 + 4 = 18 for 3+/5+
@RogerBW asked for a die roll:
Might as well use one of those 6s for the machine gunner.
Drops: crowbar, uniform.
Bruno shoots N:
2d6: 3 + 5 = 8 for 3+
Sorry, the earlier drop should have included a first aid kit.
Drops: StG44, Bombardment.
OK, I think that’s all our actions. I’m in an RPG at the moment so I’ll do the enemy phase later.
@RogerBW asked for a die roll:
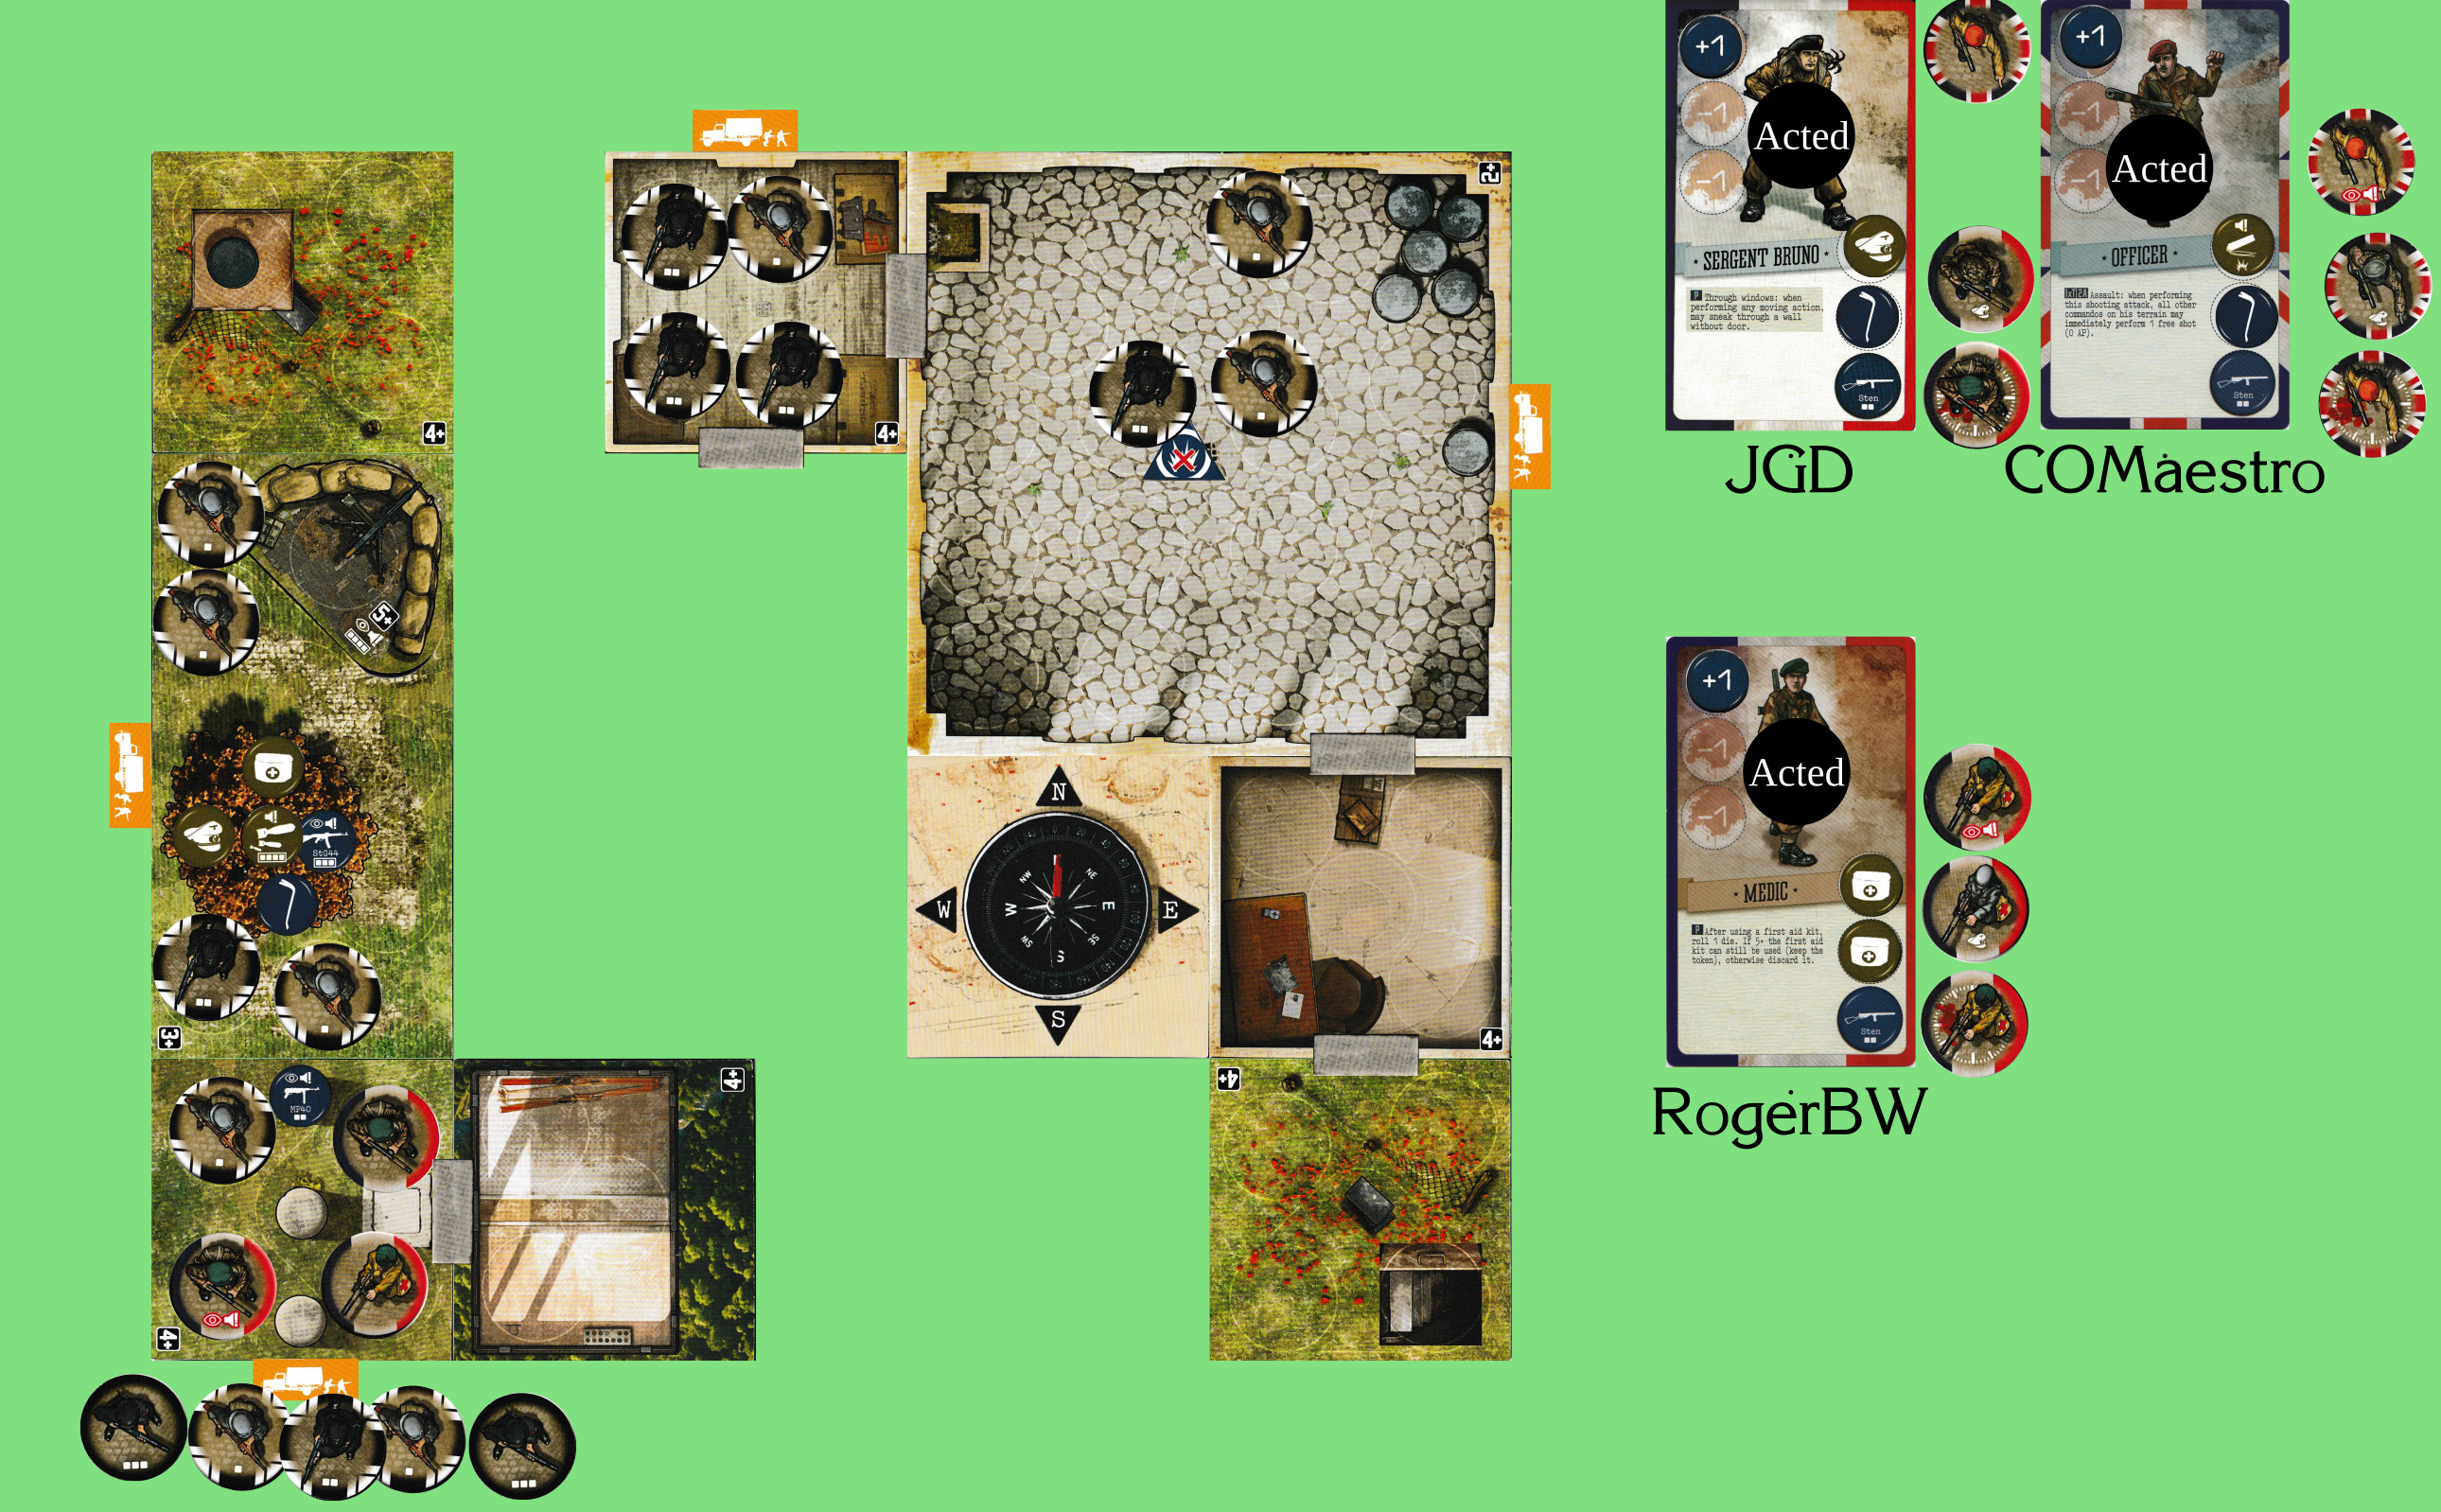
Enemy phase
Enemy reinforcements
- N: enemy-2
enemy-2 - S: enemy-2
enemy-1 (we can choose which one comes in, so I’ll make it one of the one-boxers) - E: enemy-1
enemy-1 - W: enemy-1
enemy-1
This is where we may lose. That one enemy who makes it in in the south gets to try to spot each of us. If any of us becomes visible, they’ll get shot by the enemies to the north as well…
3d6: 6 + 2 + 3 = 11 spotting (Bruno, Officer, Medic) on a 1-2 each.
Alas, Officer is visible. Could be much worse, actually; we have first aid kits.
The “Bomber” event goes off; the way to the north is open.
We are now in the space between enemy reinforcements and enemy movement. (Enemies will try to move towards the visible officer, which they can’t do.) Next is enemy shooting. Do we want to use saved actions to shoot (or close-combat) before we are fired on? I’d like to keep the medic’s action to last, for healing the officer after he gets shot.
I’m thinking vaguely in terms of trying to clear out the medium tile and make a run for the north.
Yup, we’re in trouble now. The enemy-1 on our tile is doing something useful in keeping the enemy-2 out, so I’ll leave him alone. Using Bruno’s saved action to shoot north.
@discobot roll 2d6
4, 5
OK, that eliminates the two nearest enemies to the north.
Drops: crowbar, MG42. Ooh, this looks potentially survivable.
(Note that as I understand it that fixed machine gun nest doesn’t get refilled until the enemy movement phase.)
Officer, do you want to take a shot? If you can get both the ones who are left in the medium tile (and if not I can have a go, but if you do I can close-combat the one in our square before he shoots you), things look relatively good for us.

Yes, use my saved action to shoot N
@RogerBW asked for a die roll:
(You’re welcome to make the rolls too.)
Officer shoots N:
2d6: 5 + 1 = 6 for 3+
@RogerBW asked for a die roll:
Another crowbar.
And I think I really have to try to finish off that last one before he gets into the MG nest.
2d6: 3 + 2 = 5 for 3+
@RogerBW asked for a die roll:
Uniform.
Enemy movement
Effectively none.
Enemy shooting
d6: 5 vs 4 to hit the Officer.
Turn 6
(not a problem, that can be the three in the eastern section)

OK, we can’t get out this turn, but since the event doesn’t give a northward move I think we’ve got this.
- Bruno: close-combat the remaining enemy, N becoming visible, N becoming stealthy
- Medic: heal Officer, N becoming visible, N becoming stealthy
- Officer: N remaining visible, N becoming stealthy, open trapdoor
and then out next turn. All of us sett up our ideal equipment load as we go. Someone should certainly have the MG42. I’m inclined to take an enemy uniform and a single first-aid kit.