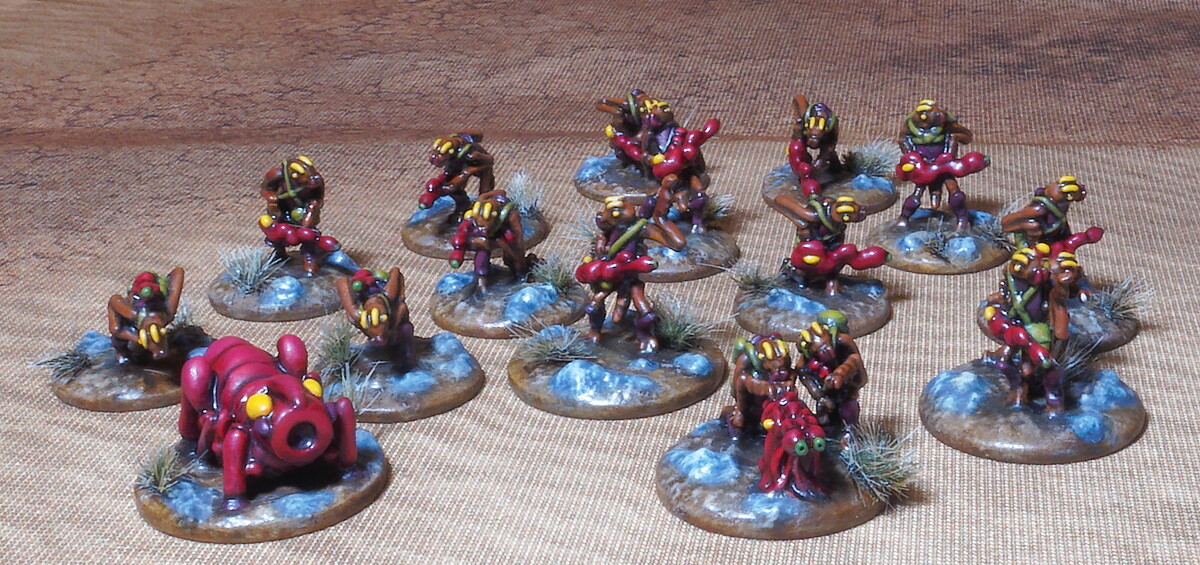
And after repainting these Stikk aliens from Khurasan I’ve also added tufts! Something I swore I would never do, but I have to admit they do look spiffy.
8 Likes
Lower left: “Son, I don’t care about your guitar-playing, the Hive Master said you’re a howitzer-bug and so a howitzer-bug is what you are.”
3 Likes
Guitar bugs but you’re the howitzer bug made me laugh.
2 Likes
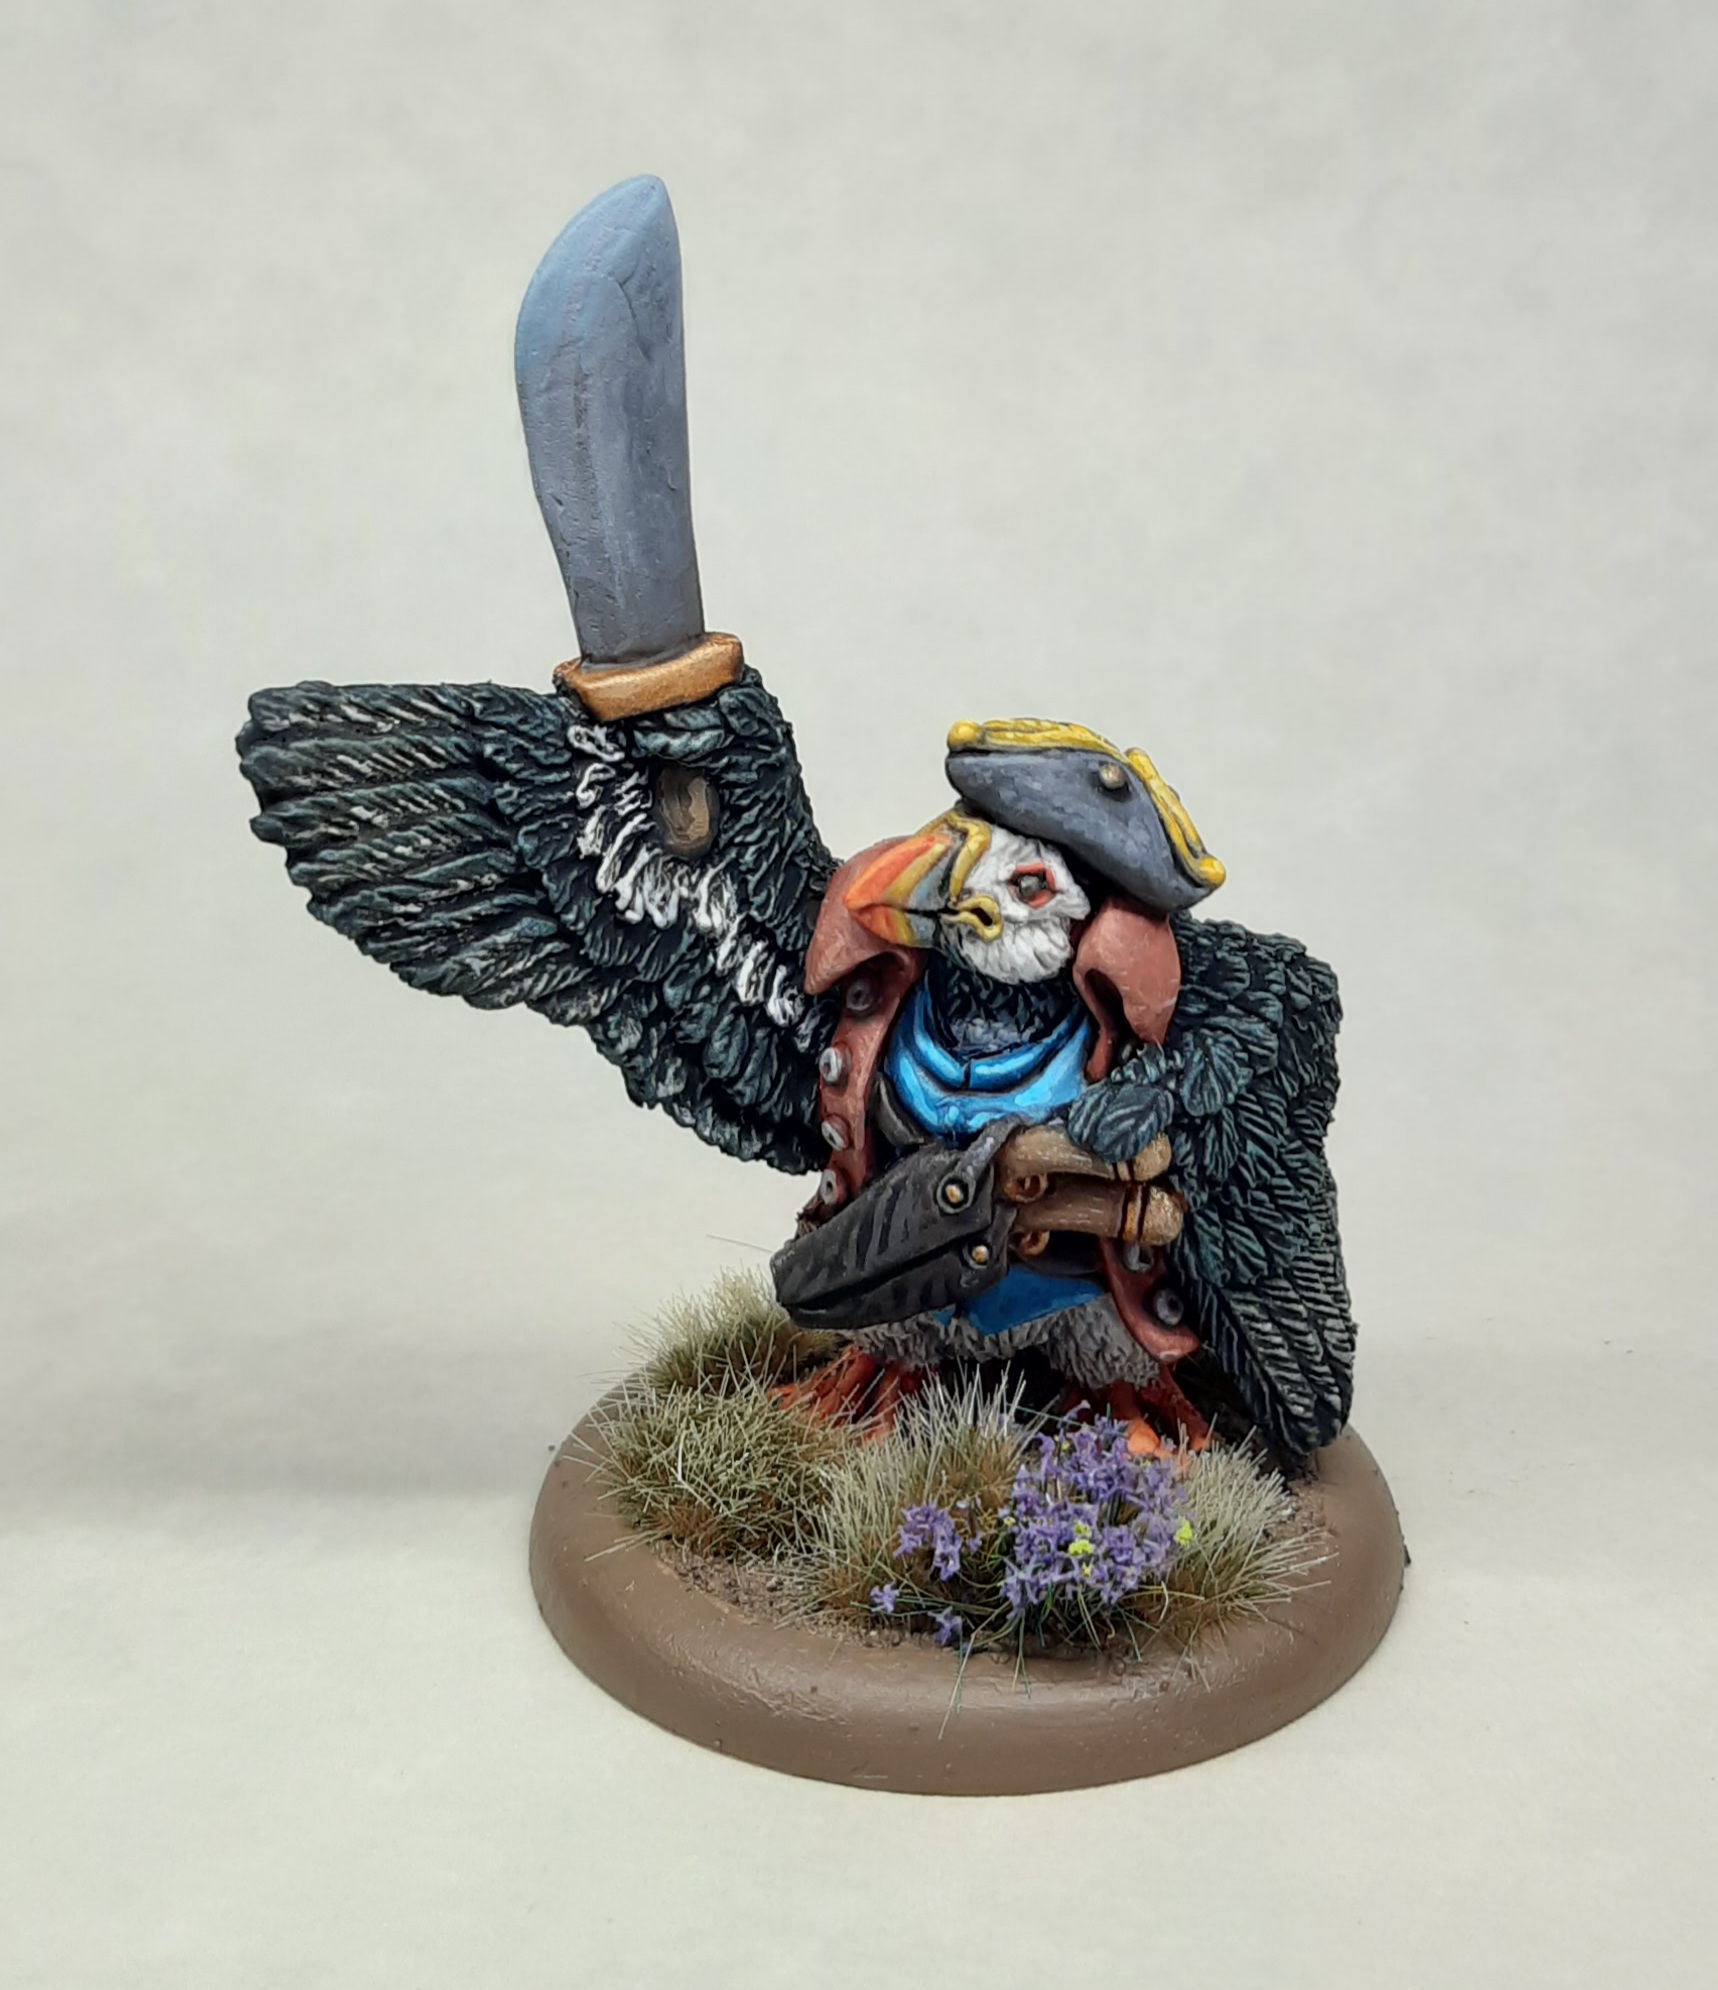
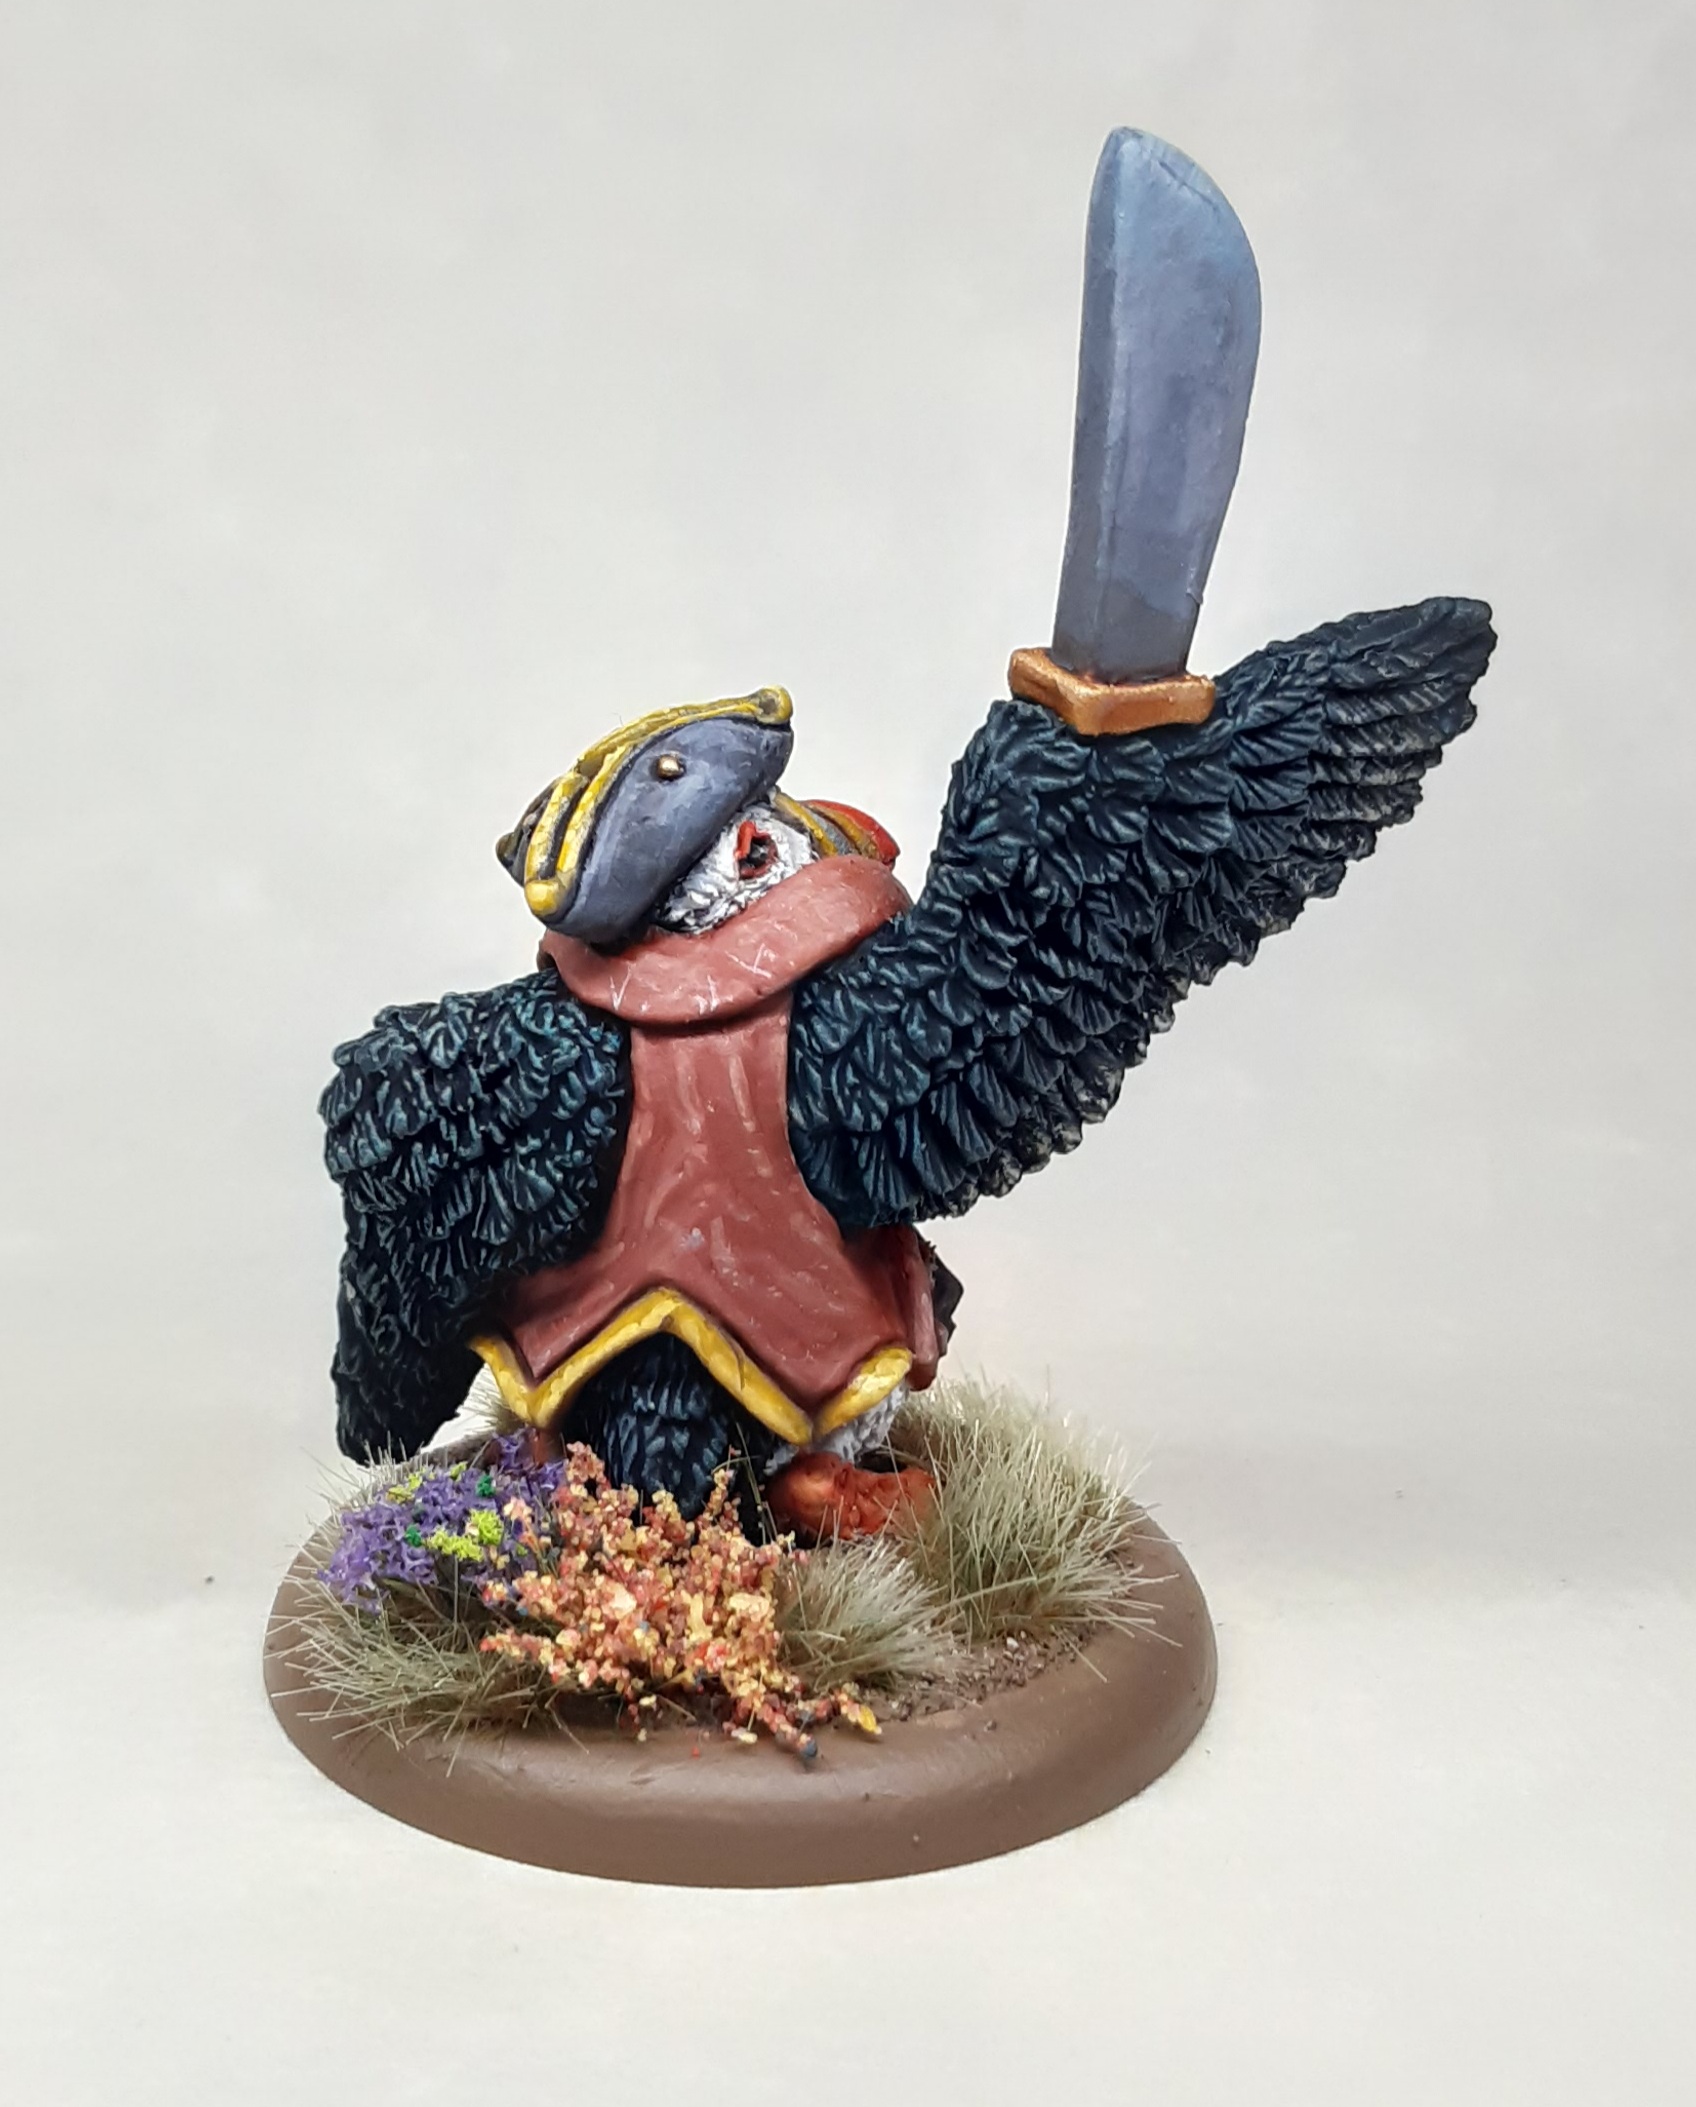
Another round up of completed models from the last month or so.
Some recently arrived Kickstarter models
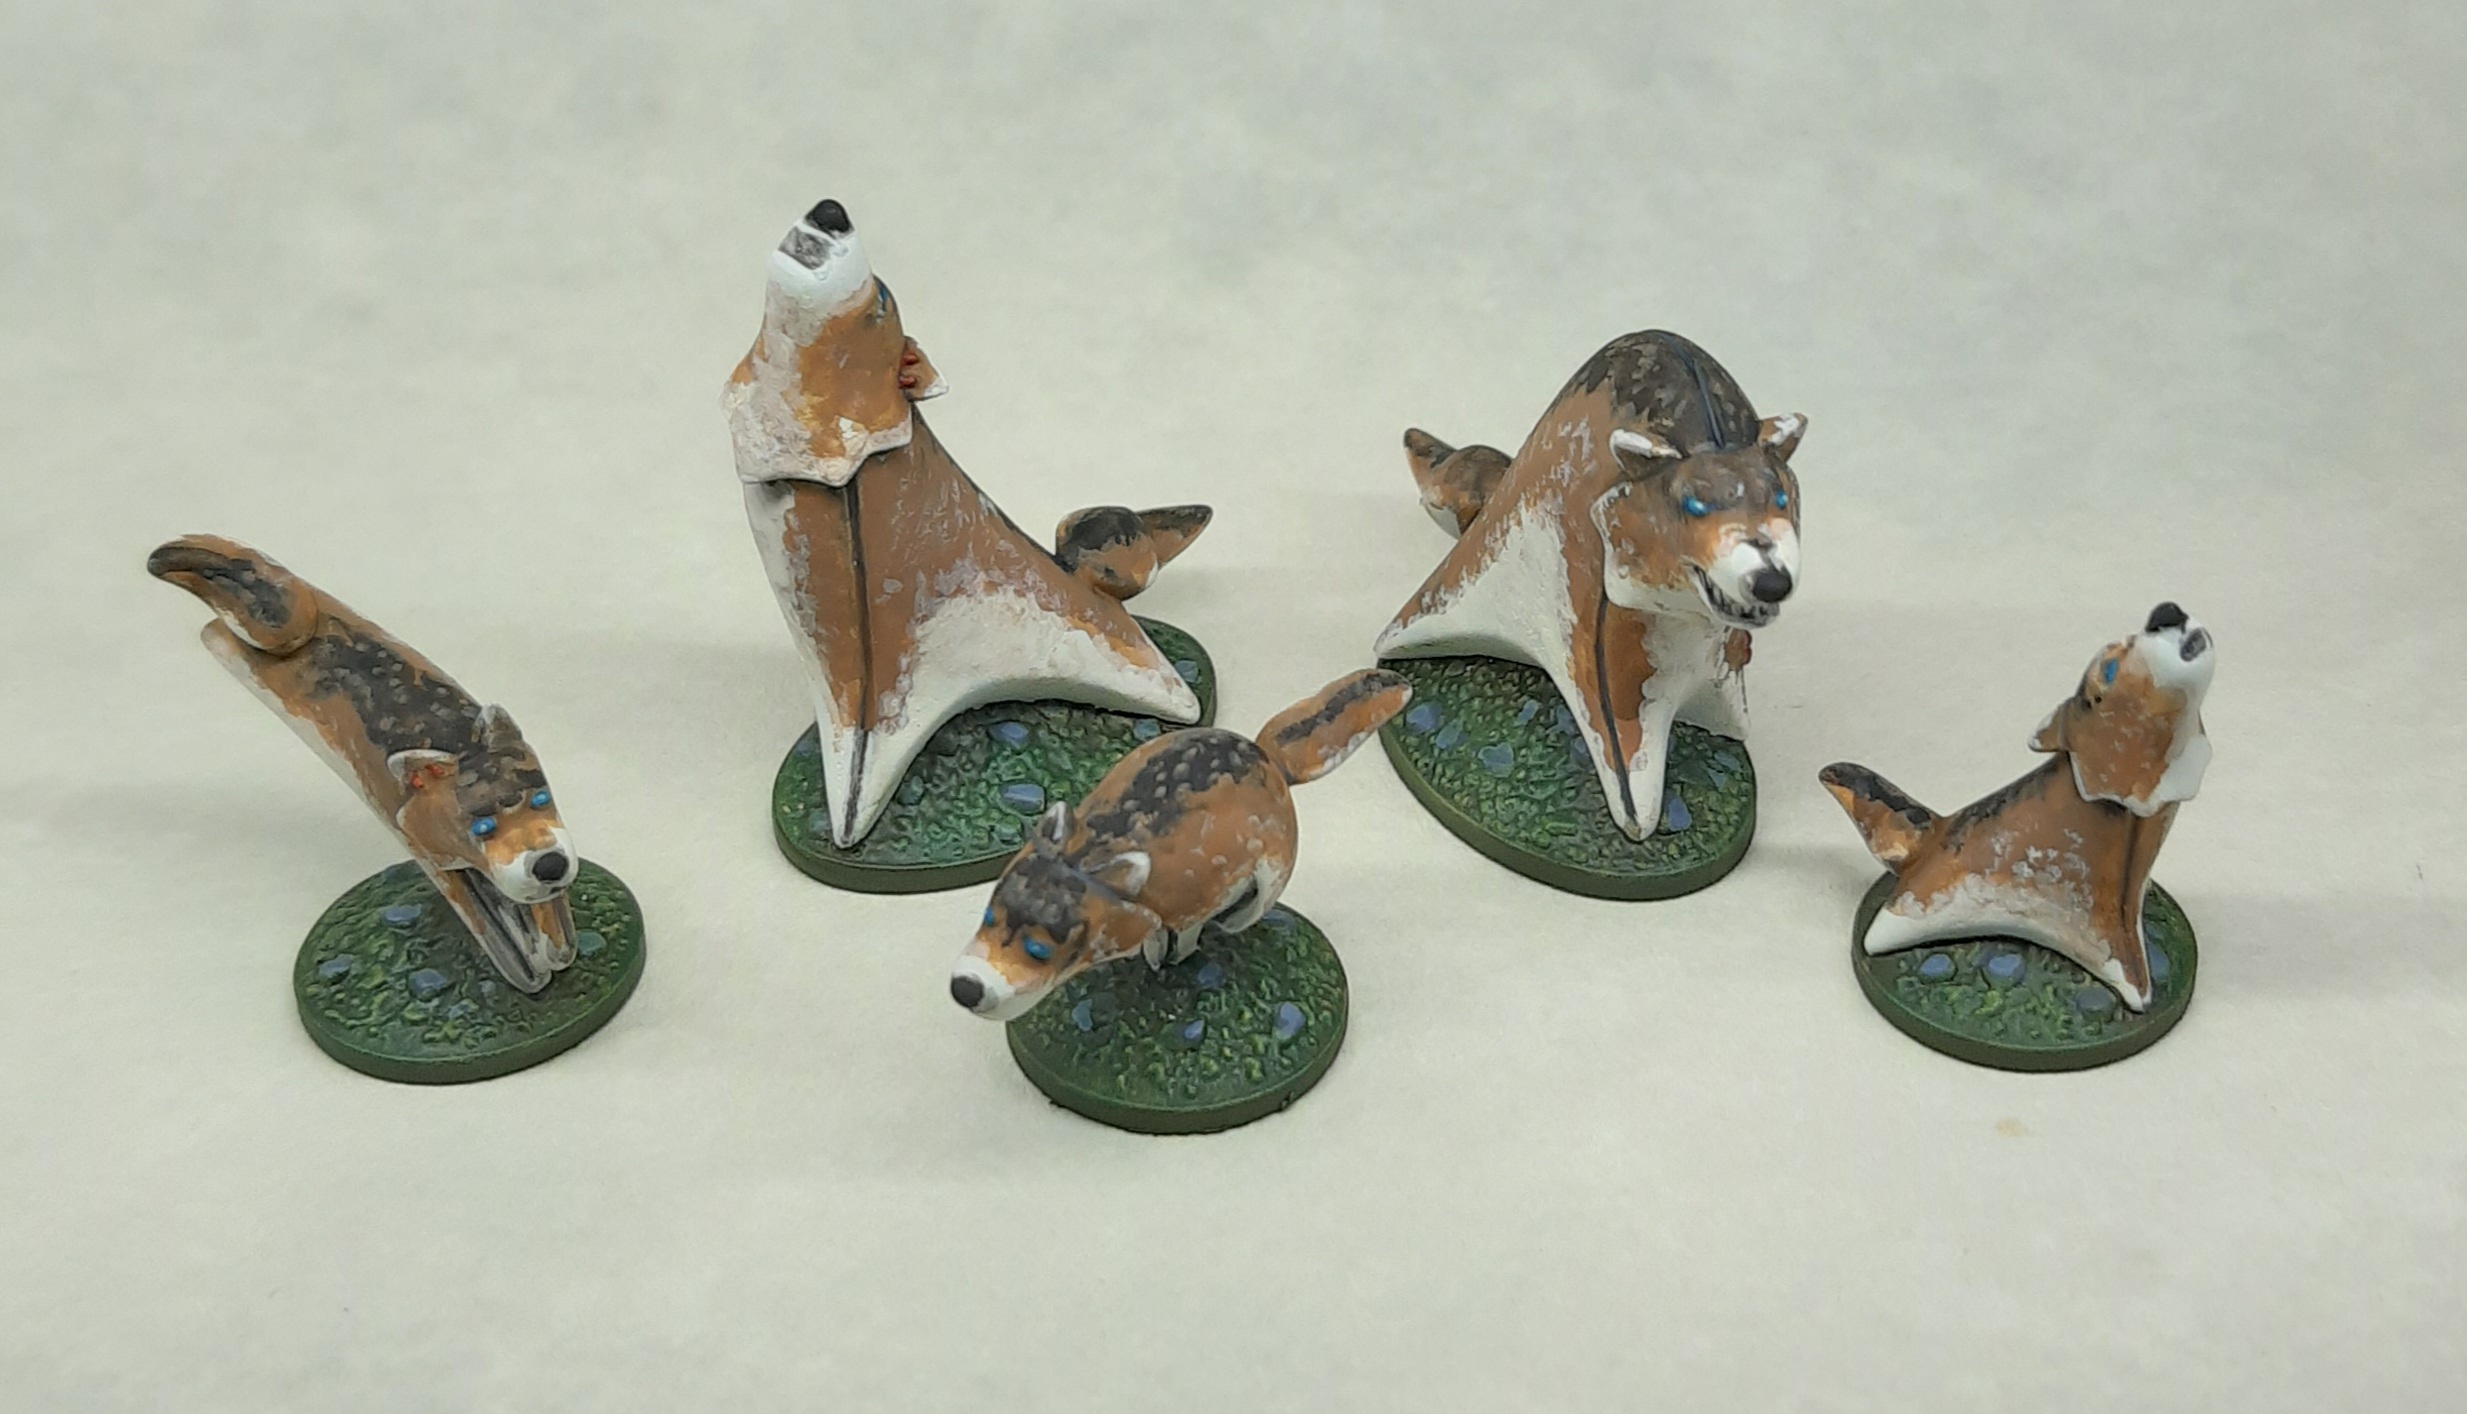
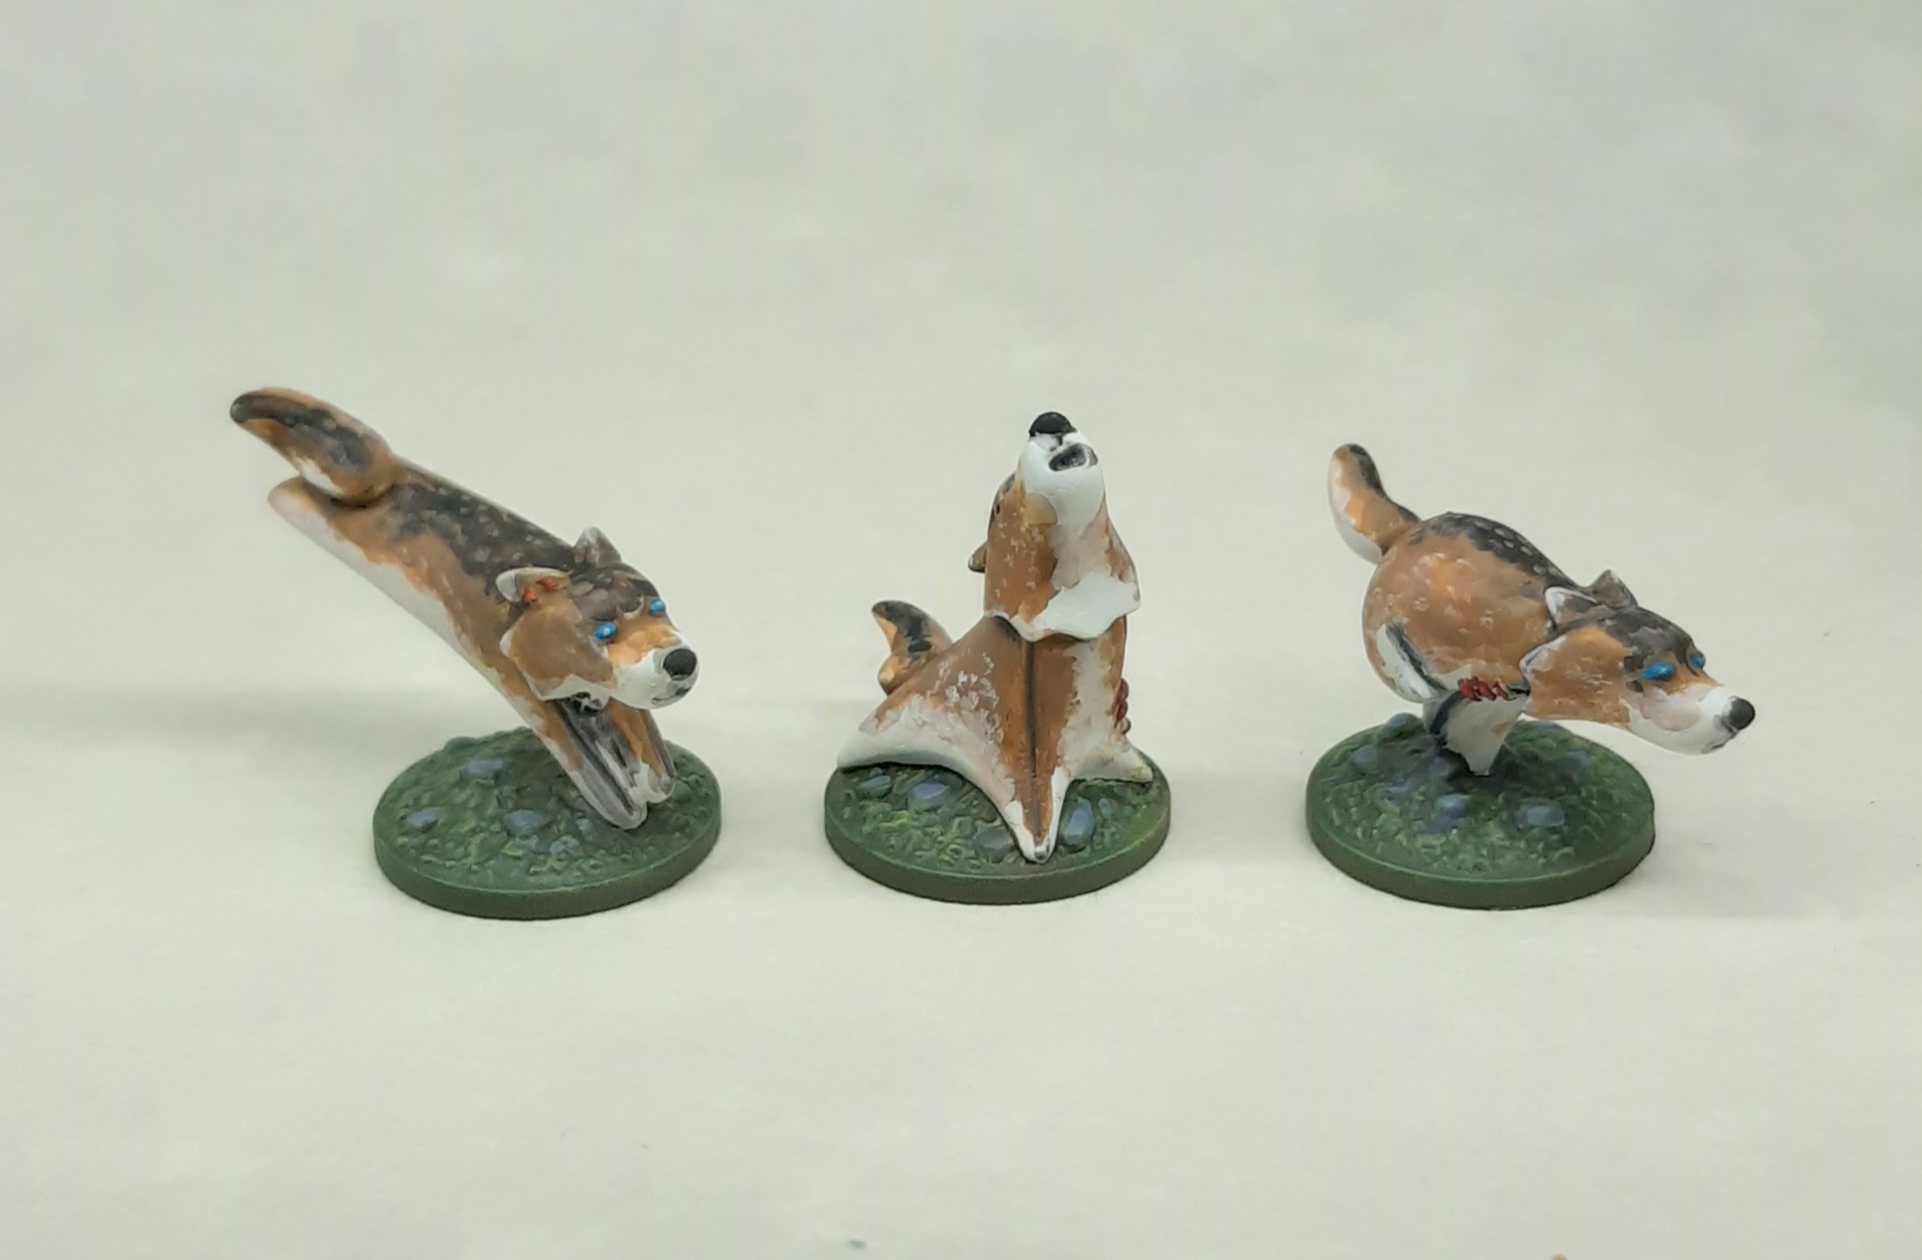
The little wolves are very cute
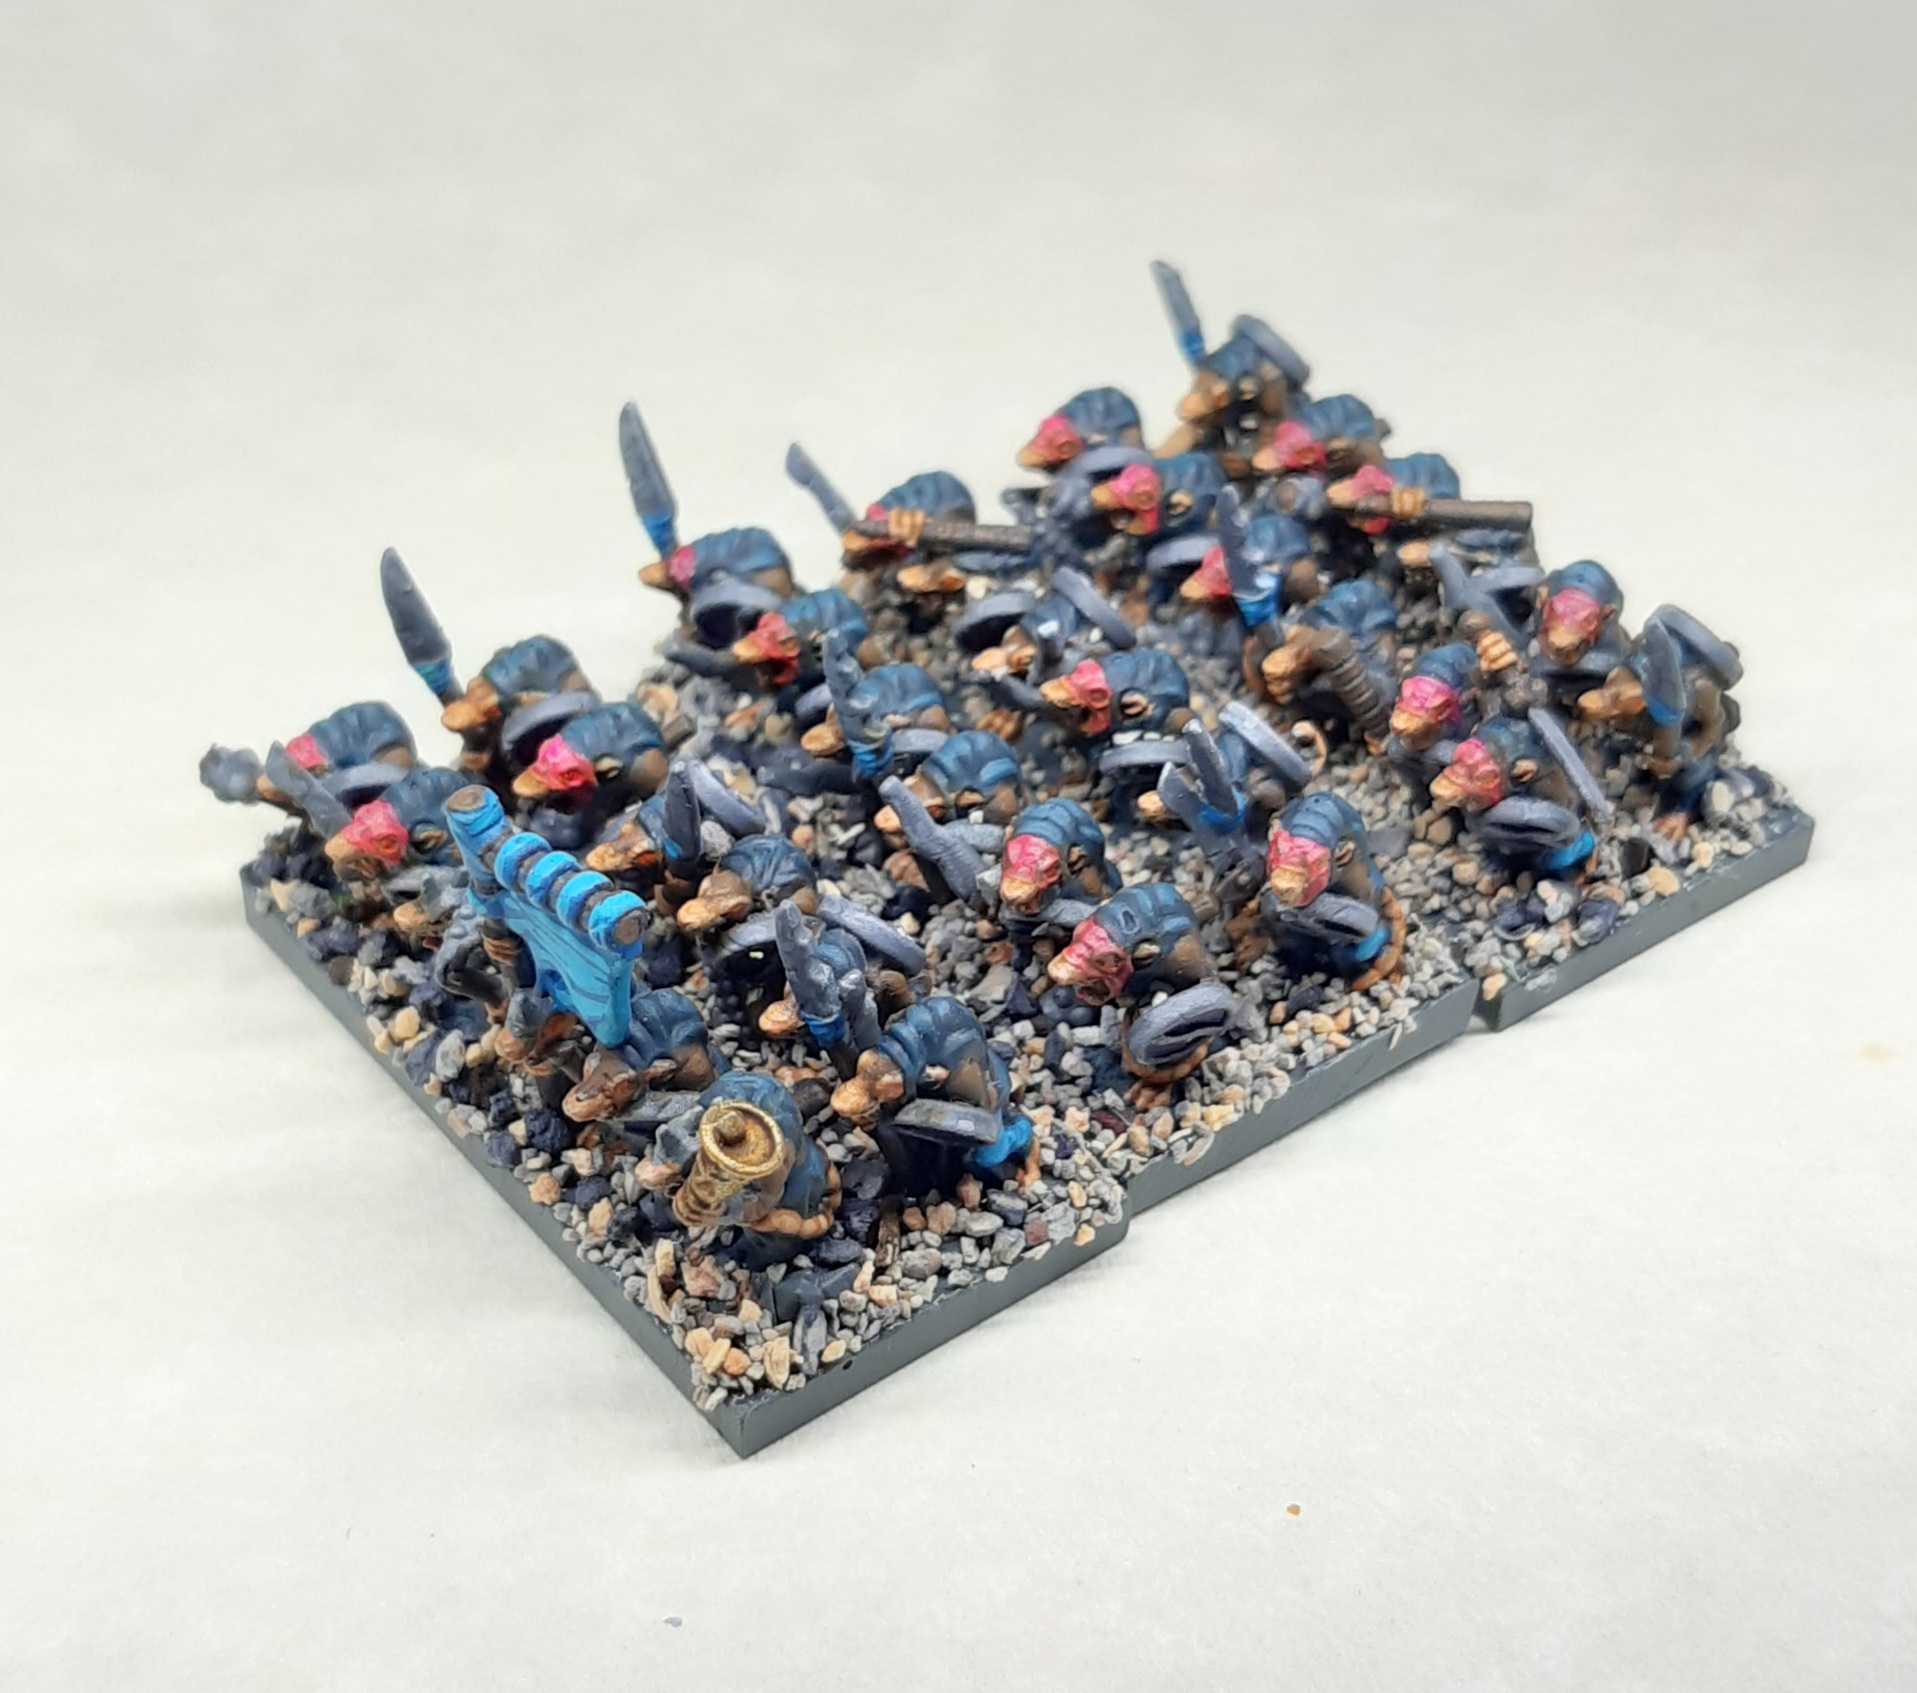
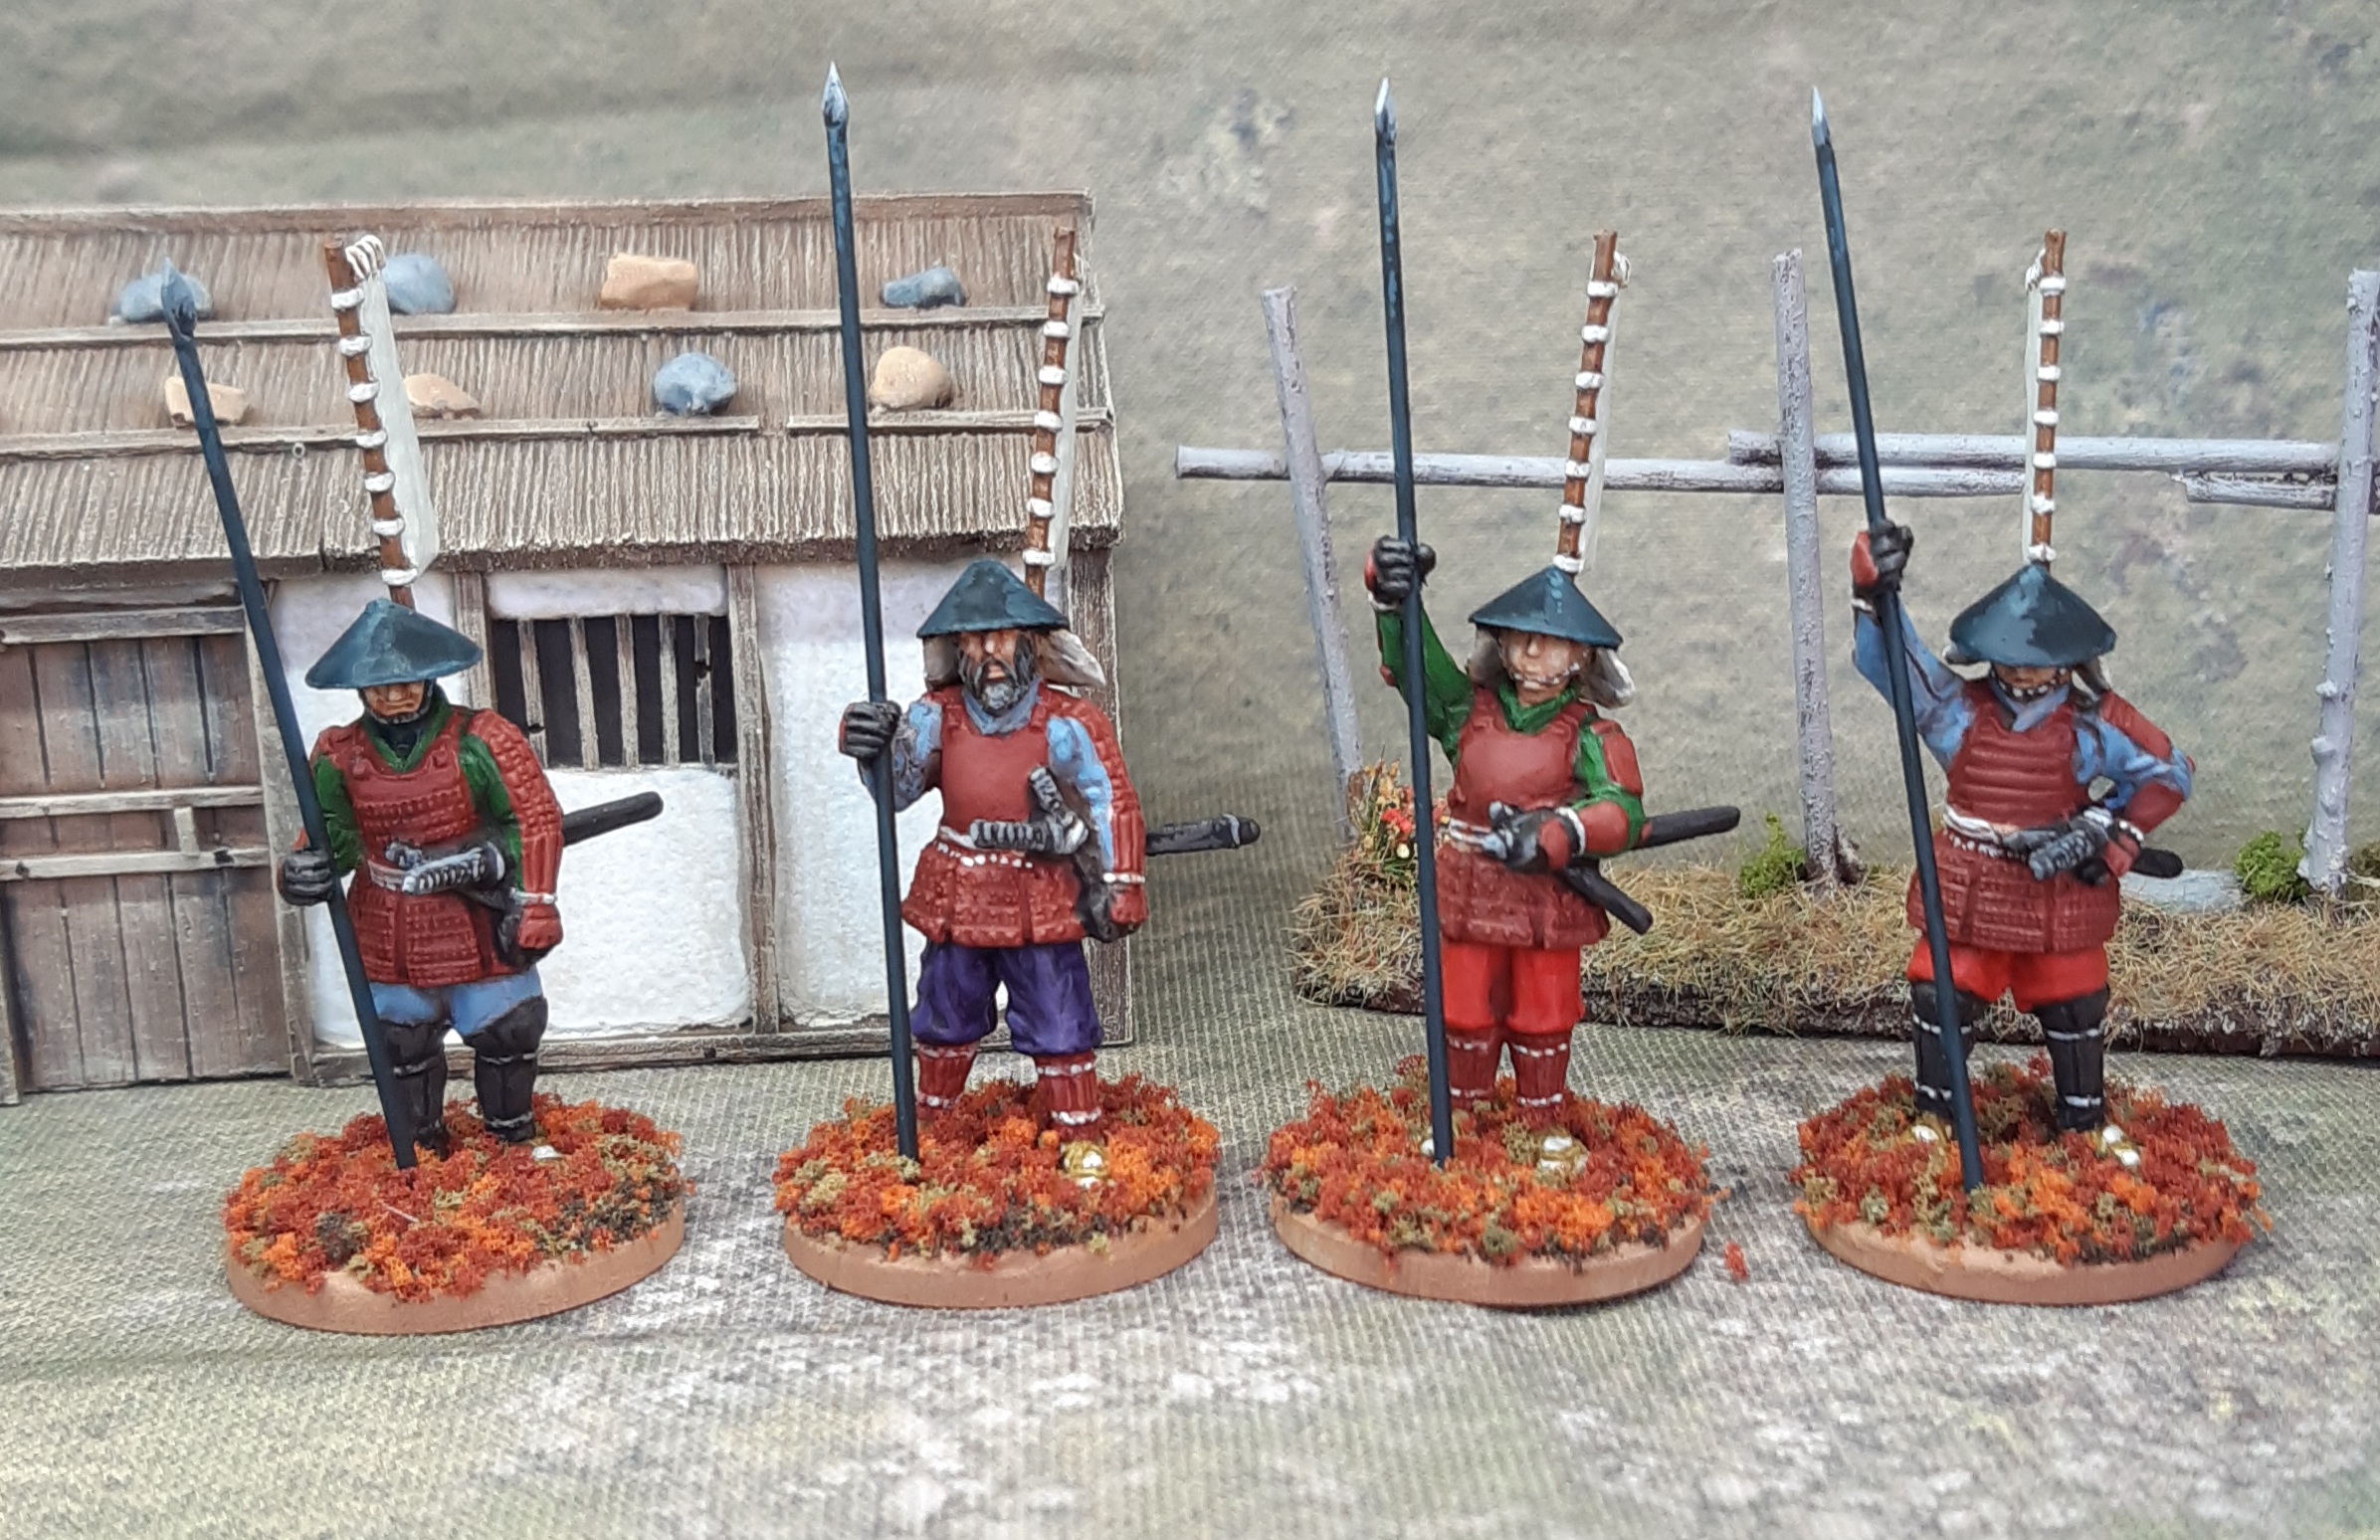
Plus some more of my usual stuff. Small Frenchmen, smaller rats and some more samurai.

12 Likes
So much playing with unpainted figures has been enough… I am putting together a kit of brushes and primes, palette and… questions come up. To the experts here (way more expert than me, I only painted my Hero Quest when I was in my teens, and it has rained plenty since then) what do you recommend? Vallejo or Citadel paints for a beginner?
I have been doing a bit of research, and so far this is the video I have liked more. He does use Vallejo paints…

1 Like
Vallejo hit a nice sweet spot between quality and cost. Dropper bottles all the way though - not citadel madness. Get the basic colours and mix them. Use the money you save on…
Redgrass wet palette, cheapy brushes, and one nice sable brush that’s quite big with a fine tip. Then you’re away ![]()
Lots of people here happy to help
6 Likes
I agree with the above. I’ll add that you shouldn’t worry about what brand you grab. Be beholden to noone. Just get to know the paints you do buy.
1 Like
@Mintochris has pretty much nailed it. Vallejo do some nice starter sets too. Their Game colour range is a bit brighter with a slightly more satin finish than their Model colour range.
Dropper bottles are great combined with a wet palette as they really help reduce paint wastage. You can knock together your own wet palette from a plastic tray, sponge and baking paper- there’s lots of online guides on how to do so.
3 Likes
Or, if you want, buy a wet pallette and when the sheets and absorbent pads runs out go buy a roll of grease proof paper and one of those flat sponge washing up thingies.
That way you get to decide if the dedicated bits are worth the money.
2 Likes
The most important thing I’d like to add is using GW spray to undercoat. The best quality it has is being really forgiving of mistakes. It thins as it dries so it’s hard to really mess up your miniature and obscure too much detail.
Bonus things are: do a search about brush care before you start. Having that in mind will stop your brushes messing up quickly so the whole thing could be more enjoyable. Roughly never get paint past half way up the bristles. If it goes in to the metal ferrule it’ll dry there and bust the shape.
Undercoat colour is fairly personal. I’m messy so I prefer black undercoat, it hides a lot of sins. White though does great stuff for colours so if you’re neater and more precise it could be good. Some people love to swear blind one is better than the other, I believe it’s what suits you and where you get your first good paint job. Each undercoat will have it’s own strengths and weaknesses as well as different paints that work better/worse on them.
While Vallejo paints do make the majority of my paint collection I use all major brands. One thing not to underestimate is the sensible design of GW paints at being accessible. Base, layer wash is straight forward. Sure the pots aren’t as good but with a wet pallet at your disposal they’re not open long enough for it to be much of a problem. Also the base-layer-wash or base - wash-layer approach can be quick enough. Also the contrast paints can produce some nifty results as @Marx has proved with all their huge forces that are really nicely done. Vallejo model colour for black and white paint though. The only GW that has any use if the contrast black. The abaddon black, white scar and the other white are all s:face_with_symbols_over_mouth: ![]() t
t
2 Likes
I am going to add my voice to the chorus here, but from somebody who paints a lot of 70-75% quality minis (the “Arm’s Length” standard… it looks good from about a meter away but if you get closer you will notice it lacks detail) and who works in a game store and therefore has access to a lot of varied products:
-
I almost always recommend starting with GW/Citadel paints, especially their primers. They are the most expensive paint available, but they are also the most beginner friendly. Vallejo makes a superior line of colours, but each bottle will be slightly different in consistency: some too thick, some too thin. When you’re used to it, it’s easy as pie to correct for (which I do), but as a starter it can be super frustrating. One bottle of Citadel “base” colour will be exactly the same consistency as any other Citadel “base” colour.
1.a) Citadel divides their paints into “lines” of similar product. As a starter, the only 3 you are concerned with are the “Base” line, the “Layer” line, and the “Shade” (and honestly, if you are really tight on cash, the only ones that I would say are irreplaceable are the Shades. Nuln Oil and Agrax Earthshade are often referred to as talent-in-a-bottle, and it’s not unjustified. Save on the paints if you need, but buy the best shade paint you can… and that’s Citadel) -
Black primer. When you get better you can start messing with white and coloured primers, but 99% of your early work should be black (unless you are specifically doing Yellow as a primary colour for your mini… my recommendation there is don’t until you are very experienced. Yellow is the worst. We will return to this). The thing with the human eye is that it is designed to notice mistakes. Things that look wrong. With black primer if you can’t reach an area with your brush (or if you notice it too late and risk ruining other work) it just looks like shadow. If you use White primer, your eye will pick out specifically the areas you missed and ignore all the good you did on the model. Super annoying, but true. The colours (including Gray primer) are harder to work with because Red Paint + Black Primer = dark red area, and Red Paint + White Primer = light red area, but Red Paint + Blue Primer =… ?? It might be purple, it might be brown, it might be red… it’s really hard to know, and as a result you have to use way more paint to get the colour you want, and then it still might not look right (a red plate of armour might have a darker blue shadow which might look good or might look awful). As mentioned above, Citadel makes hands-down the most fool-proof primers (there is always a better fool. No tool is perfect. But Citadel Primer, while often 2x as expensive as Army Painter or Vallejo primers are easier to use, give consistent results, and do their job exceptionally well).
2.a) Do not, under any circumstance, use off-brand or “cheap” primers until you are experienced. Using a $3 can from Canadian Tire seems like great savings until you are painting a mini and all the primer slides off. Or you obliterate the model’s details. You can absolutely use cheap primer eventually when you know what you’re doing and are very careful, but it’s not the way to start.
2.b) Contrast paints are great, but they “need” (are easier to use with) Contrast Primers, specifically Seer Grey and Wraithbone White. Since those aren’t black, I don’t recommend starting with them, and contrast paints do really weird stuff over black primer. A humble suggestion is to leave them aside until you feel ready to start experimenting. -
Okay, this is getting a tiny bit into theory, but I think it’s important. Pick 2-3 colours per model and a skin-tone. That’s it. Think about any superhero you want: Ironman is Red-Yellow-Gold. Batman is Black-Grey-Yellow. Superman is Red-Blue-Yellow. Green Arrow is Green-DarkGreen-Black. Almost every memorable character is one or two colours at most. If you want to be super fancy you can also throw in a metallic colour as part of your model (if you’re painting a legion of platemail, sure), but that’s about it. Less is more. And if you are painting units or armies, you want at least one of those colours to be common across the models (so an army of Space Marines will all use Ultramarine Blue somewhere on the model, even if the rest of the colours are different).
3.a) One slightly tricky thing here once you have picked your 2-or-3 colour scheme is picking the correct wash. The short answer is “Always Use Agrax Earthshade,” and it’s good advice if you are okay with a slightly dirty, grungy look to your models (and many people are. No judgment). However, Nuln Oil works better with greys, purples, and silvers, and Agrax Earthshade works better with everything else like reds, browns, greens, golds, skintones, oranges… it’s not a big deal, don’t stress it, and you can always just use both, with the Nuln going on the silver areas and everything else being Agrax, for example). -
Cool. You have your black primer, you have your 5-7 paints (your 3 colour scheme plus a metallic plus skin paint, as necessary, but then also pick up a white and a black). You need a brush. Here again Citadel and their stupid consistency rears its expensive head: Citadel brushes are almost always a perfectly mediocre brush for a more-than-mediocre price, but they are always the same. And as a beginner, that’s important because you are going to destroy some of your brushes. And that’s fine! It happens to all of us. Don’t throw the brushes you wreck away: they’re great for applying texture paints (we’ll get to those) or drybrushing (again, coming soon). But don’t go out and get a super-expensive Winsor and Newton Series 7 Size 2 until you are absolutely positive you won’t wreck it. They cost anywhere from $40-90CAD, and they are ruined if you aren’t super careful.
4.a) When picking brushes, try to stay one size bigger than you think you need, and pick brushes not because they are tiny but because they have a good point. I use a size 2/Medium/Regiment brush for absolutely everything. Eyes, highlights, individual rivets… because that little point will let you get where you need to go. But small, tiny, Size 0000 or whatever will hold paint for at most a few seconds before it dries, and when it dries you are going to try and paint something and it will glob off. Eventually you can use flow improver or thinners to keep that paint wet longer on a small brush, but for now? Skip the tiny ones. -
Right, time to paint! Get the model(s) you are going to paint ready by putting them on a box lid or using blue-tack to stick them on an old hockey stick. Go outside when it’s not super humid or freezing cold (or use a very well ventilated garage with nothing you care about inside it) and start priming. Start just to the left of the model(s), press the nozzle, and then sweep over the model(s) from left to right. If you point the primer directly at the model you can sometimes get big globs of paint that were stuck on/in the nozzle hit the model: frustrating. Avoid the problem by starting away from the models and ending away from the models. Rotate 90 degrees, sweep again. Rotate 90, etc… until the model has a thin but uniform coating. I also blast them once quickly from above and then, after about an hour I will lie them down and hit them from the bottom, but if you use a stick or handle or small box that’s not necessary. Whenever possible rotate the models, not the direction of the can. It’ll make your life a bit easier.
5.a) There is a lot of talk about “zenithal highlights” or “slapchop” or “speed painting” out there. They’re all well and good eventually. For now, stick with the basics. -
You’ve primed your model. Apply paint! Thin coats. The usual advice is your paint should “have the consistency of light cream or milk.” I usually use a 4-to-1 mix of paint-to-water. Dip brush in paint, dip brush on palette. Shit, I forgot to mention palettes…
6.a) Right! Wet palettes are great but can be a little tricky to use (they water your paints on their own, so you have to get used to them). I use a dollar store plastic palette with little divets for the colours but it needs to be cleaned periodically. I have a buddy who uses a bathroom tile he had leftover from a reno. You can absolutely use the plastic blisters many models come in. You just want something not porous at all. The paint will usually stay wet enough to use on a palette for 20-30 minutes, depending on how much you thin your paints and how close/hot your lights are. Shit, I forgot to talk about light…
6.b) Don’t worry about lighting too much if you’re just starting. But you want to paint somewhere with lots of natural light or good, bright indoor lights. Eventually consider getting an Ottlamp or whatever that has brightness settings and a swing arm. -
Right! Now we can paint. Each section of the model gets one colour. Thin your paints, go slowly. You will probably have to do 2 coats: it’s way more important to take your time than it is to get the colour uniform the first time. Lighter colours (whites, grays, light blues) may need 4-5 coats. Don’t sweat it. I like doing 4-5 guys at the same time, and then doing the same colour on each of them. When I finish with the last one, the first one is dry enough that I can move on to the next colour.
7.a) Remember how I said early not to use yellow? Yellow for several centuries was achieved by using lead. It’s poisonous, and therefore they no longer use lead… but as a result almost all yellows go on like water. They are extremely tricky to make look good. I suggest avoiding them outright (I mean, I still do avoid them unless abso-freakin’-lutely necessary), but if you must use a yellow, Citadel “Averland Sunset” is the best yellow I’ve ever worked with… but it’s got orange notes.
7.b) Don’t have the same colour on two areas that touch. Like, a brown for a leather tunic is fine and good unless you are going to use the same brown for the boots: I would then use my red or purple or whatever for the tunic and keep the boots brown. It sounds harder than it is: whenever two different materials touch, use a different colour. So you can do all the plate in silver and the feathers and belt and tabbard in blue, just as an example. -
Once you have applied all the colours to your model, go do something for 30-45 minutes (ideally 1-2 hours). Then come back and coat the entire model, head to toe, with your wash. A single thin, uniform coat. If the wash seems to be really pooling somewhere (like, in the fold of a skirt or between armoured plates) just dry your brush on a paper towel and then use it to soak up some of the excess, but honestly, don’t worry about it.
8.a) Totally optional, but after you’ve done your thin single coat of the Shade, you can then use a little of each of your original colour to “highlight” the most raised areas. You can also mix in a tiny amount of white if you want. Totally unnecessary, but it can make the models… ugh, I hate this phrase… sigh… it can make the models “pop” and make them look very good. -
Optional drybrushing: If your models are primarily one colour (Space Marines, par example), you can do a totally optional drybrushing step. First, paint the major colour (blue, let’s say) using all the above advice: thin coats, taking your time. Once that colour is dry and before doing any other colours, add a little white to the colour you are working with at about a 1-to-3 ratio (using “brushfuls” as an approximate measure). Mix well. Then, take a brush you have ruined or don’t mind ruining (or a cheap makeup brush, whatever) and put a little paint on the brush. Drag that across a dry paper towel until almost all the colour stops coming off: you want a hint of the initial paint on the brush. Then quickly brush that across your model, from the top down. It should leave a little lighter colour on all the edges and raised areas. Works really well for things with lots of edges and surfaces (fur, chainmail, cloaks) and usually badly on large, smooth surfaces (tanks, shields without designs on them, etc…). Then do the rest of your colours, painting over the areas that were “accidentally” drybrushed around the areas you wanted drybrushed. Continue with remaining steps.
9.a) You can also “seal” or protect your models. If you are going to touch them a lot, yes, do this. Citadel “Purity Seal” or whatever it’s called now in a rattle can is good. Put your models back on that box you used to prime them, and use exactly the same steps as when you primed them to put on a thin coat of sealer/varnish/whatever it is. Thin. And do not do this step if it is humid out. The result will be foggy looking models, which you can fix but is a pain in the butt and doesn’t always work. -
Boom! Revel in your mastery over painting! Honestly, those steps there have done years of work for me. Your models will look good! They will look great on the table. There’s a billion things you can do to step up your game eventually, but honestly, after learning several hundreds “tricks and tips,” I almost always go back to the basics for 95% of my models. Sure, to paint Sabine I spent 3 weeks and did all sorts of mix-paint-freehand-OSL-bull$#!t, but that was one model. I wouldn’t do that for a unit, much less an army.
-
Shit, forgot basing. As a start, just paint the base black (super easy, looks good), but you can also pick up either Vallejo or Citadel textured paint. Vallejo stuff is miles cheaper, and is actually as good-or-better than Citadel, but you have to buy it in huge pots. Citadel, while 5x more expensive, are also in smaller pots which means you can get a broad selection of them. Apply them to the base with a bad/ruined brush (I use dental tools, but I’m nuts and you don’t have to do that), and then after they dry paint the ring around the base black. If you are painting a lot of similar units for the same army (say, 50 Clone Troopers… hypothetically) you can paint the rings for each unit the same colour (or just put a thick line on the front and back in a colour and do the rest black). Optional, but nice if you have time.
14 Likes
This reminds me of advice I’ve heard about motorcycles with fairings: don’t get one until you’ve laid a bike down a few times and know how to avoid it next time.
Great stuff, thanks - especially with regard to tiny brushes, which I’ve never seen explained before.
3 Likes
There’s a fairly recently released book that might be worth checking out How to Paint Miniatures for Wargames. It’s got great sections on prep, and really shows the differences between different paint styles/techniques and the relative time/effort, with lots of examples from a range of very talented painters, covering all genres (fantasy, sci-fi, historical) and scales.
5 Likes
I am printing this and putting it on the wall next to my garage desk, thanks so much!
1 Like
I just want to add a brief addendum:
- Brush care. I mentioned that you’re going to ruin brushes. It’s going to happen, don’t feel bad about it. I have destroyed… probably 20-30 brushes in the last five years? But by the same token, most of those were eventually worn out through extensive use. By taking care of your brushes, you are going to get way more mileage out of them, even though they will eventually fail (and become drybrush brushes, or glue brushes, or paint-transfer brushes, or terrain/texture paint brushes until they are too gnarly for even those tasks). The two major things to keep in mind are “Keep your brushes clean” and “Store your brushes well”.
These are hard things to explain, but the basics were mentioned above. You want to be careful not to completely submerge your brush in paint. Usually dip it about halfway into the paint, and as you drag it out of the paint, rotate it slightly to spin the bristles a little and sharpen the point. By doing this you help the brush maintain its point (and that is, if you will excuse the horrible pun, “the point” of having a good brush in the first place). The trick is that you have to be patient: transferring paint from a Citadel pot to your palette takes time if you are only doing it a “half” brushful at a time. Try to resist the urge to transfer more at a time (or, again, use a brush that’s worn out its utility elsewhere).
The most useless but tragically important information I can transmit to you is to clean your brushes with water “whenever they need it.” I wish I could be more specific than that… each paint, each size of brush, each application will change when it is needed. Almost always clean your brush between paints (always as a beginner, but as you move into things like wet-blending or dry-blending or OSL stuff you actually will intentionally not clean your brush… I digress). Hold the brush between thumb and forefinger and quickly flick it back-and-forth in a cup/mug/whatever of water. Change the water occasionally and always after you clean metallic paints off the brush and are no longer painting metallics (true metallic paint has little flecks of metal that you will see floating in your water, which if transferred to another paint will make it look slightly metallic). Serious painters will have two cups of water: one for thinning paint, one for cleaning their brush. It’s a good habit to have… and one I do not do. Serious painters will also not be able to describe to you the taste of paint-brush-cleaning water… it’s like drinking liquid crayon, or what I imagine licking a marker would taste like. Suggestion: if you are a tea/coffee drinker, put it on a different surface than your painting desk. Ya know… so I’m told.
cough
ANYway. I only use one supply of water for both cleaning and thinning, but I change it every hour or so. YMMV.
Lastly, when storing your brush… look, it’s a little disgusting, but I don’t know any other way to describe this, okay? Take the brush into your mouth, and as you draw the brush out, rotate it as you lick the bristles gently to reform the point. Do as I say and not as I do: clean the brush before doing this. Look at the brush-tip: if all the bristles are back as a fine tip, you’re set to store the brushes (NEVER bristles down on a surface! EVER!). I store my horizontally on little drying-racks that I have accumulated from years of convention attendance, many artists store theirs in a mug with the bristles pointing up, and really fancy-pants artists will have brush holders that will store the brushes suspended with the bristles facing downwards. Those are the best, but be damned if I know where/how to get one that doesn’t cost multiple fortunes and a few limbs. IMO they’re not worth the extra effort: my W&N Series 7 Size 2 and my Rosemary and Co’s are both stored horizontally and it has never been an issue.
12.a) Last point, I think: If you have a brush where 1 or 2 bristles are refusing to go back into shape, you have a few options. The easiest is to just say “Whelp! That was a good run, Friend Brush! We’re now done!”, but obviously it’s also the most expensive. If you have a good set of small scissors (I use my partner’s sewing kit scissors: very sharp and tiny) you can just snip it off. Or you can get a container of “brush soap” from any reputable art supply store (I use something called “The Master’s Brush Cleaner” I think) and use that to help reform the tip. It works, and I do use it with my expensive sable brushes… but it’s an art all on its own. This is why we start with cheap brushes, really… because “reclaiming” a damaged or twisted brush is often more work than its worth.
Okay. I think that’s everything. I hope that’s useful!
9 Likes
Very!! Thanks so much for that!
1 Like
Some brushes come with a plastic tube that goes over the brush but cannot go over the handle. With these, you can store the brush upside down and the bristles are safe.
3 Likes
Okay, enough theory. Time for a little bit of practical application.
It took me… gosh, months? Probably months, but I have finally finished the last batch of Heroes for Journeys in Middle-Earth from the newest expansion (uhhh… Spreading War I think?).
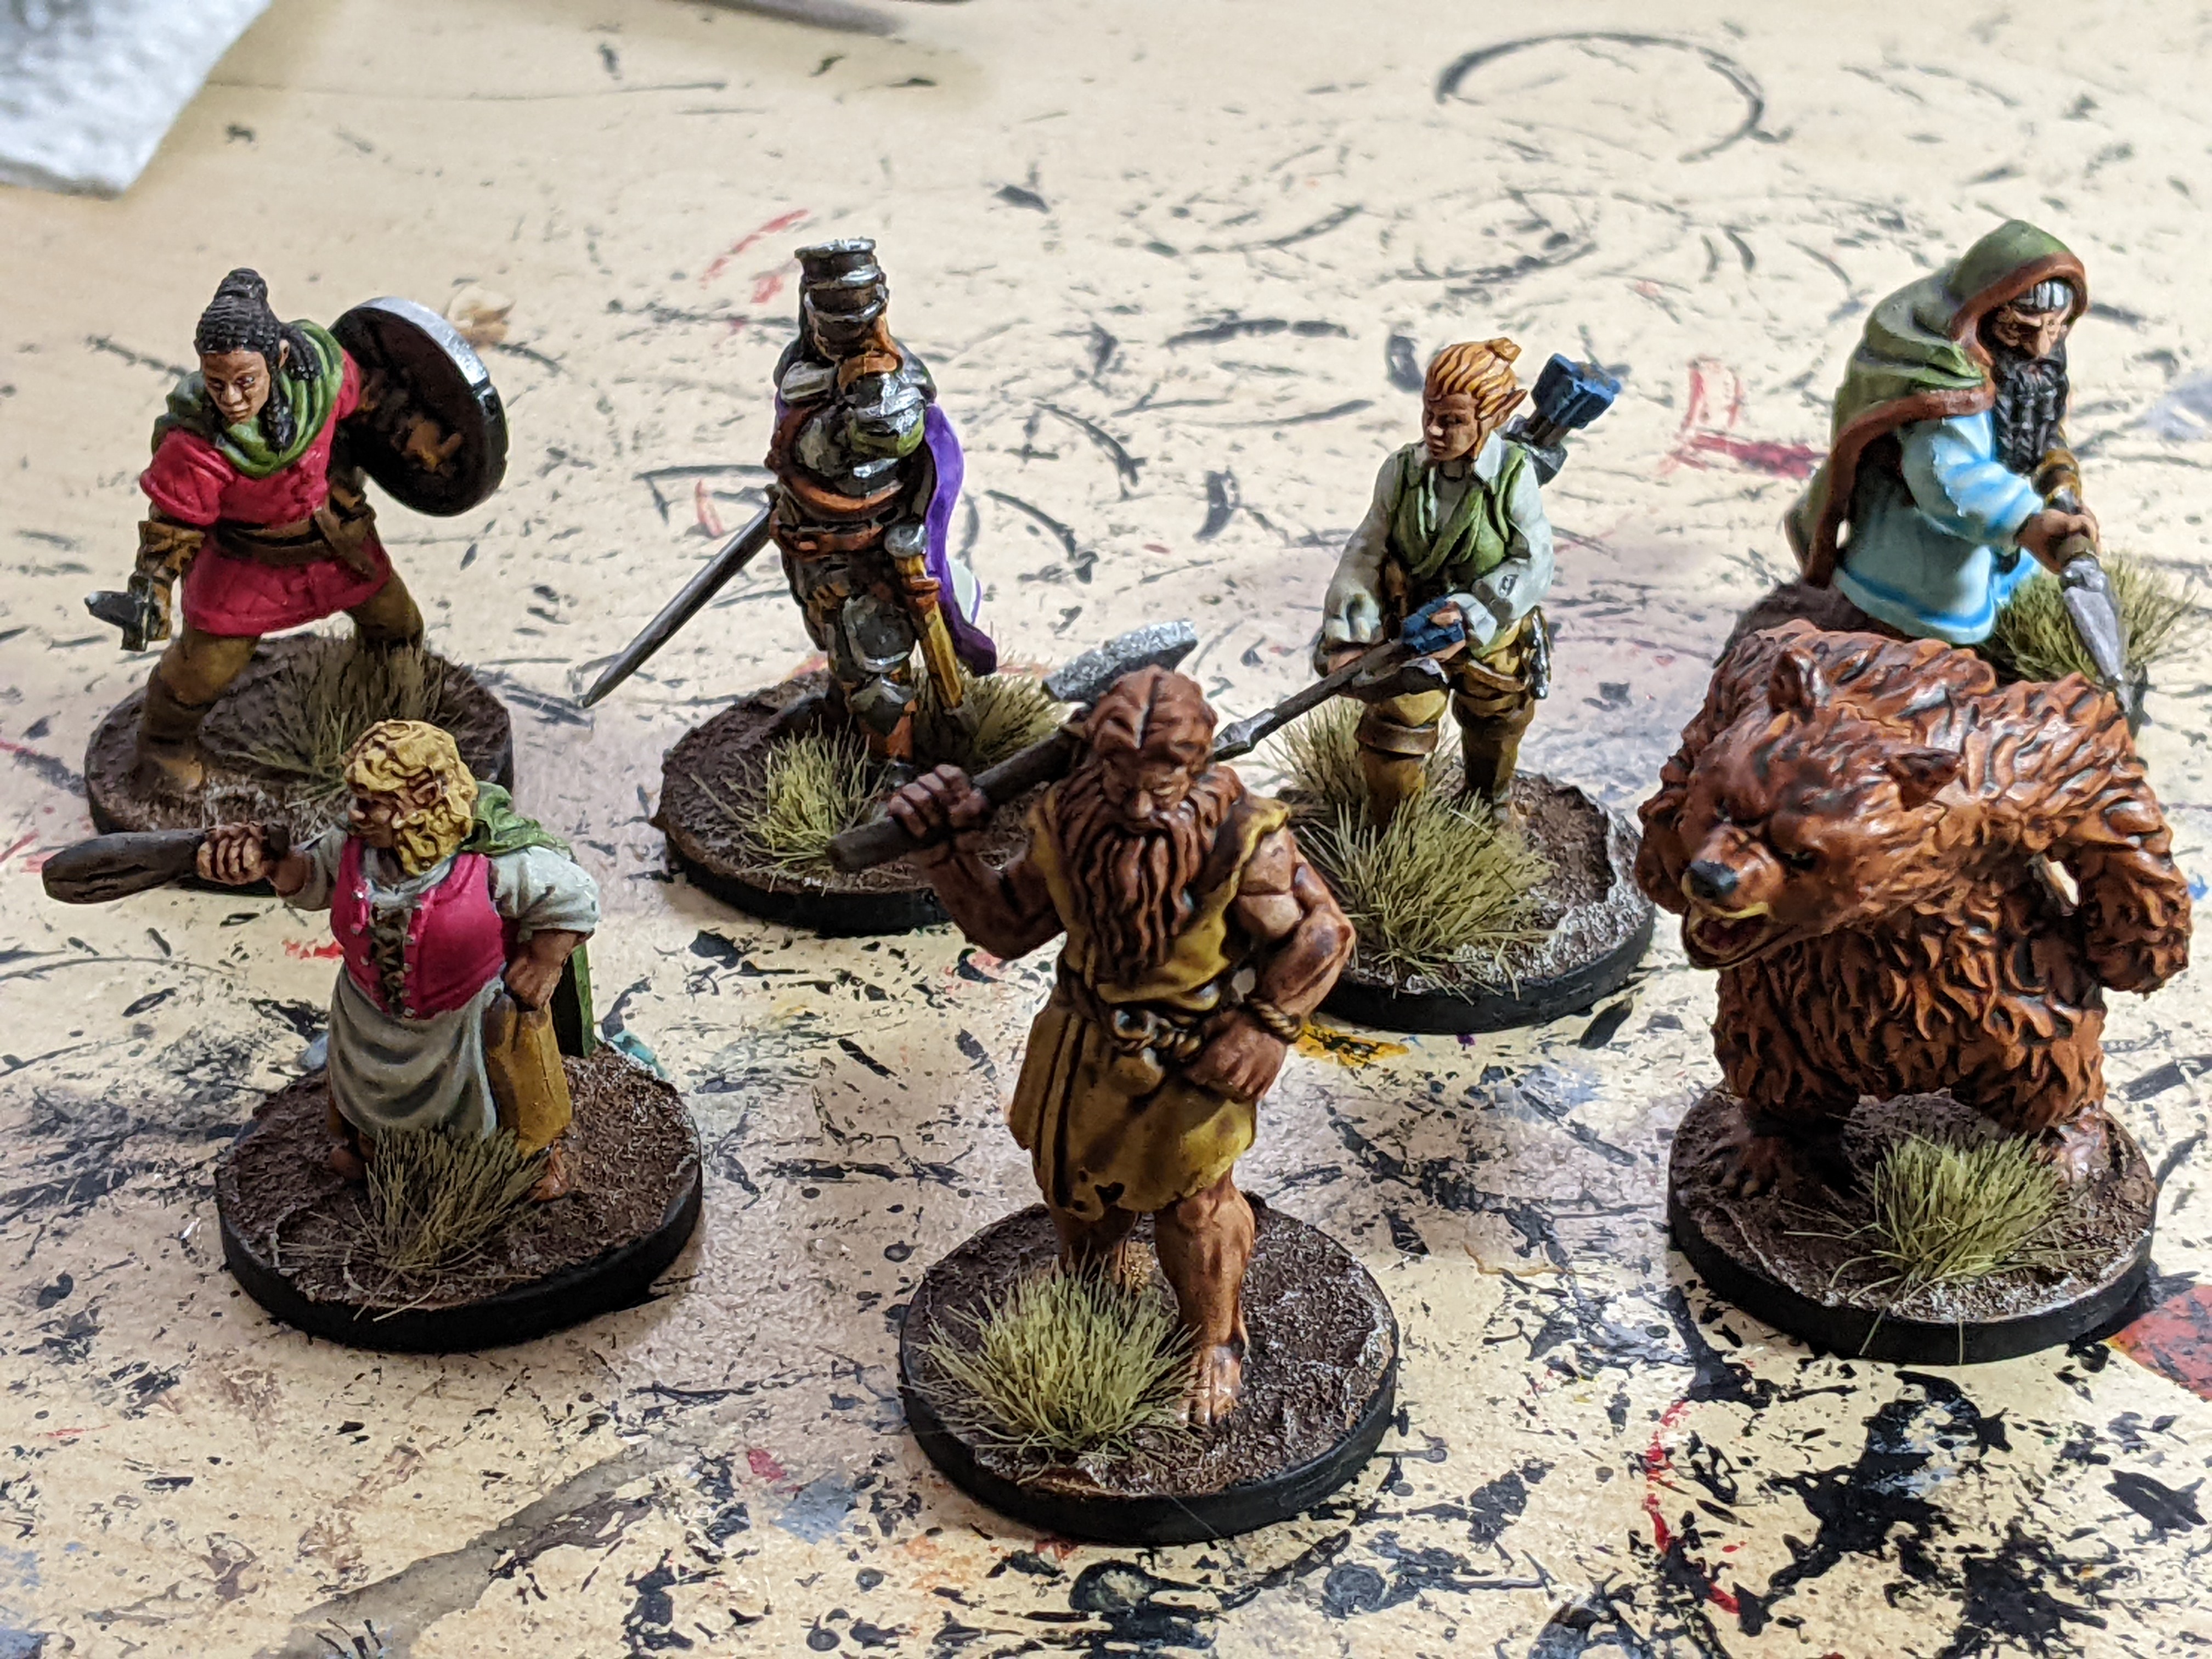
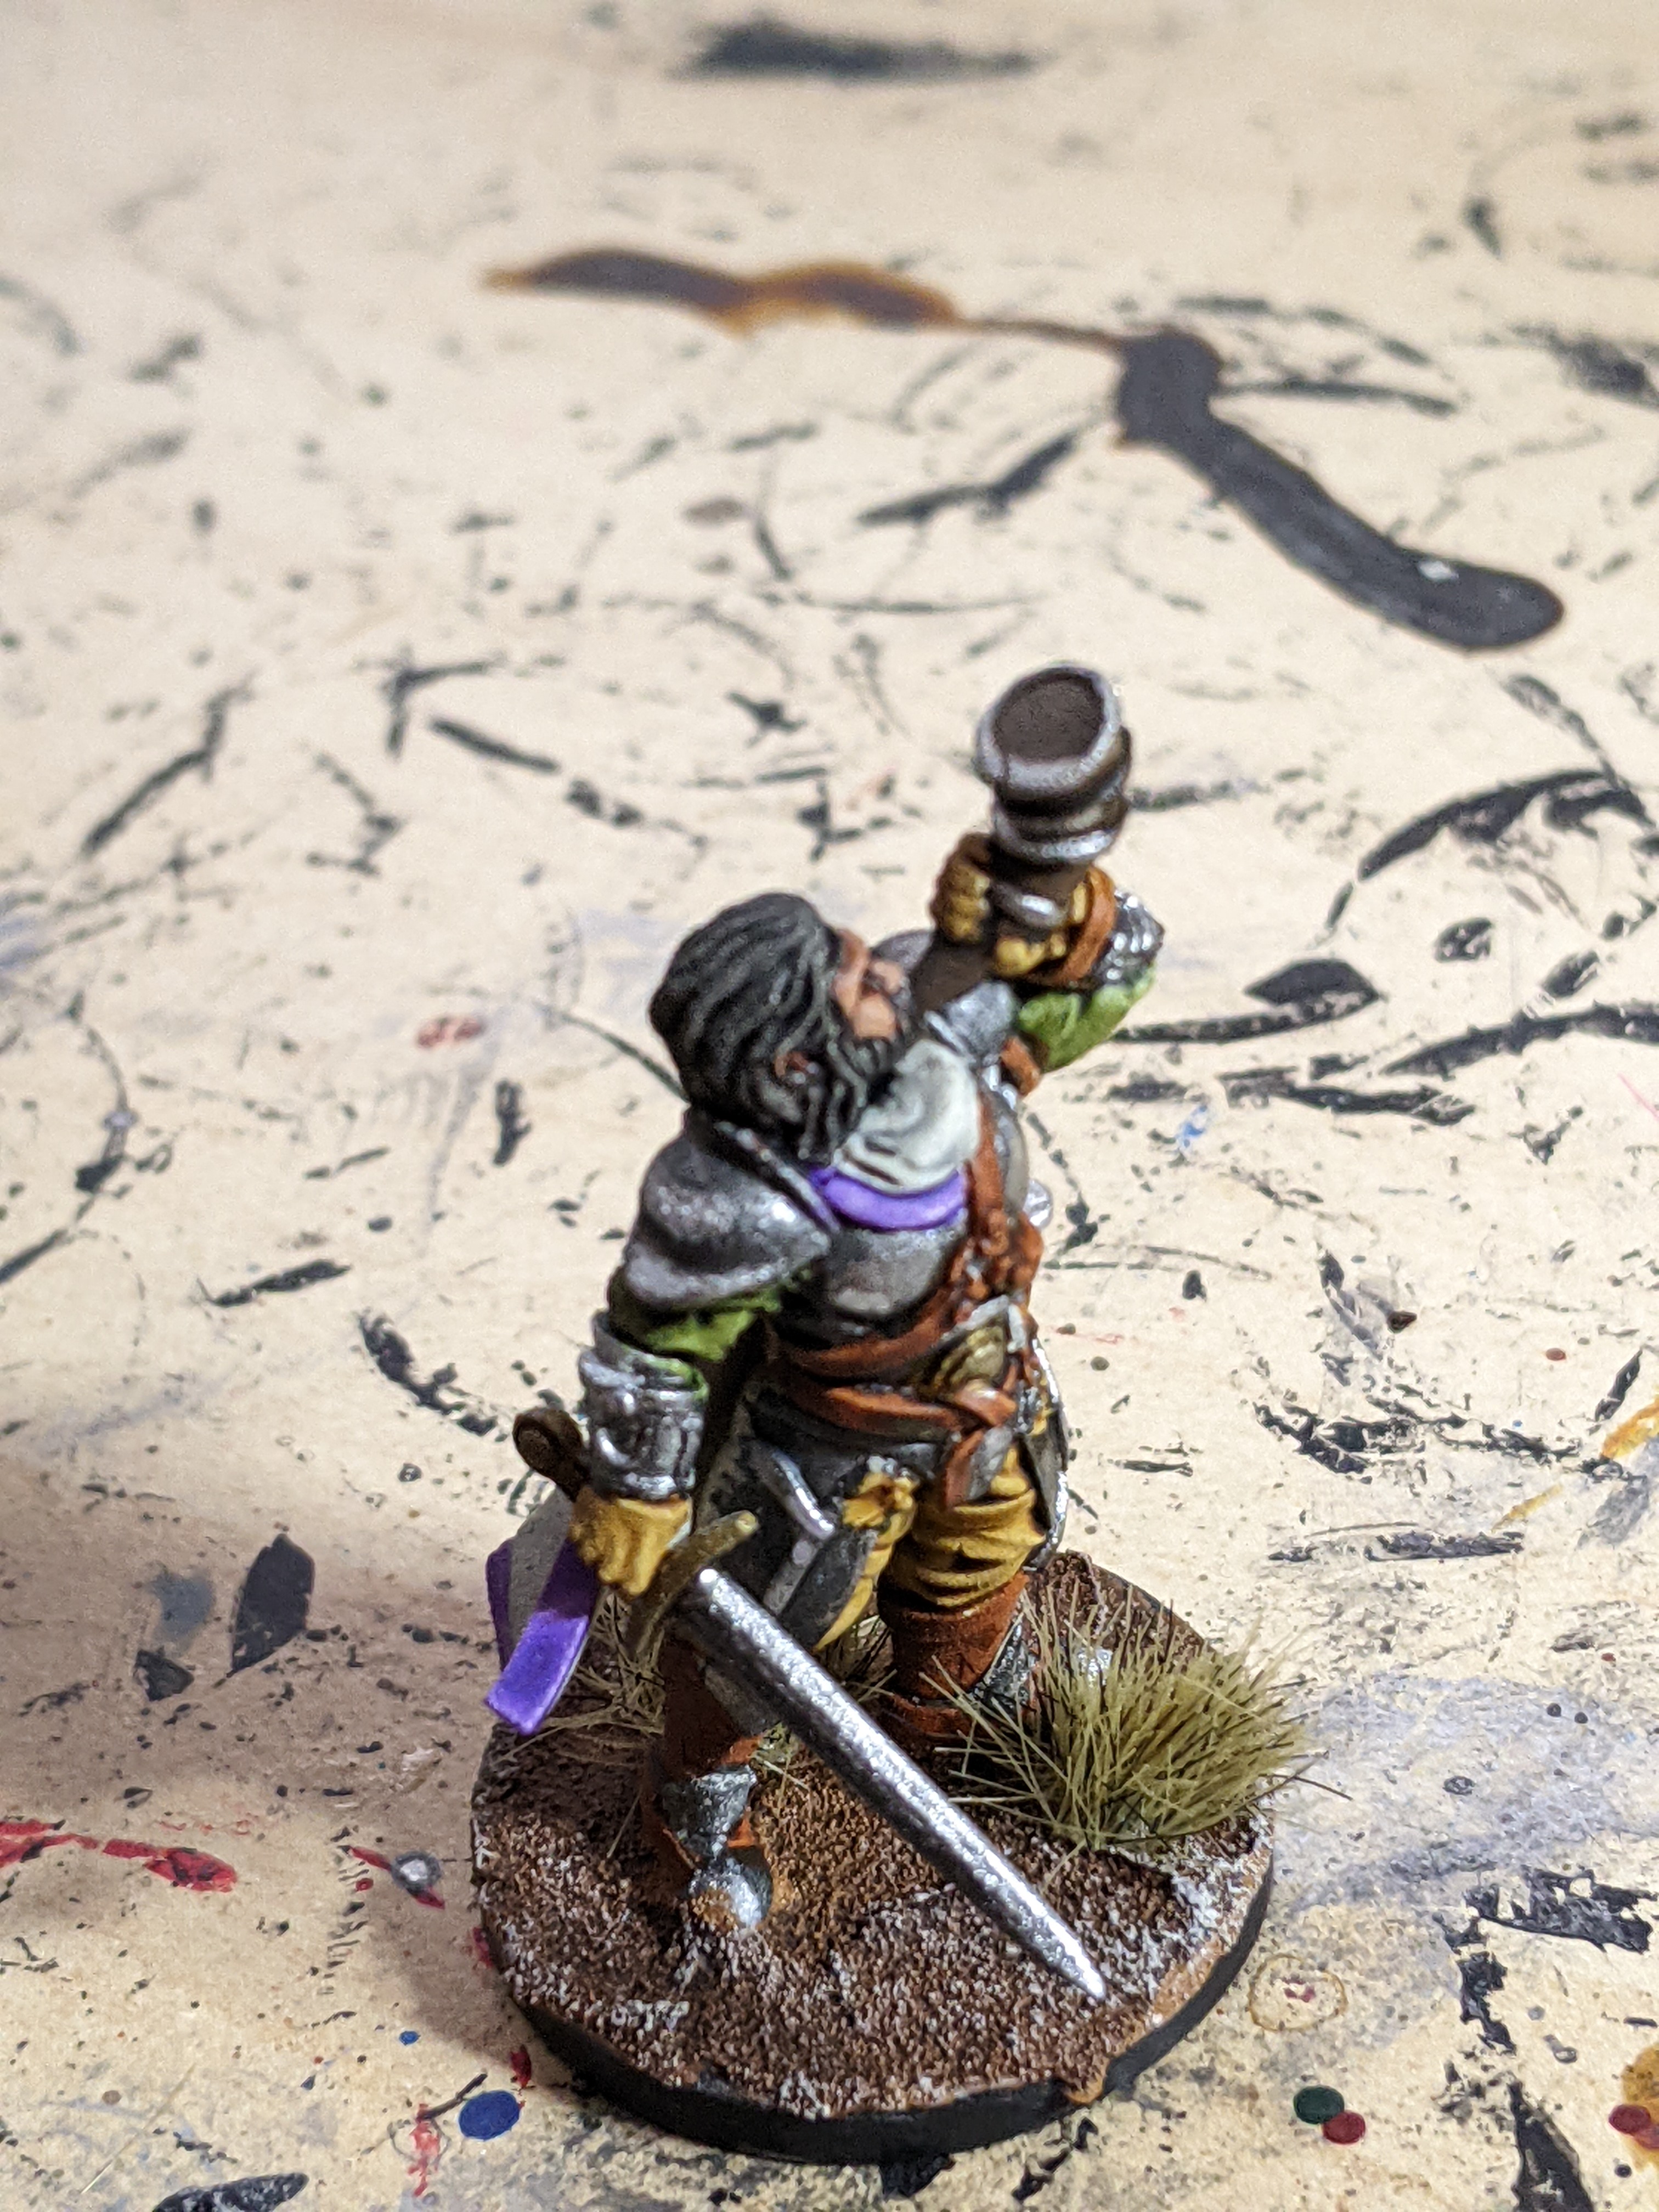
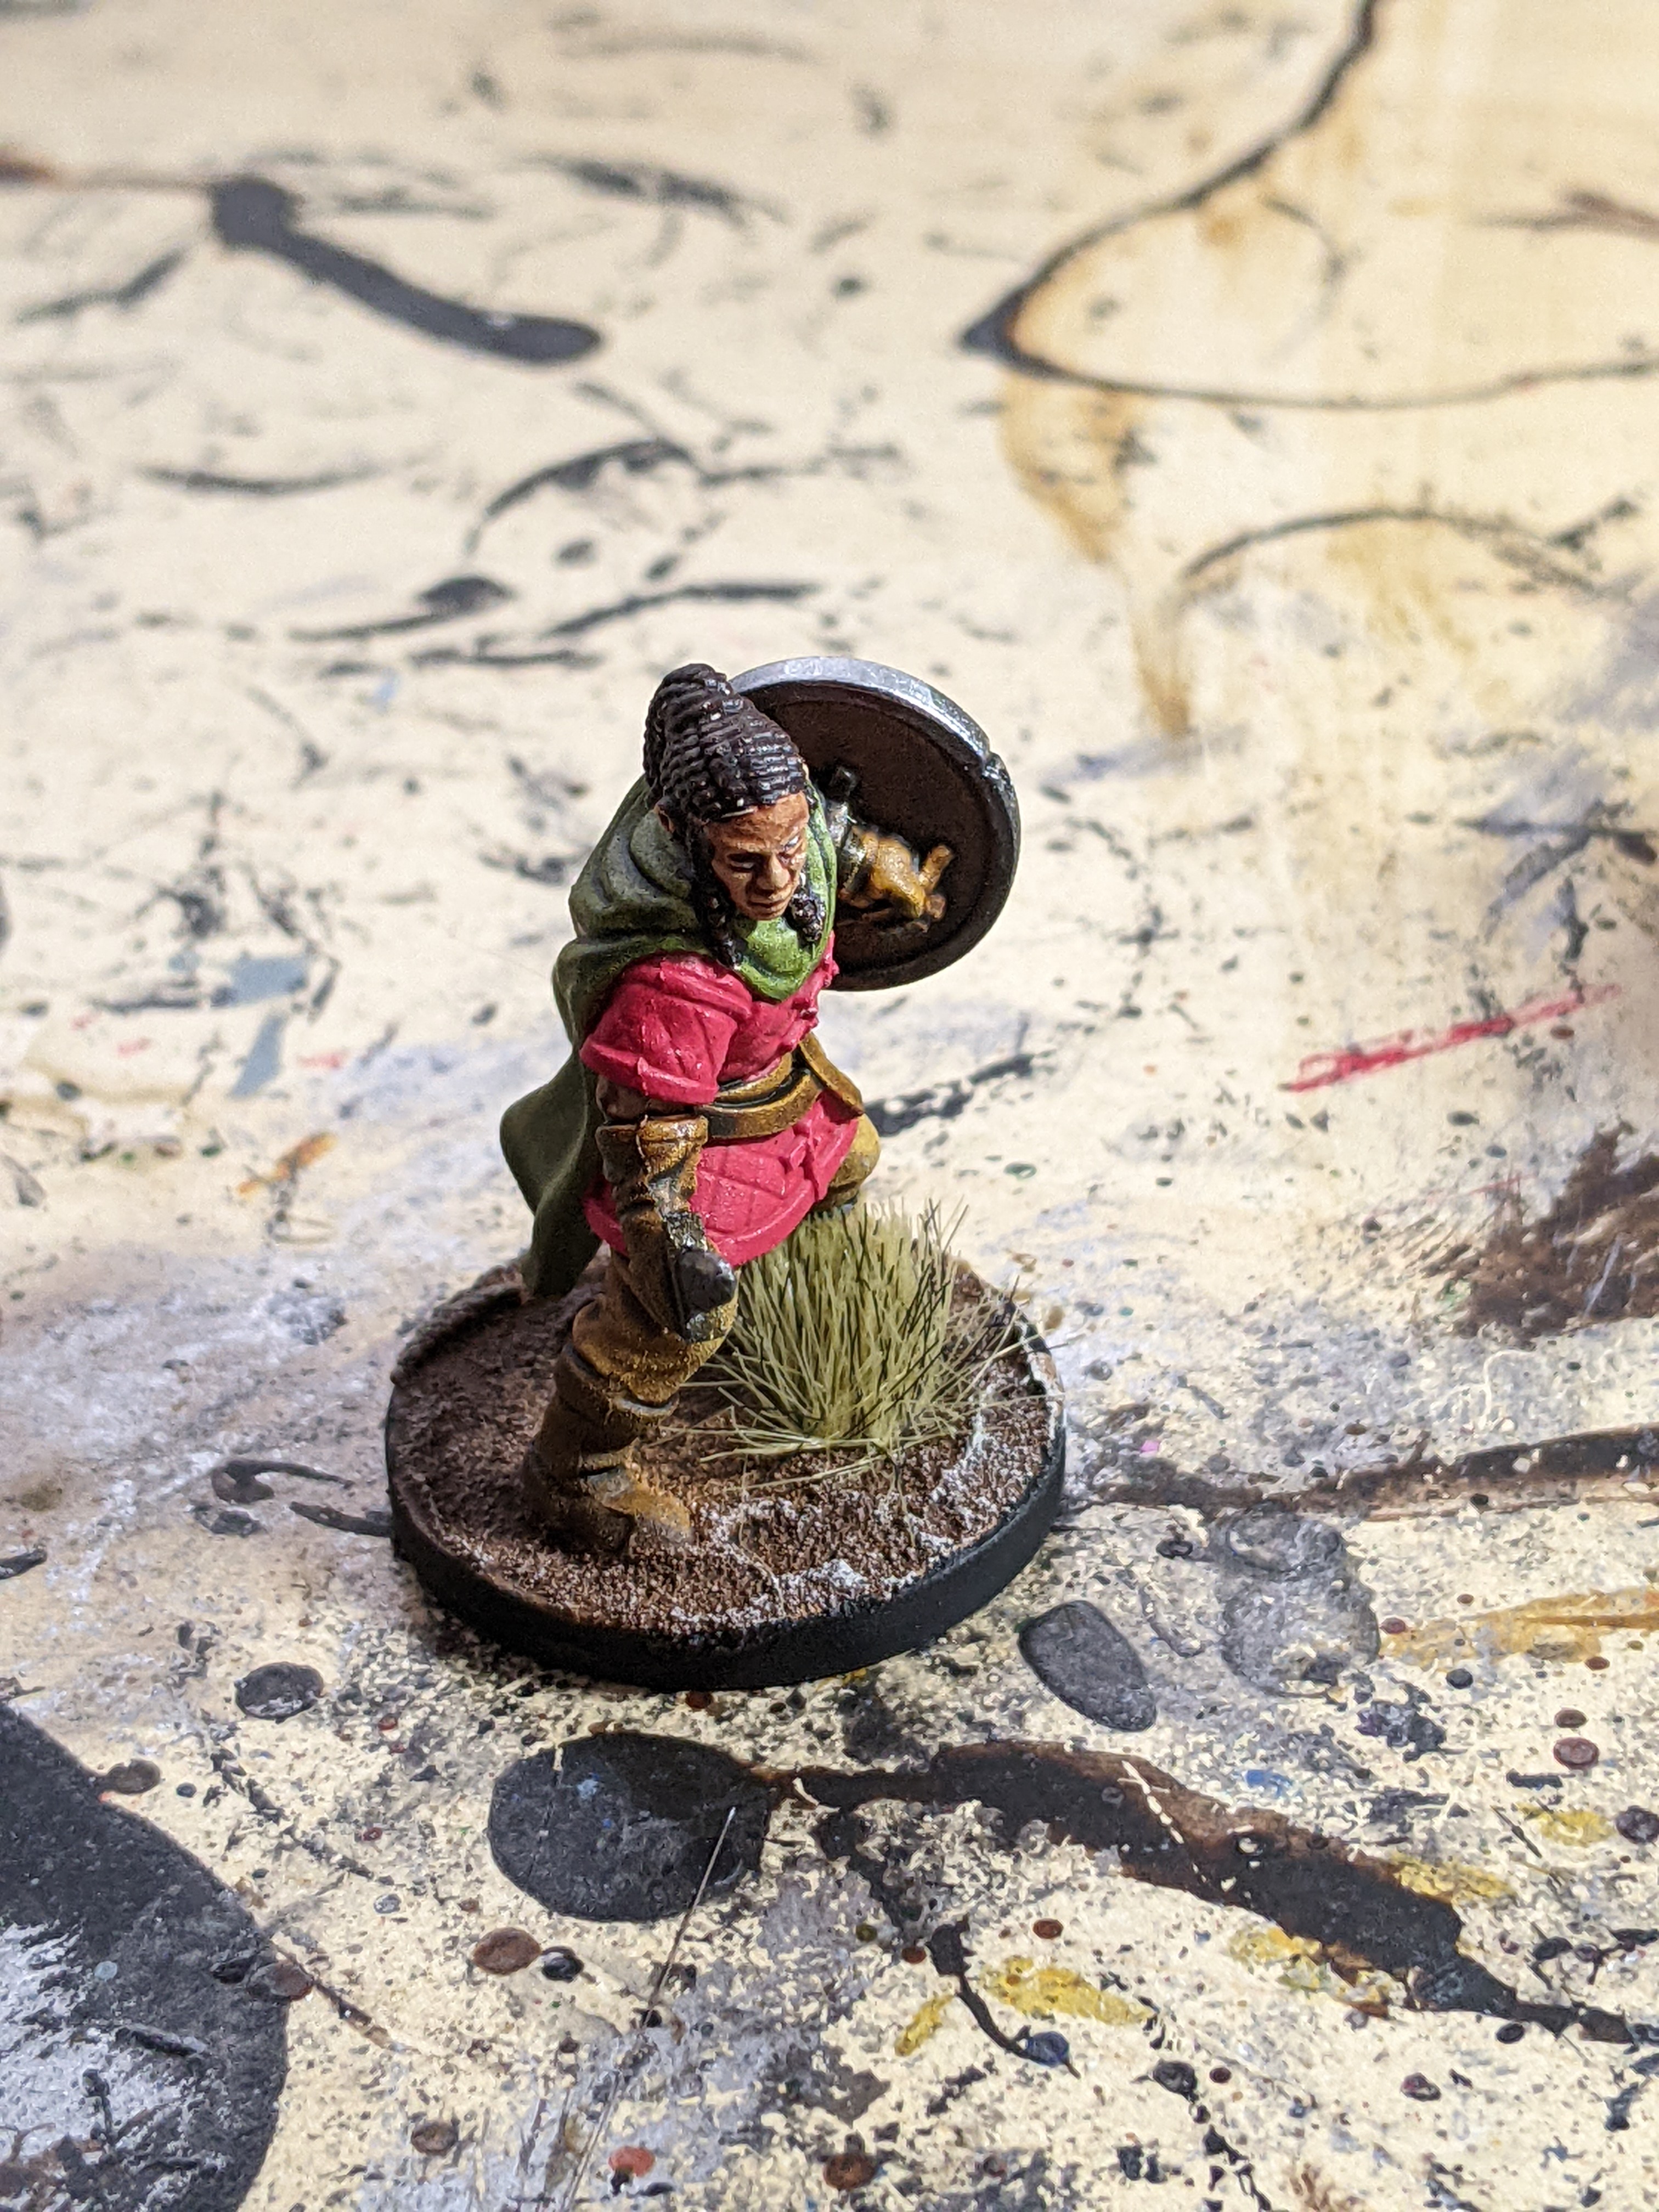

I’ll admit the length to paint them was due to medication and depression, not because of wanting to do a better job. That stated, I’m happy with how they look aside from maybe the dwarf: his tunic is too light blue. But that’s okay… still looks okay.
Next… 14 or 15 Battlemechs (two Level 2 for Comstar… which is 12… and a Clan Ad Hoc Star which if 5… so 17! Cool). I’m not doing Comstar colours, though. These are going to be Steiners and Wolves, same as the rest of my stuff. I have a small Merc force as well, but I don’t like painting their colour scheme.
Anyways, all 17 should be done by… Saturday, probably? Probably. They’d be done today except I have a big midterm in class and I need to study at least a bit for it.
9 Likes
I did a thing…
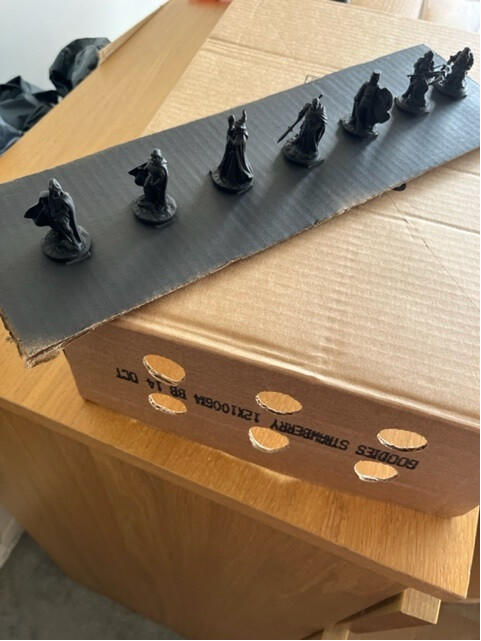
I am still waiting for my paints to turn up, but Monday was a public holiday here, and the weather was sunny and dry, and I had a can of 2X black primer… and I totally ignored @Marx and I used it instead of the Citadel brand that is 3 times the price and… it went well!
I can see now that it is not the best picture in the world, but the detail on the figures (they are only cheap print outs for D&D from a local TradeMe company) seems to be good, no blubs of paint or any issues.
So now I have something to do for the weekend (the paints do not arrive till Friday…)
9 Likes