I made a table! (warning, lots of pictures)

I’ve wanted something bigger to play games on in the living room, as my coffee table is tiny. I can barely get Terraforming Mars on it, never mind Great Western Trail. I’ve seen some for sale second-hand that were either too expensive or too small, or just plain ugly. That all combined with the fact I needed to invest my time into something instead of buying more games meant I set myself a project - make a table.

I picked up a couple of pallets locally (I only used one in the end) and armed with a jigsaw, sander, hammer, drill and crowbar, I set to work.


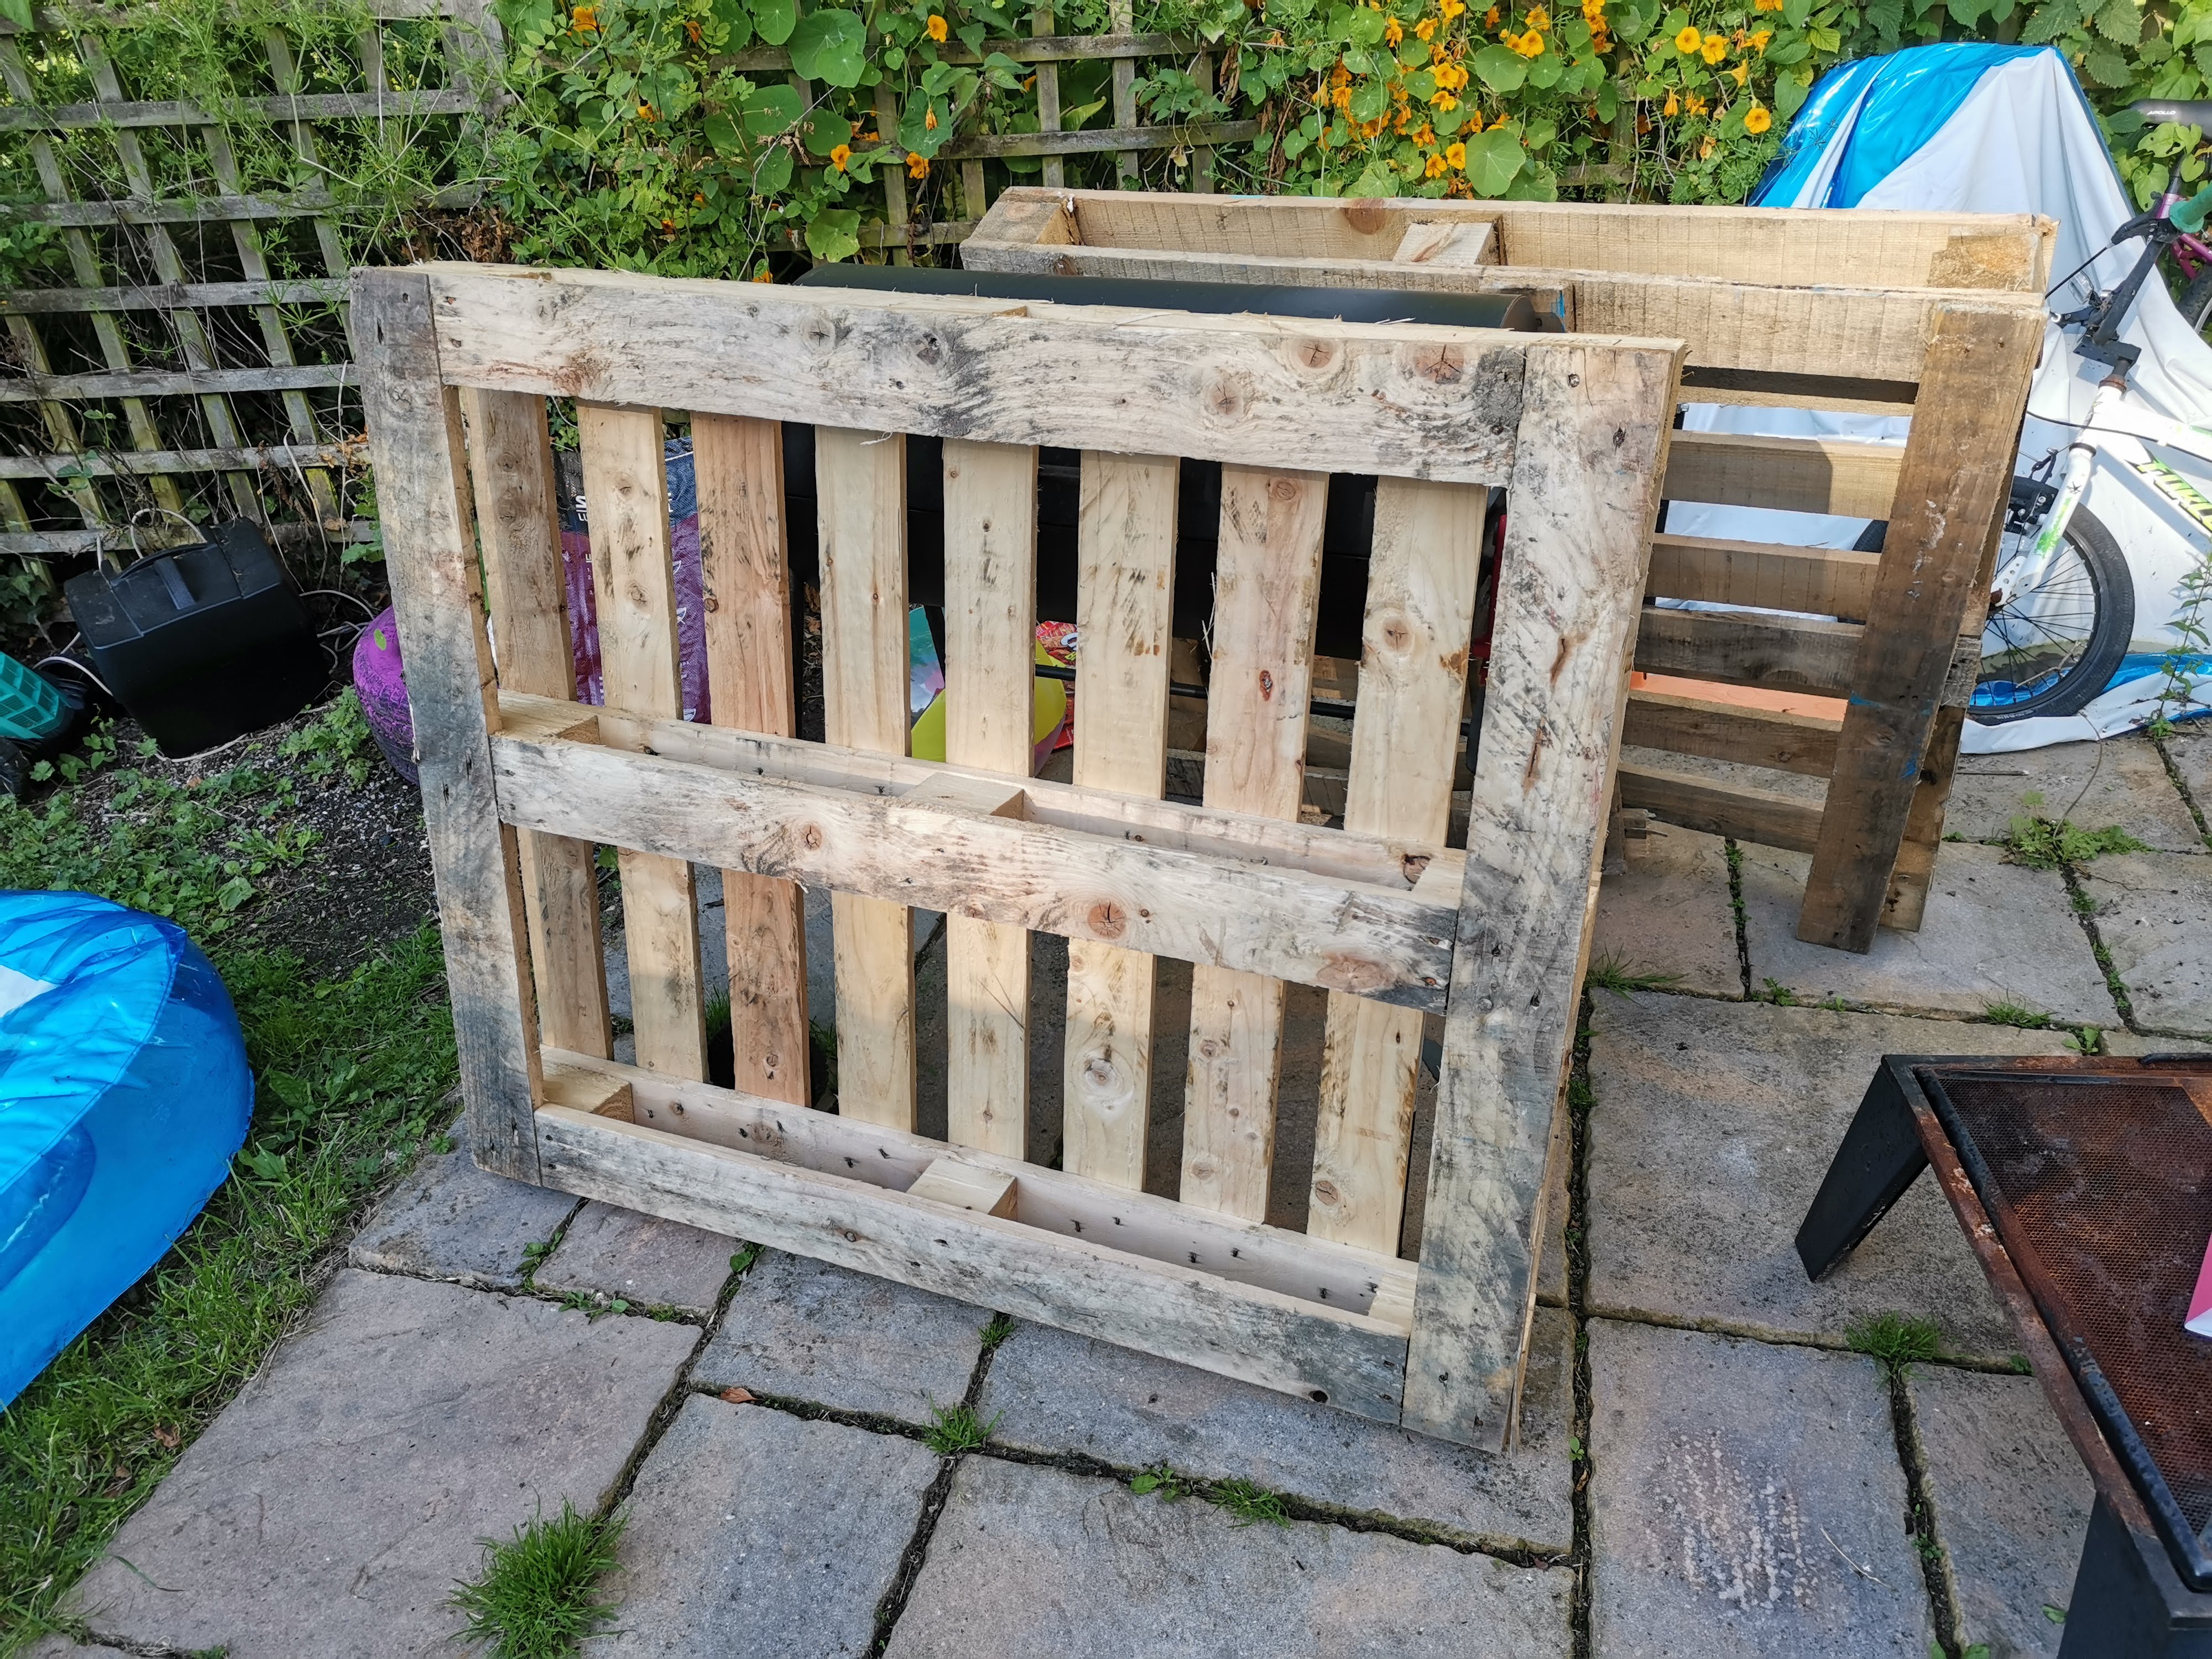
The pallets as they came, I got lucky and found an intact one, and the stamp indicated it had been heat-treated too, so I know it won’t warp or rot easily.


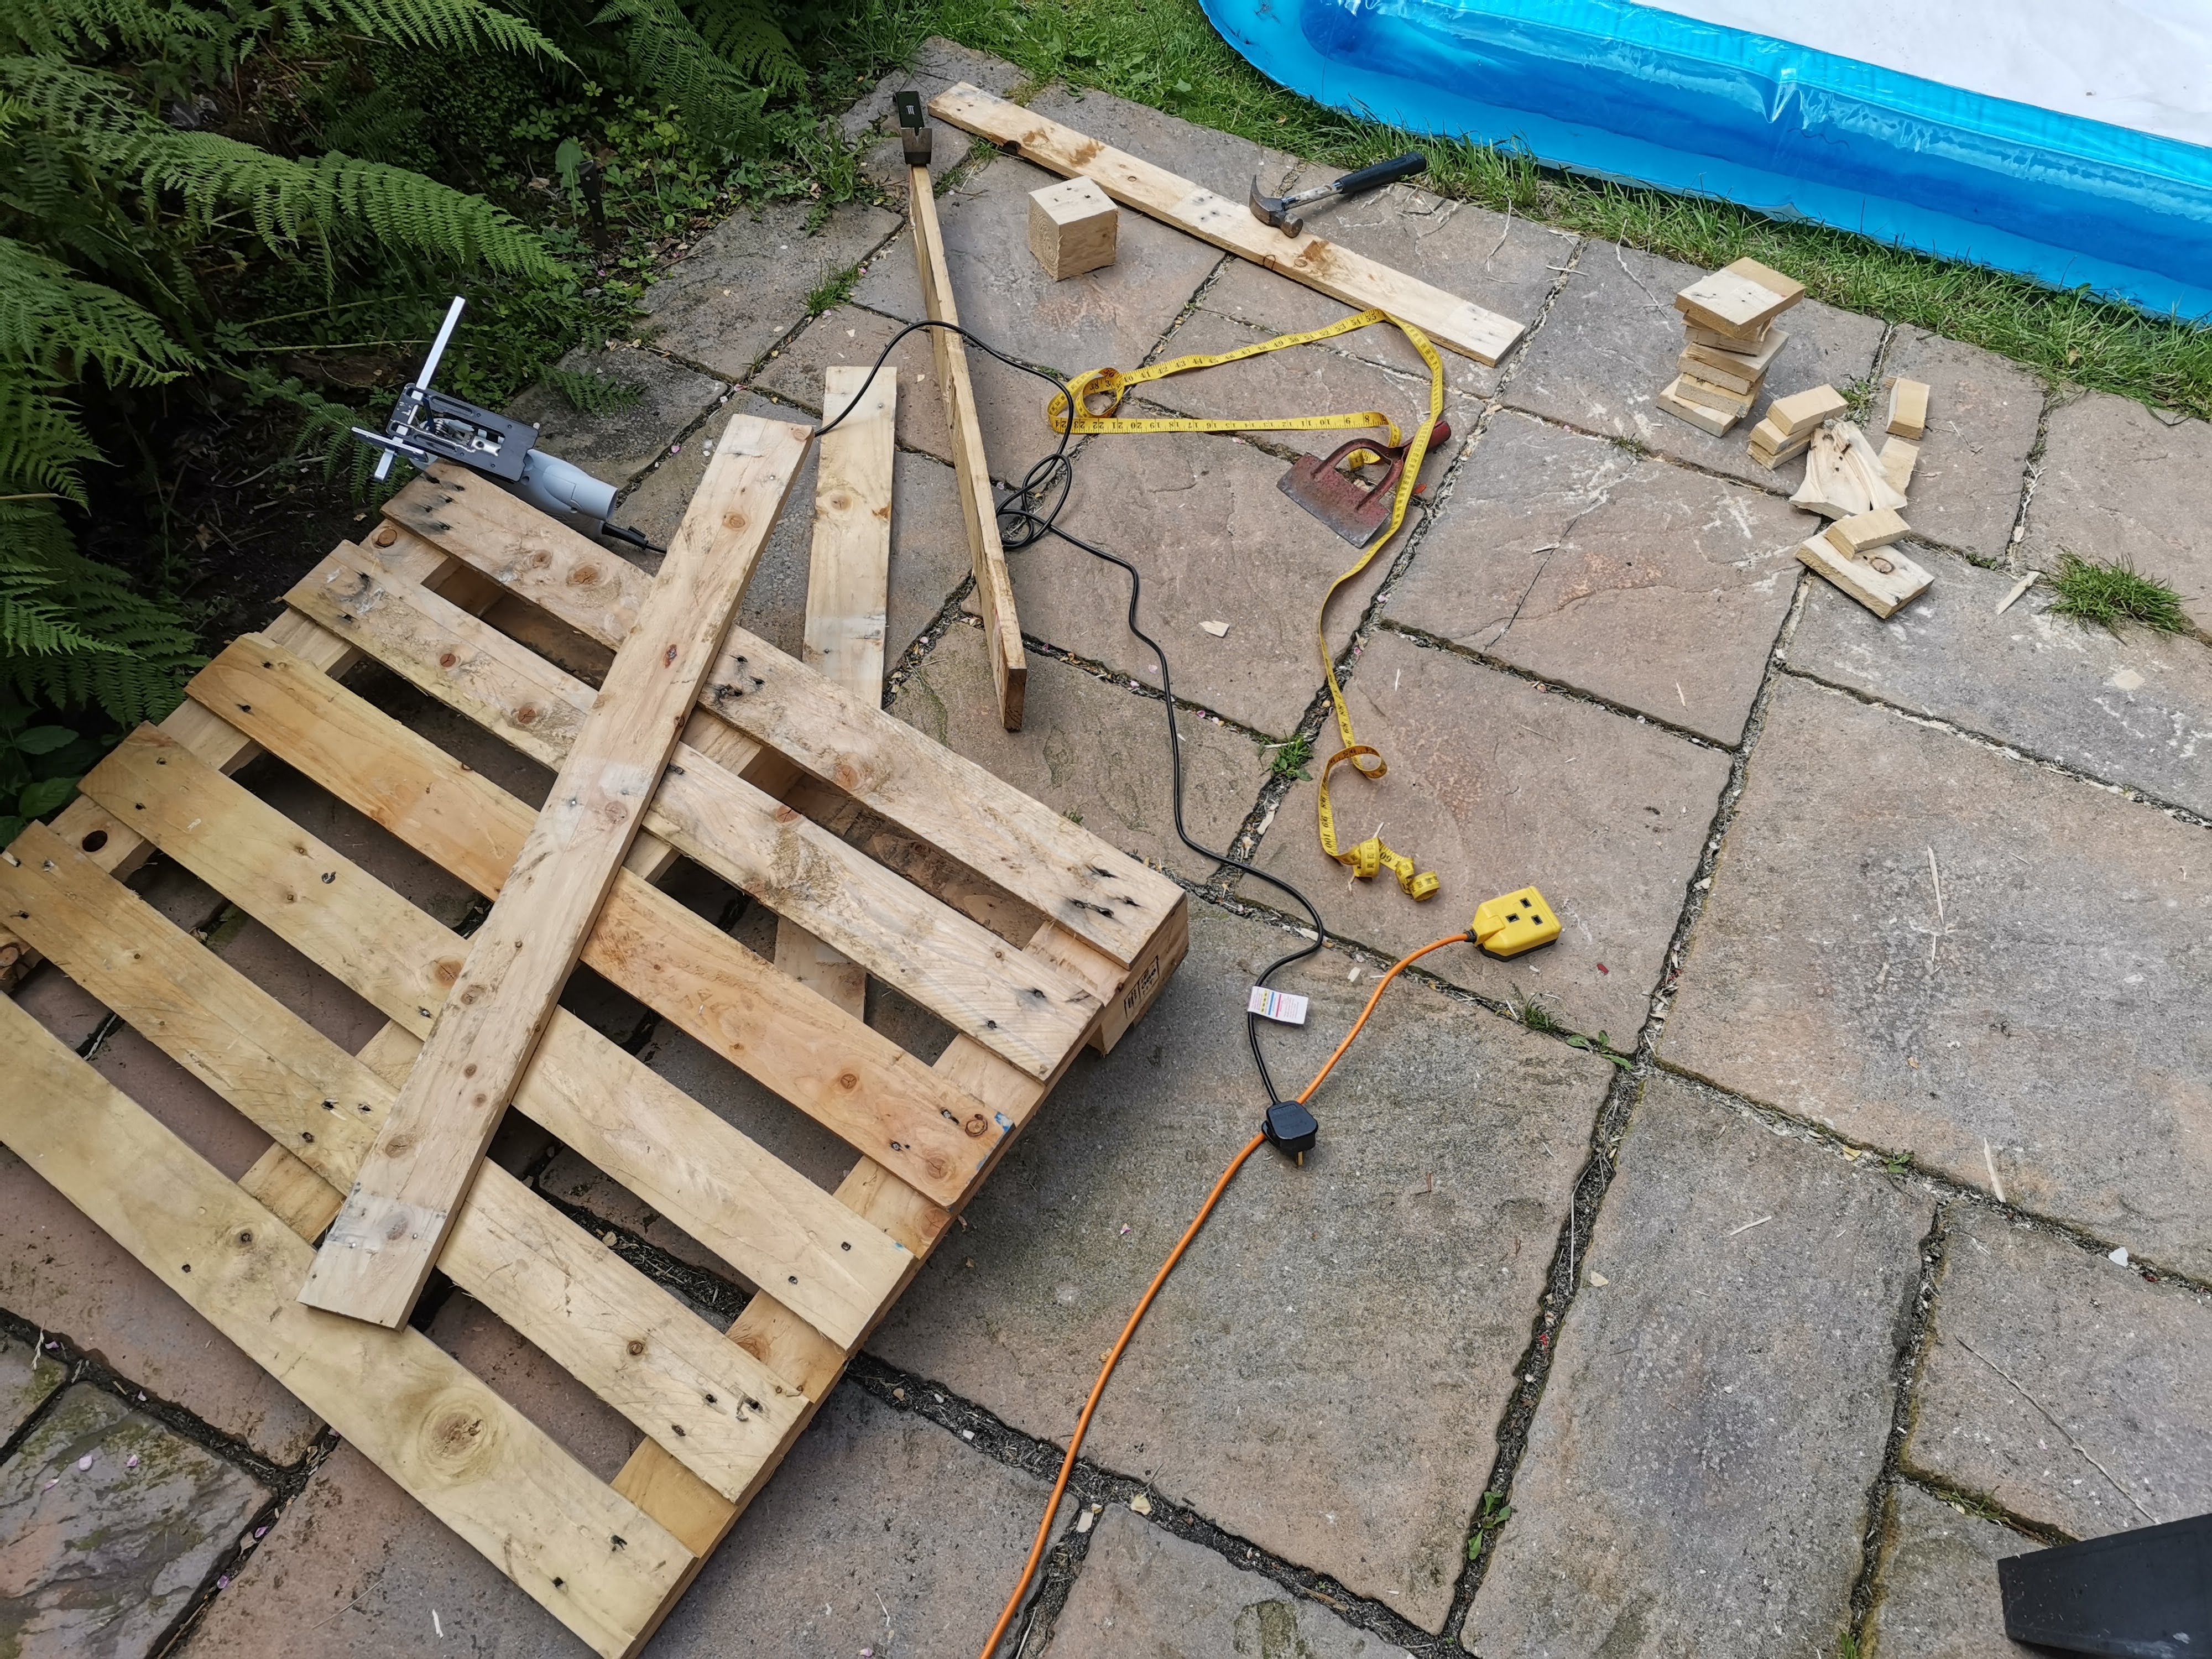
Starting to come apart. Dismantling a pallet without damaging it is by far the hardest and most long-winded part, unless you have a reciprocating saw, which I do not.


Naturally, being June, the heavens opened, so I put a gazebo up so I could still work.


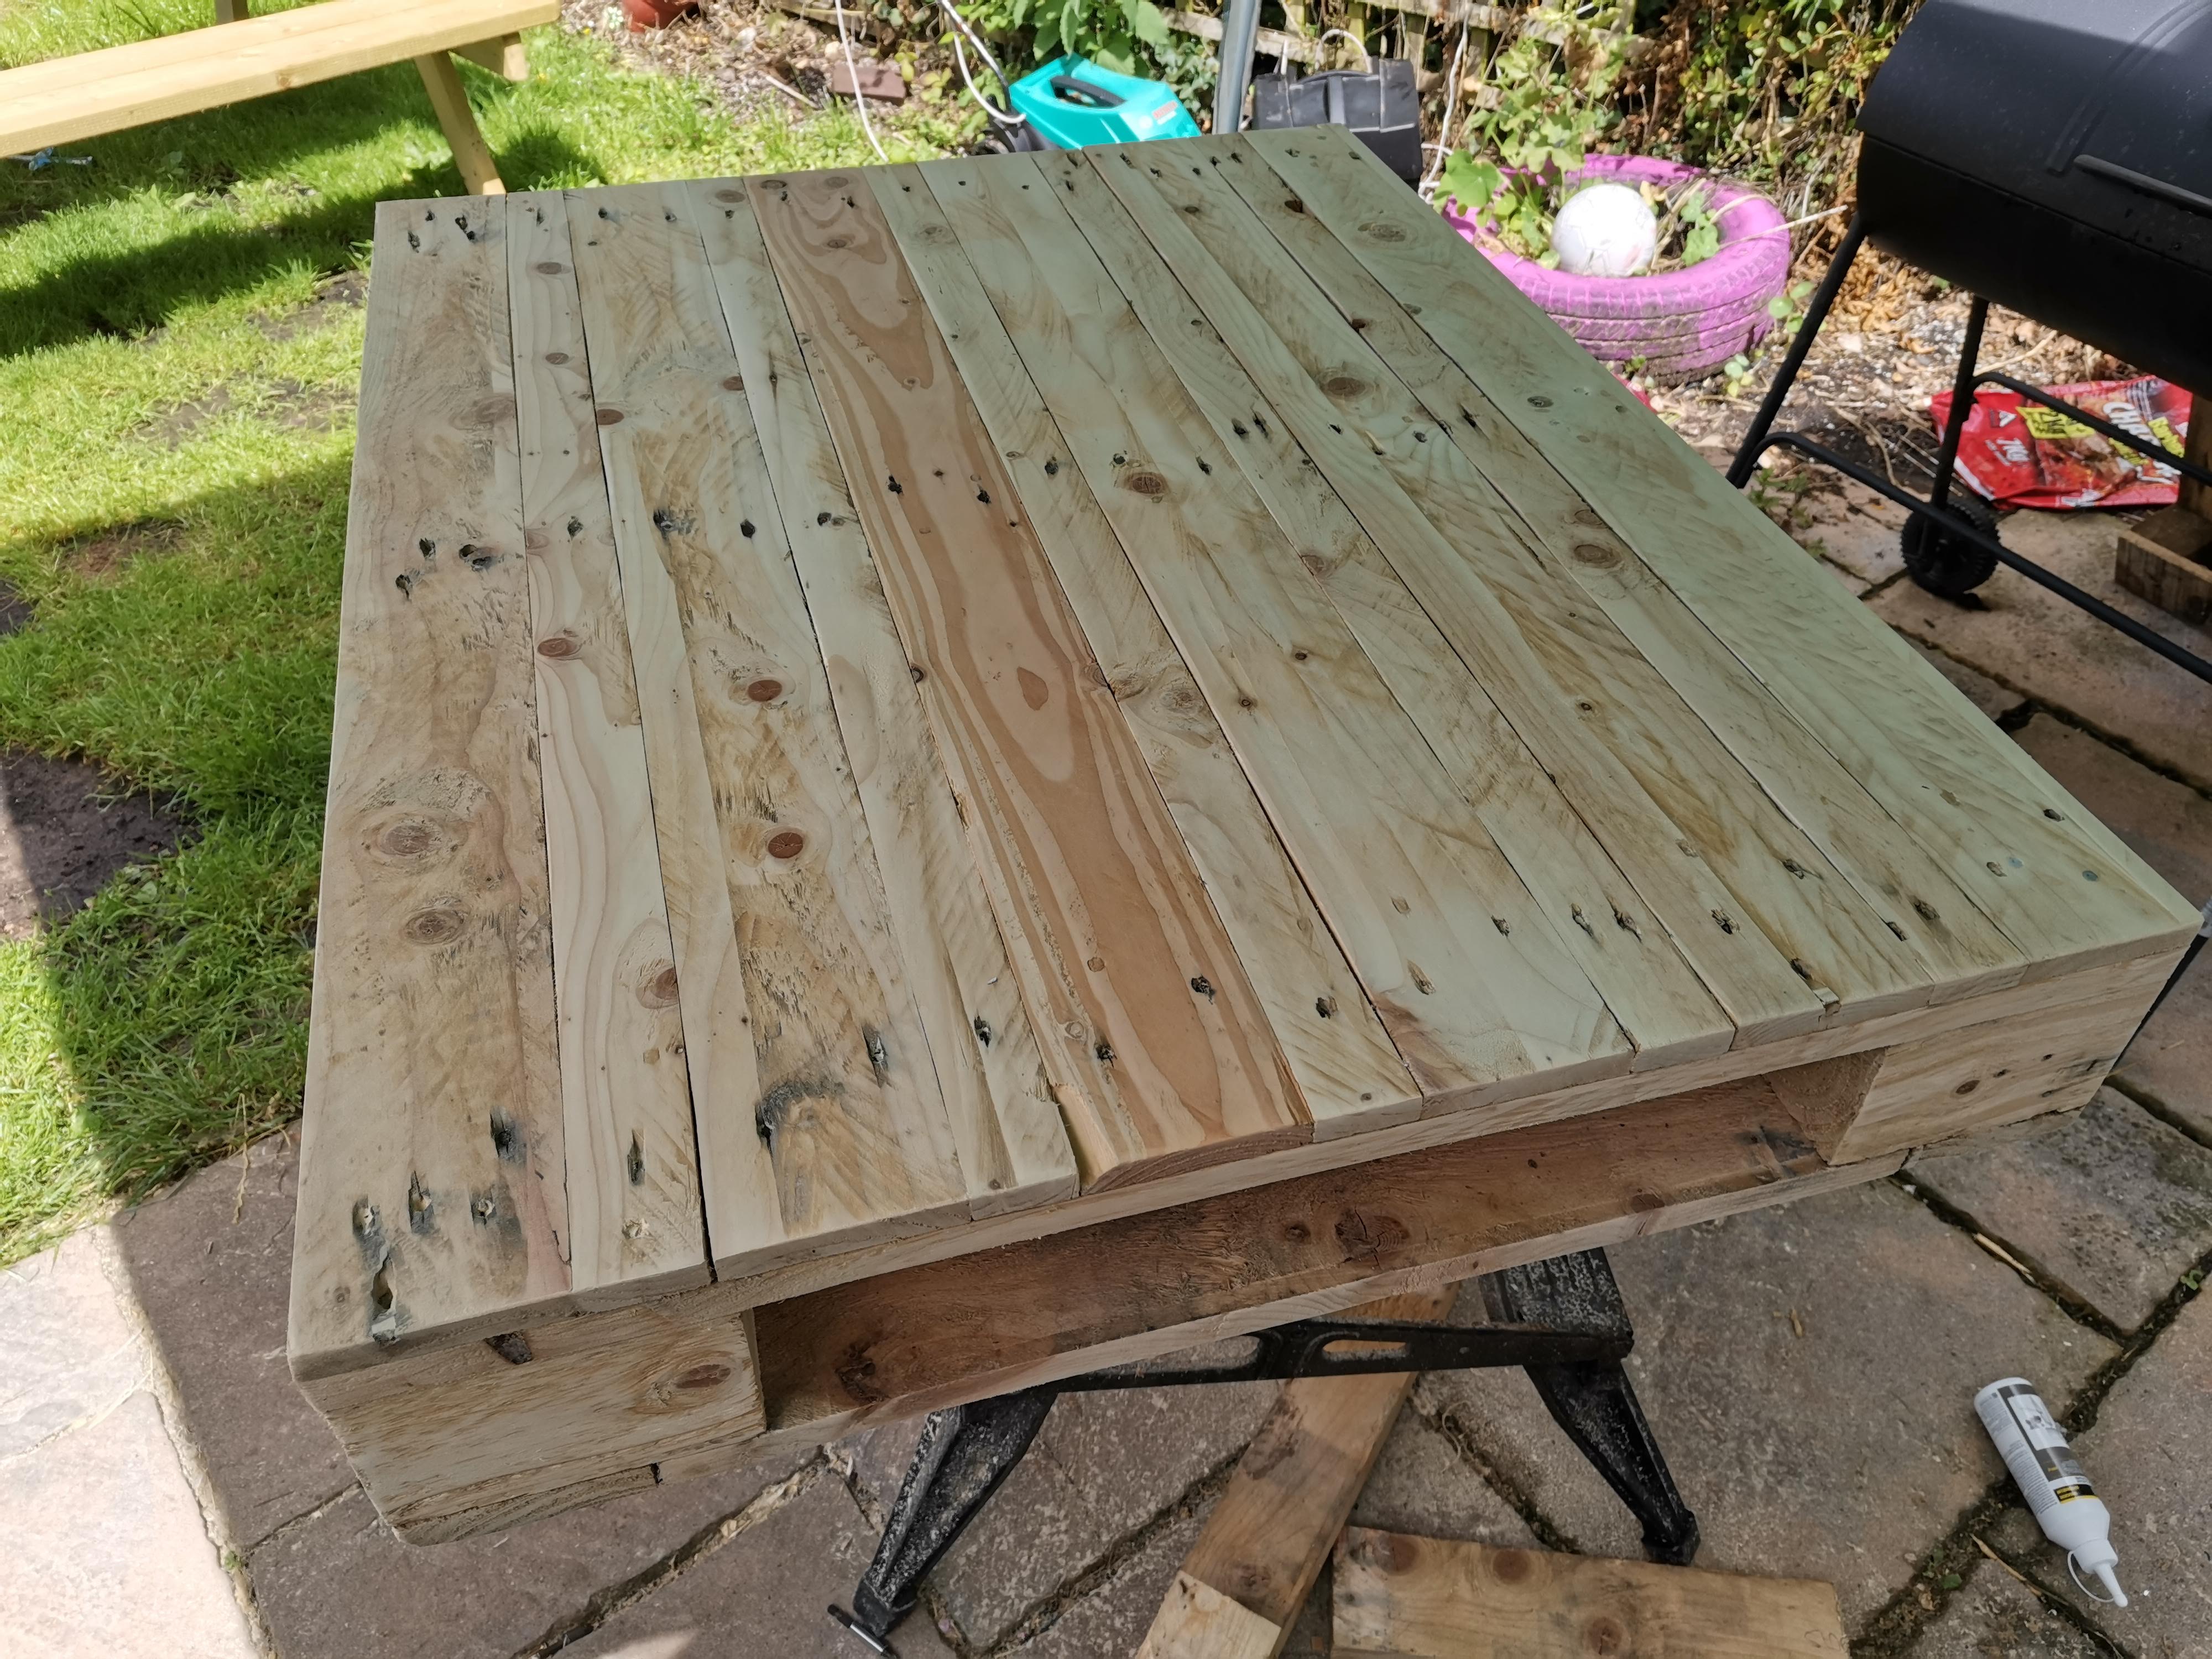
Planks off, and realising a gap is exactly half a plank width, I set to splitting them down the middle with a jigsaw.


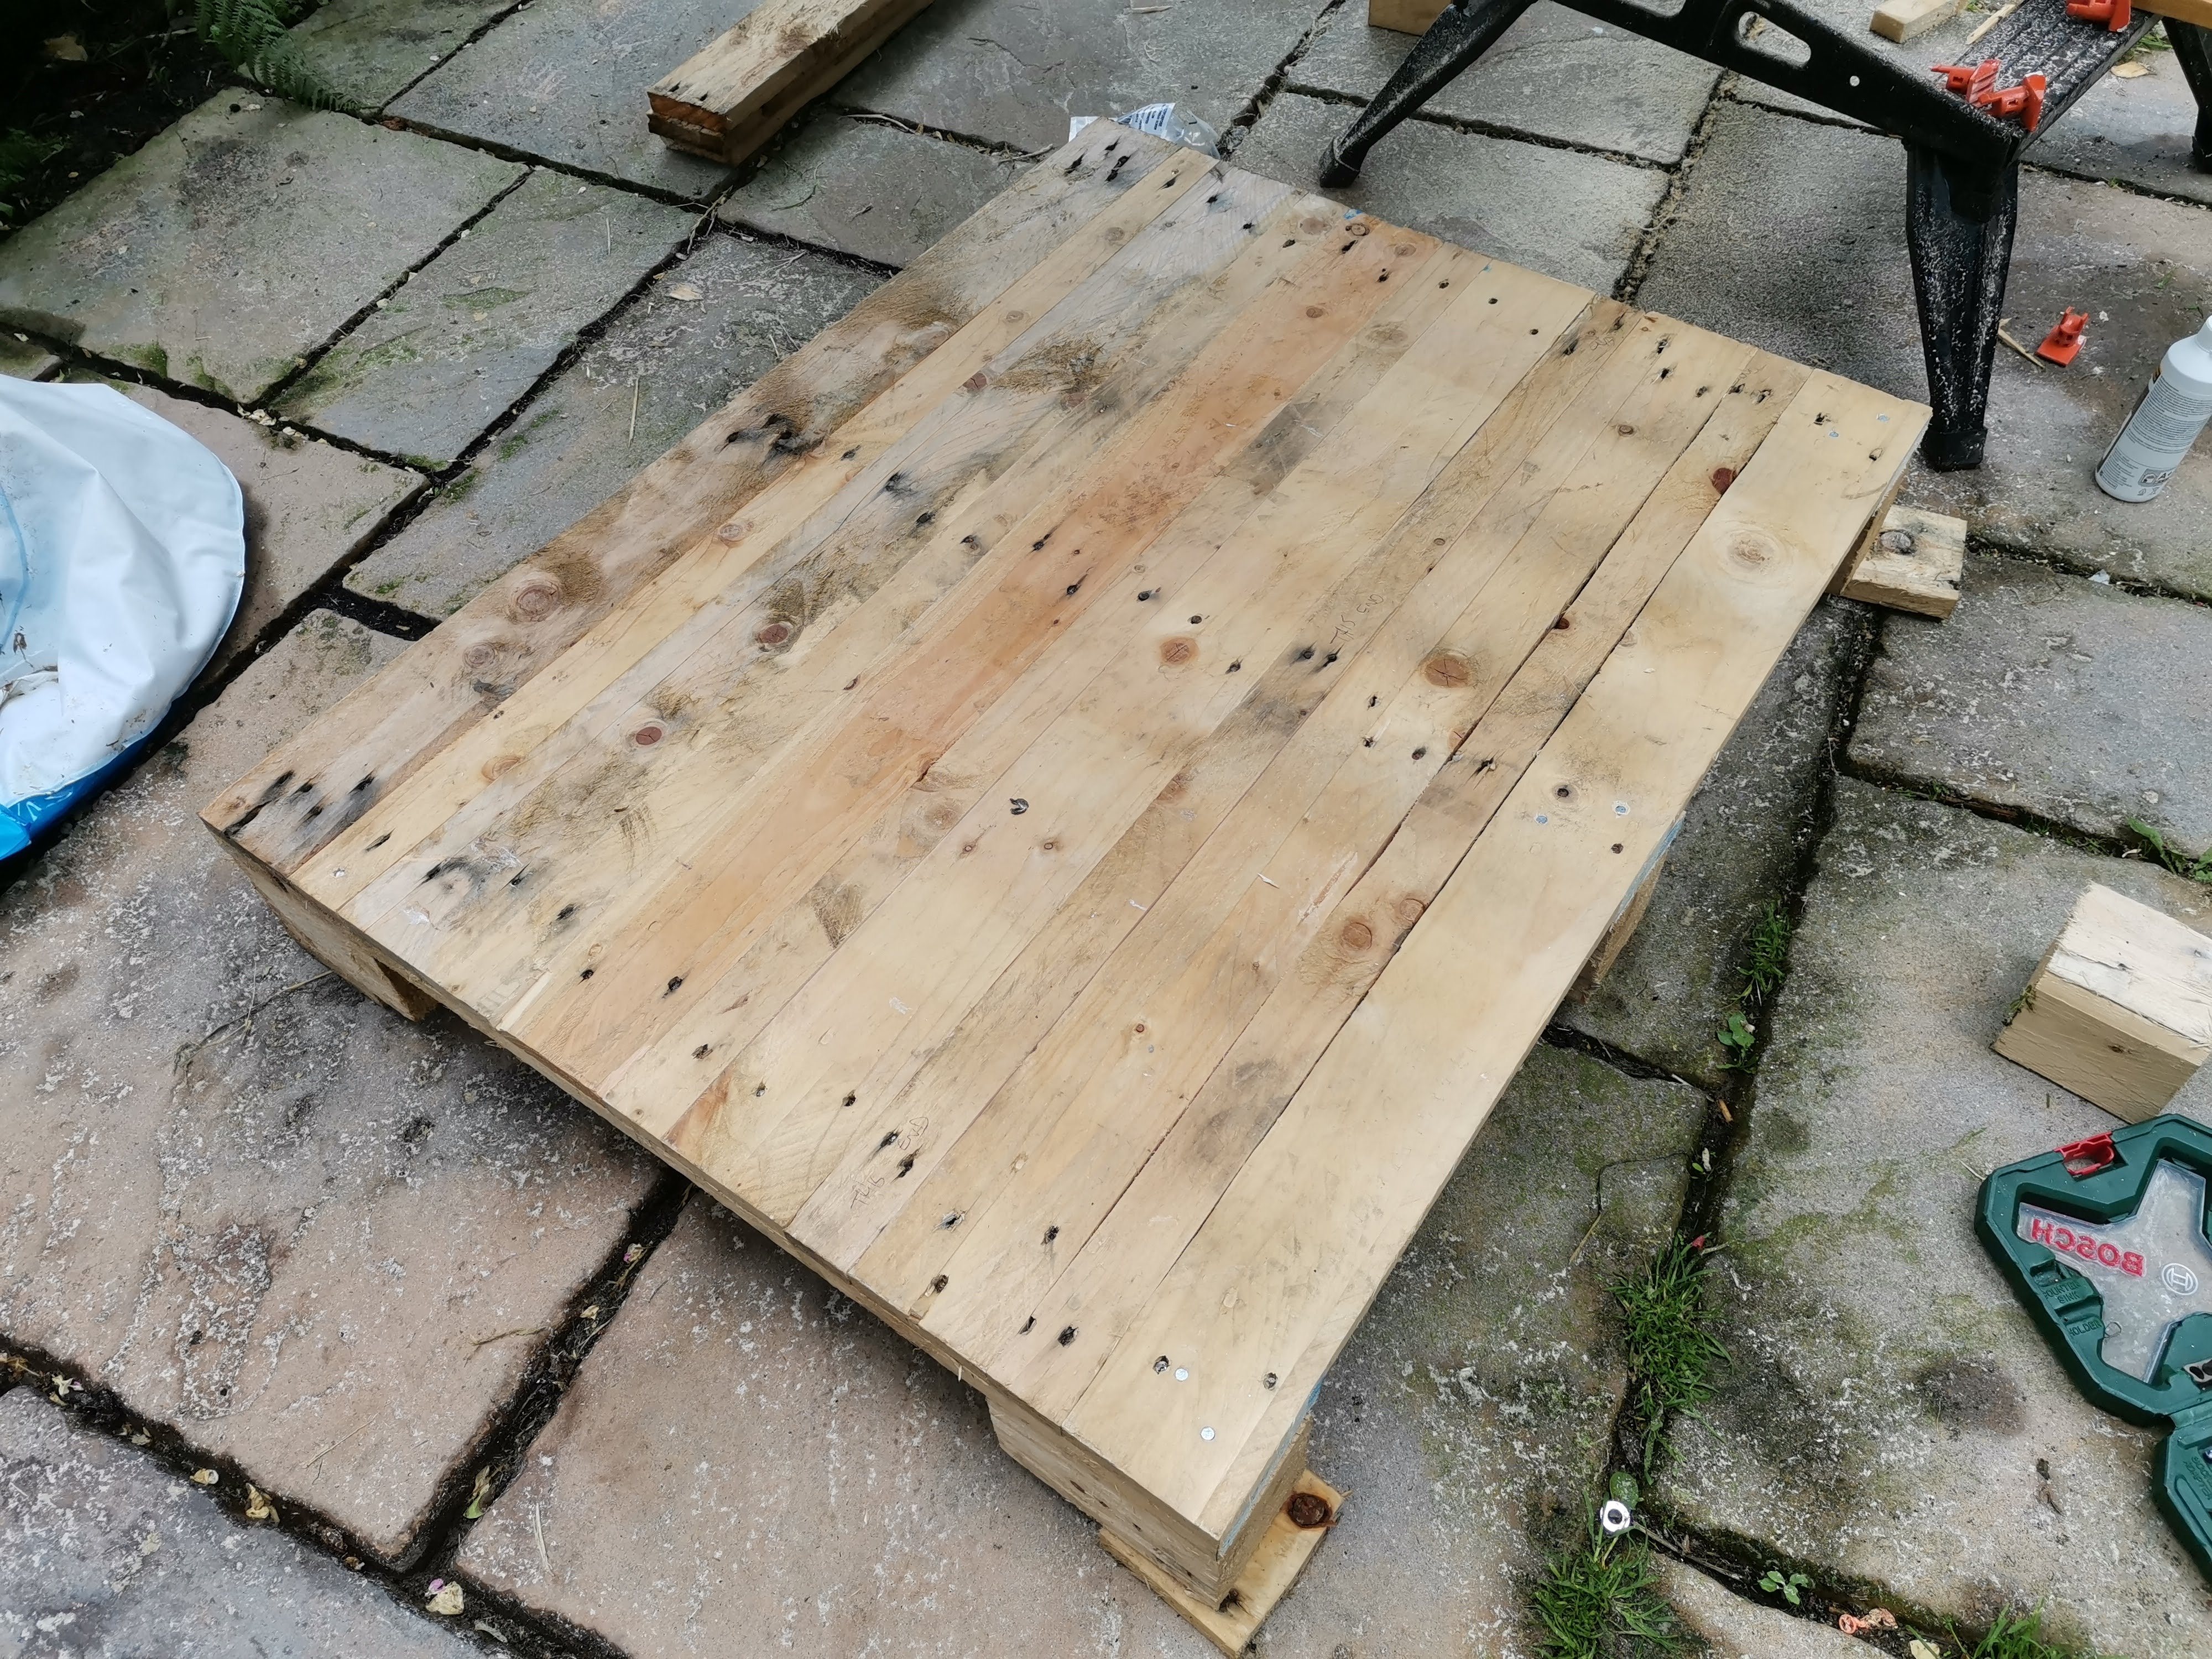
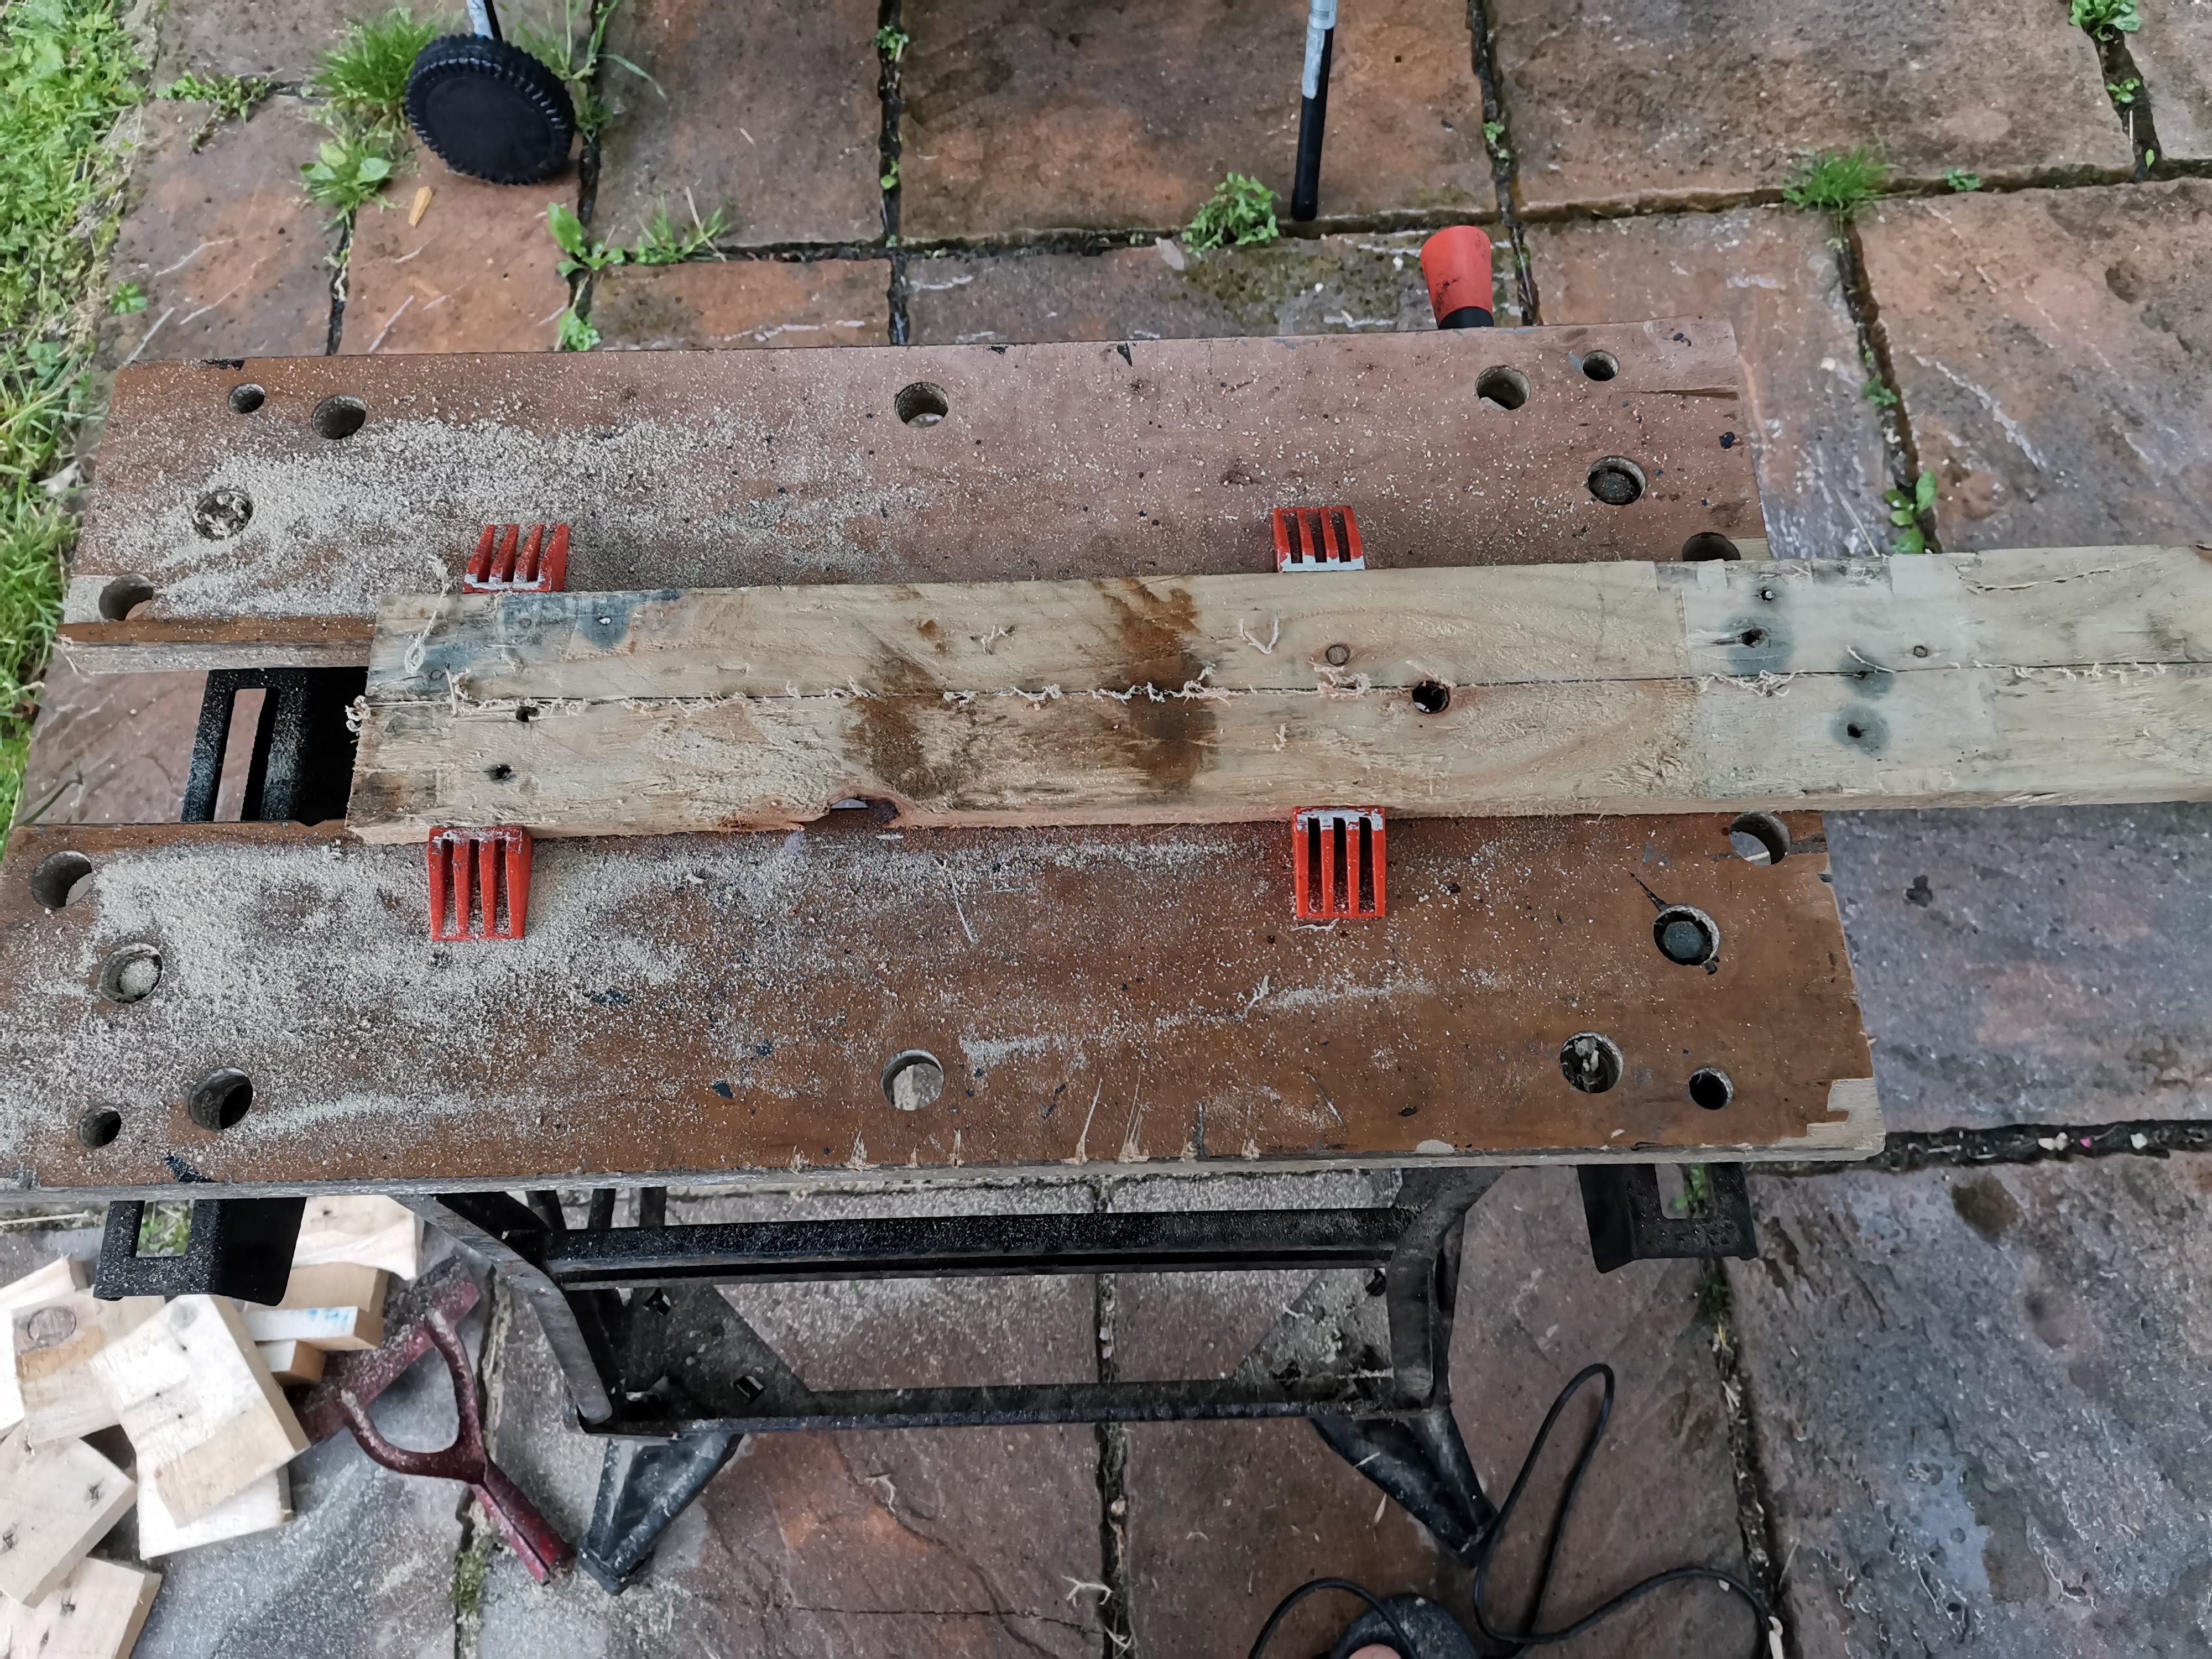
Pallet cut-down to size with the split planks screwed and nailed into place.


Bottom braces cut to size and attached.


Ready for sanding, the unfinished wood was rough.


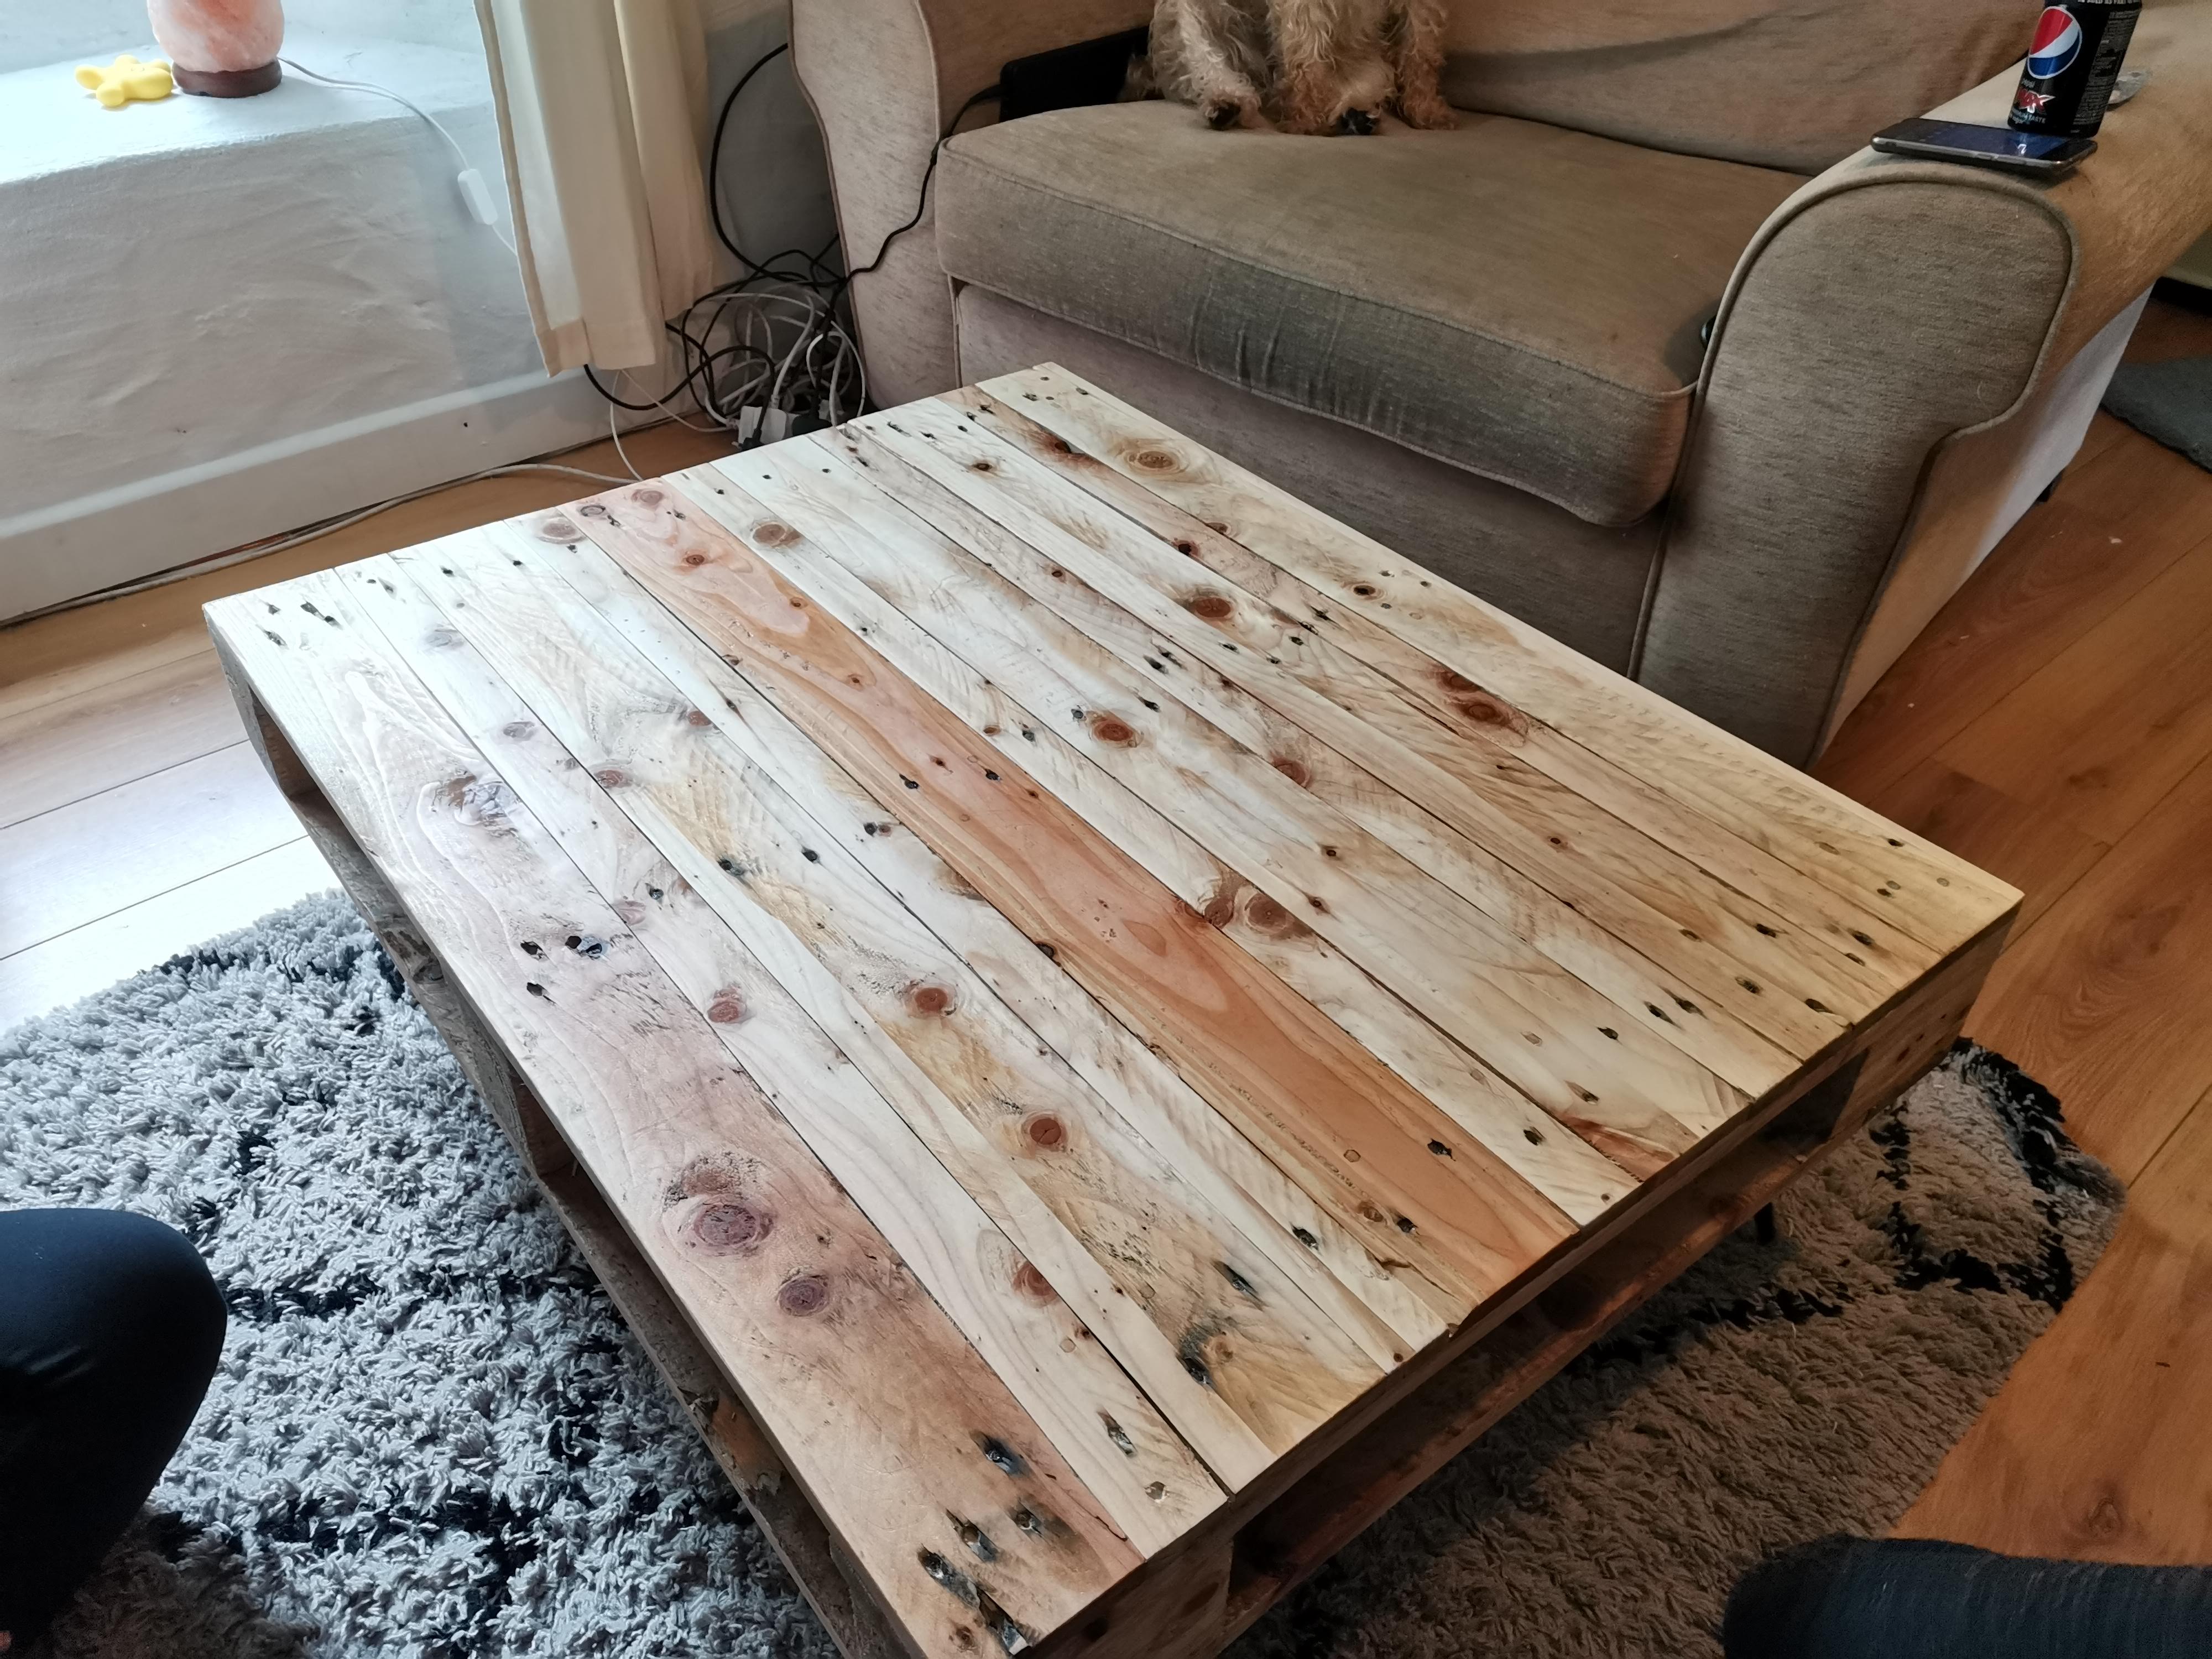
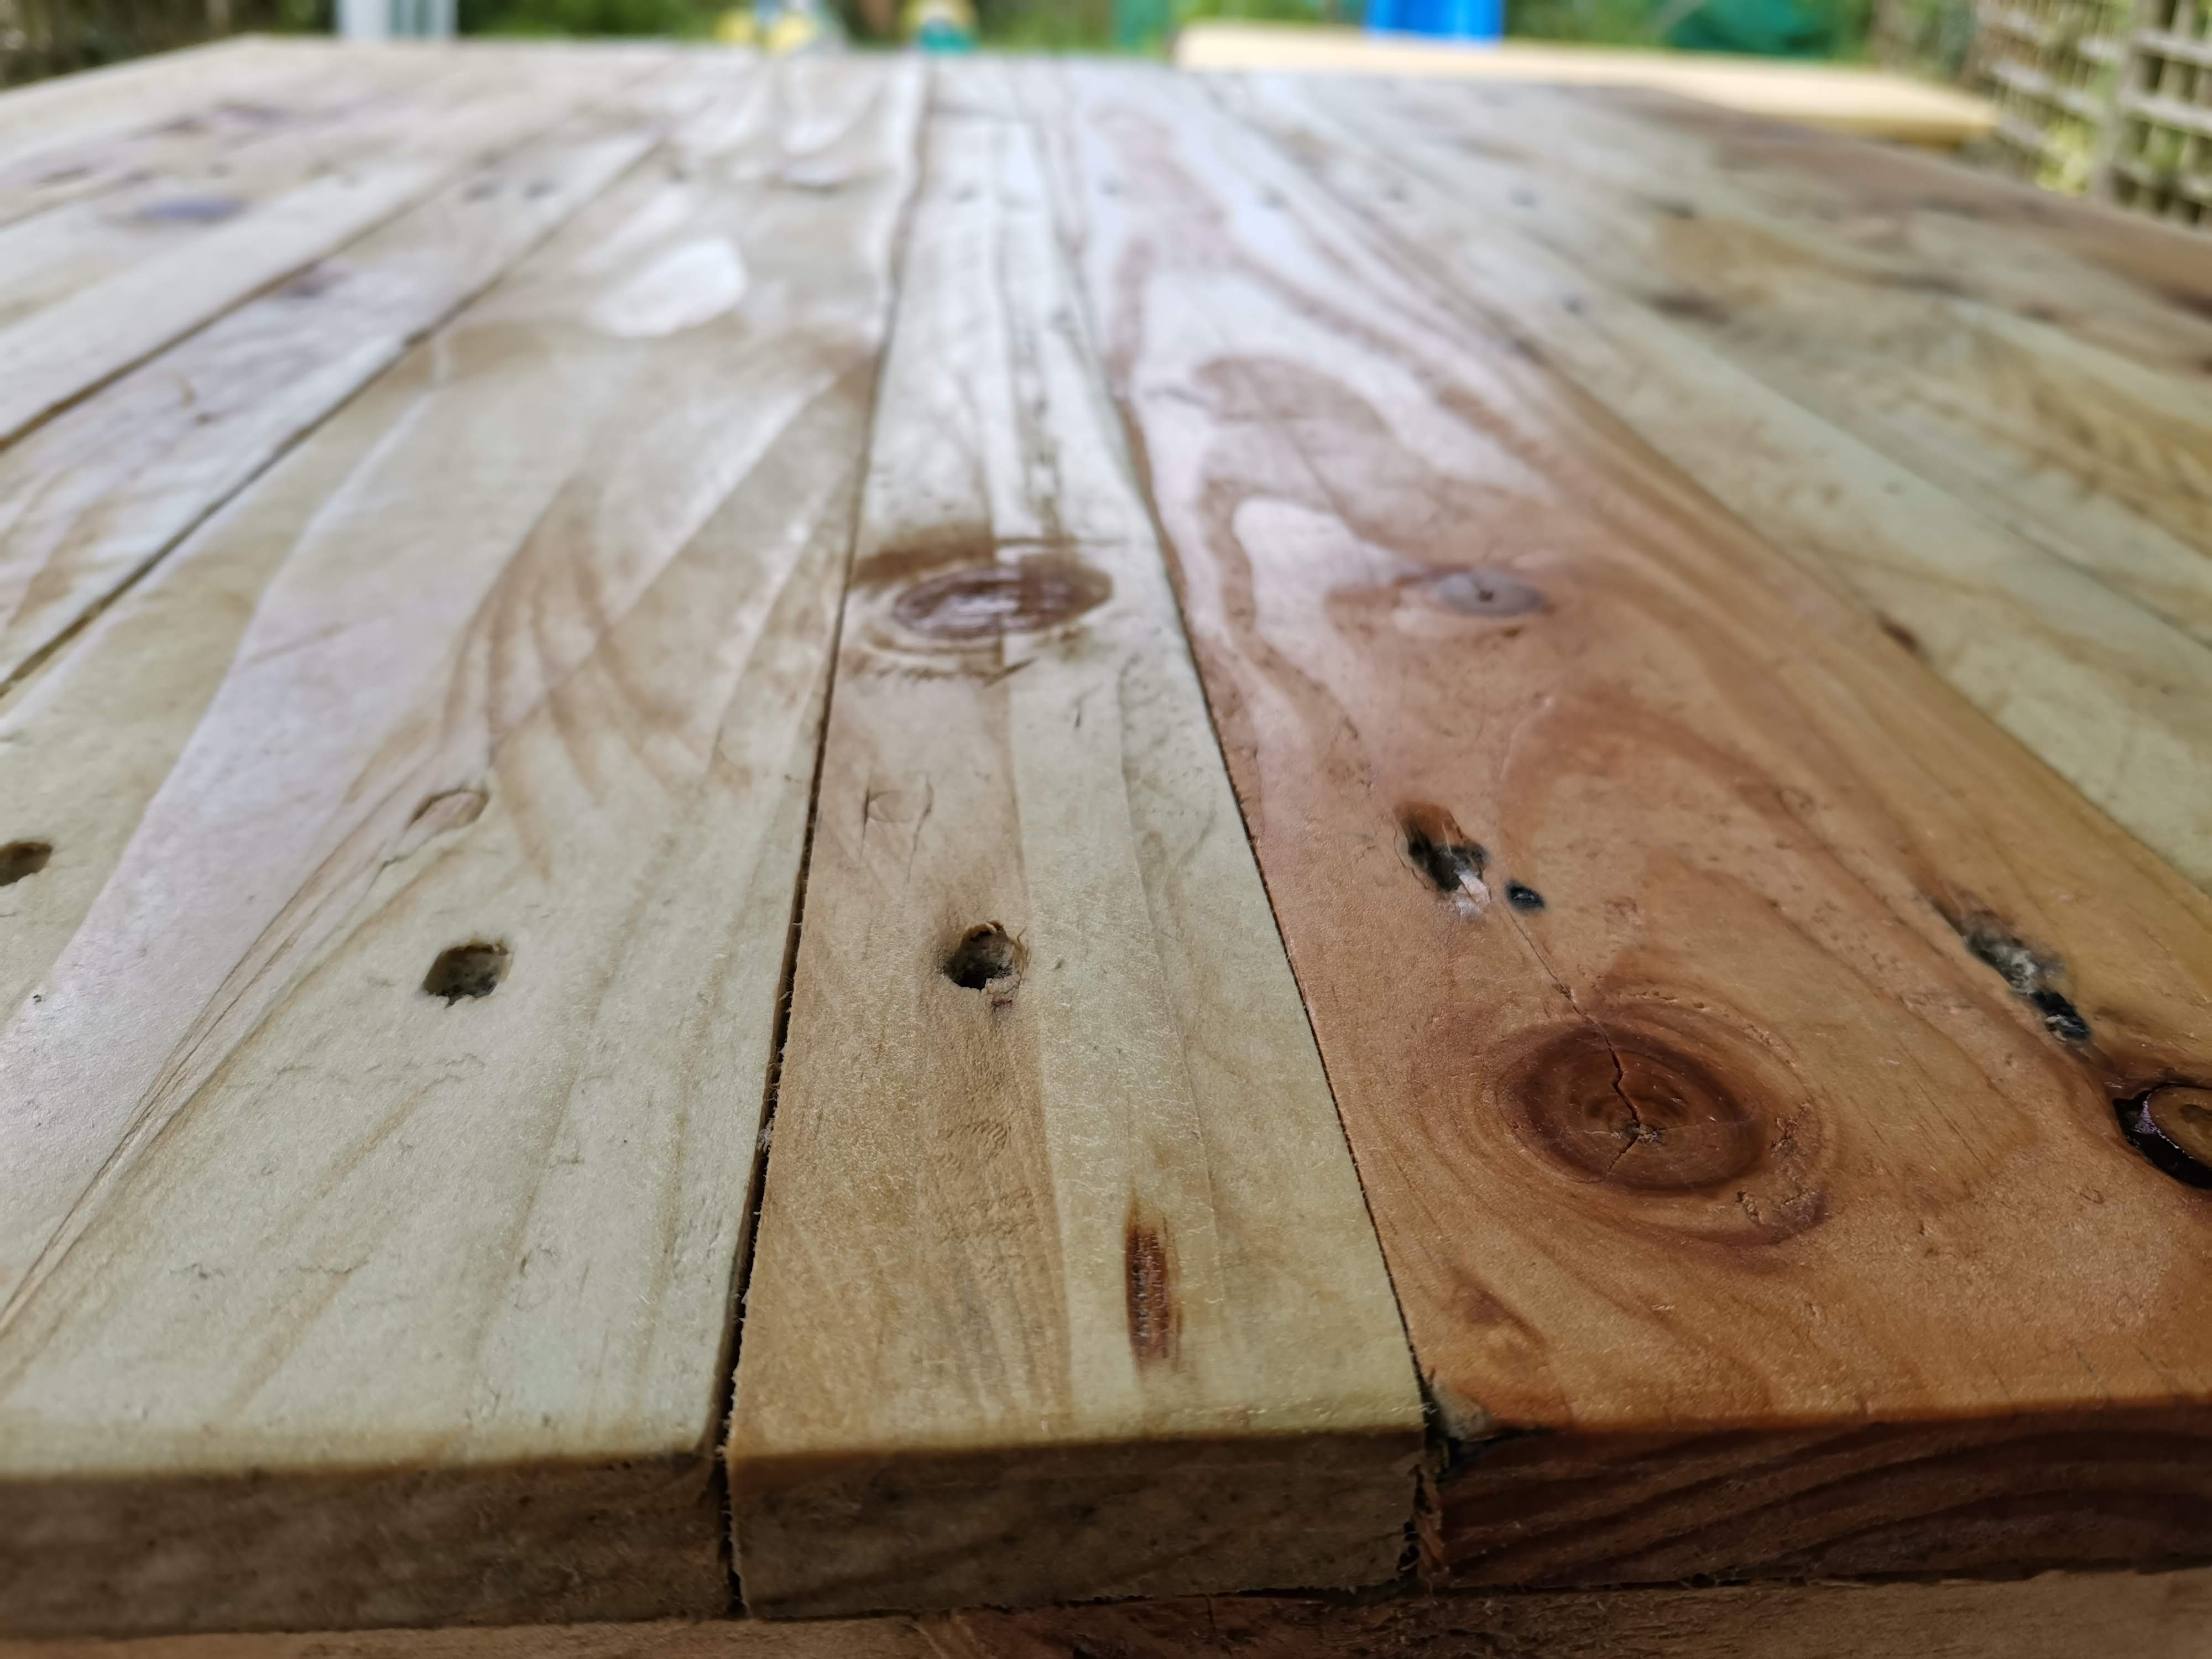
After a lot of sanding with 40, 80 and 120 grit I got the finish I wanted. Still showing its roughness, but smooth enough to use as a table.


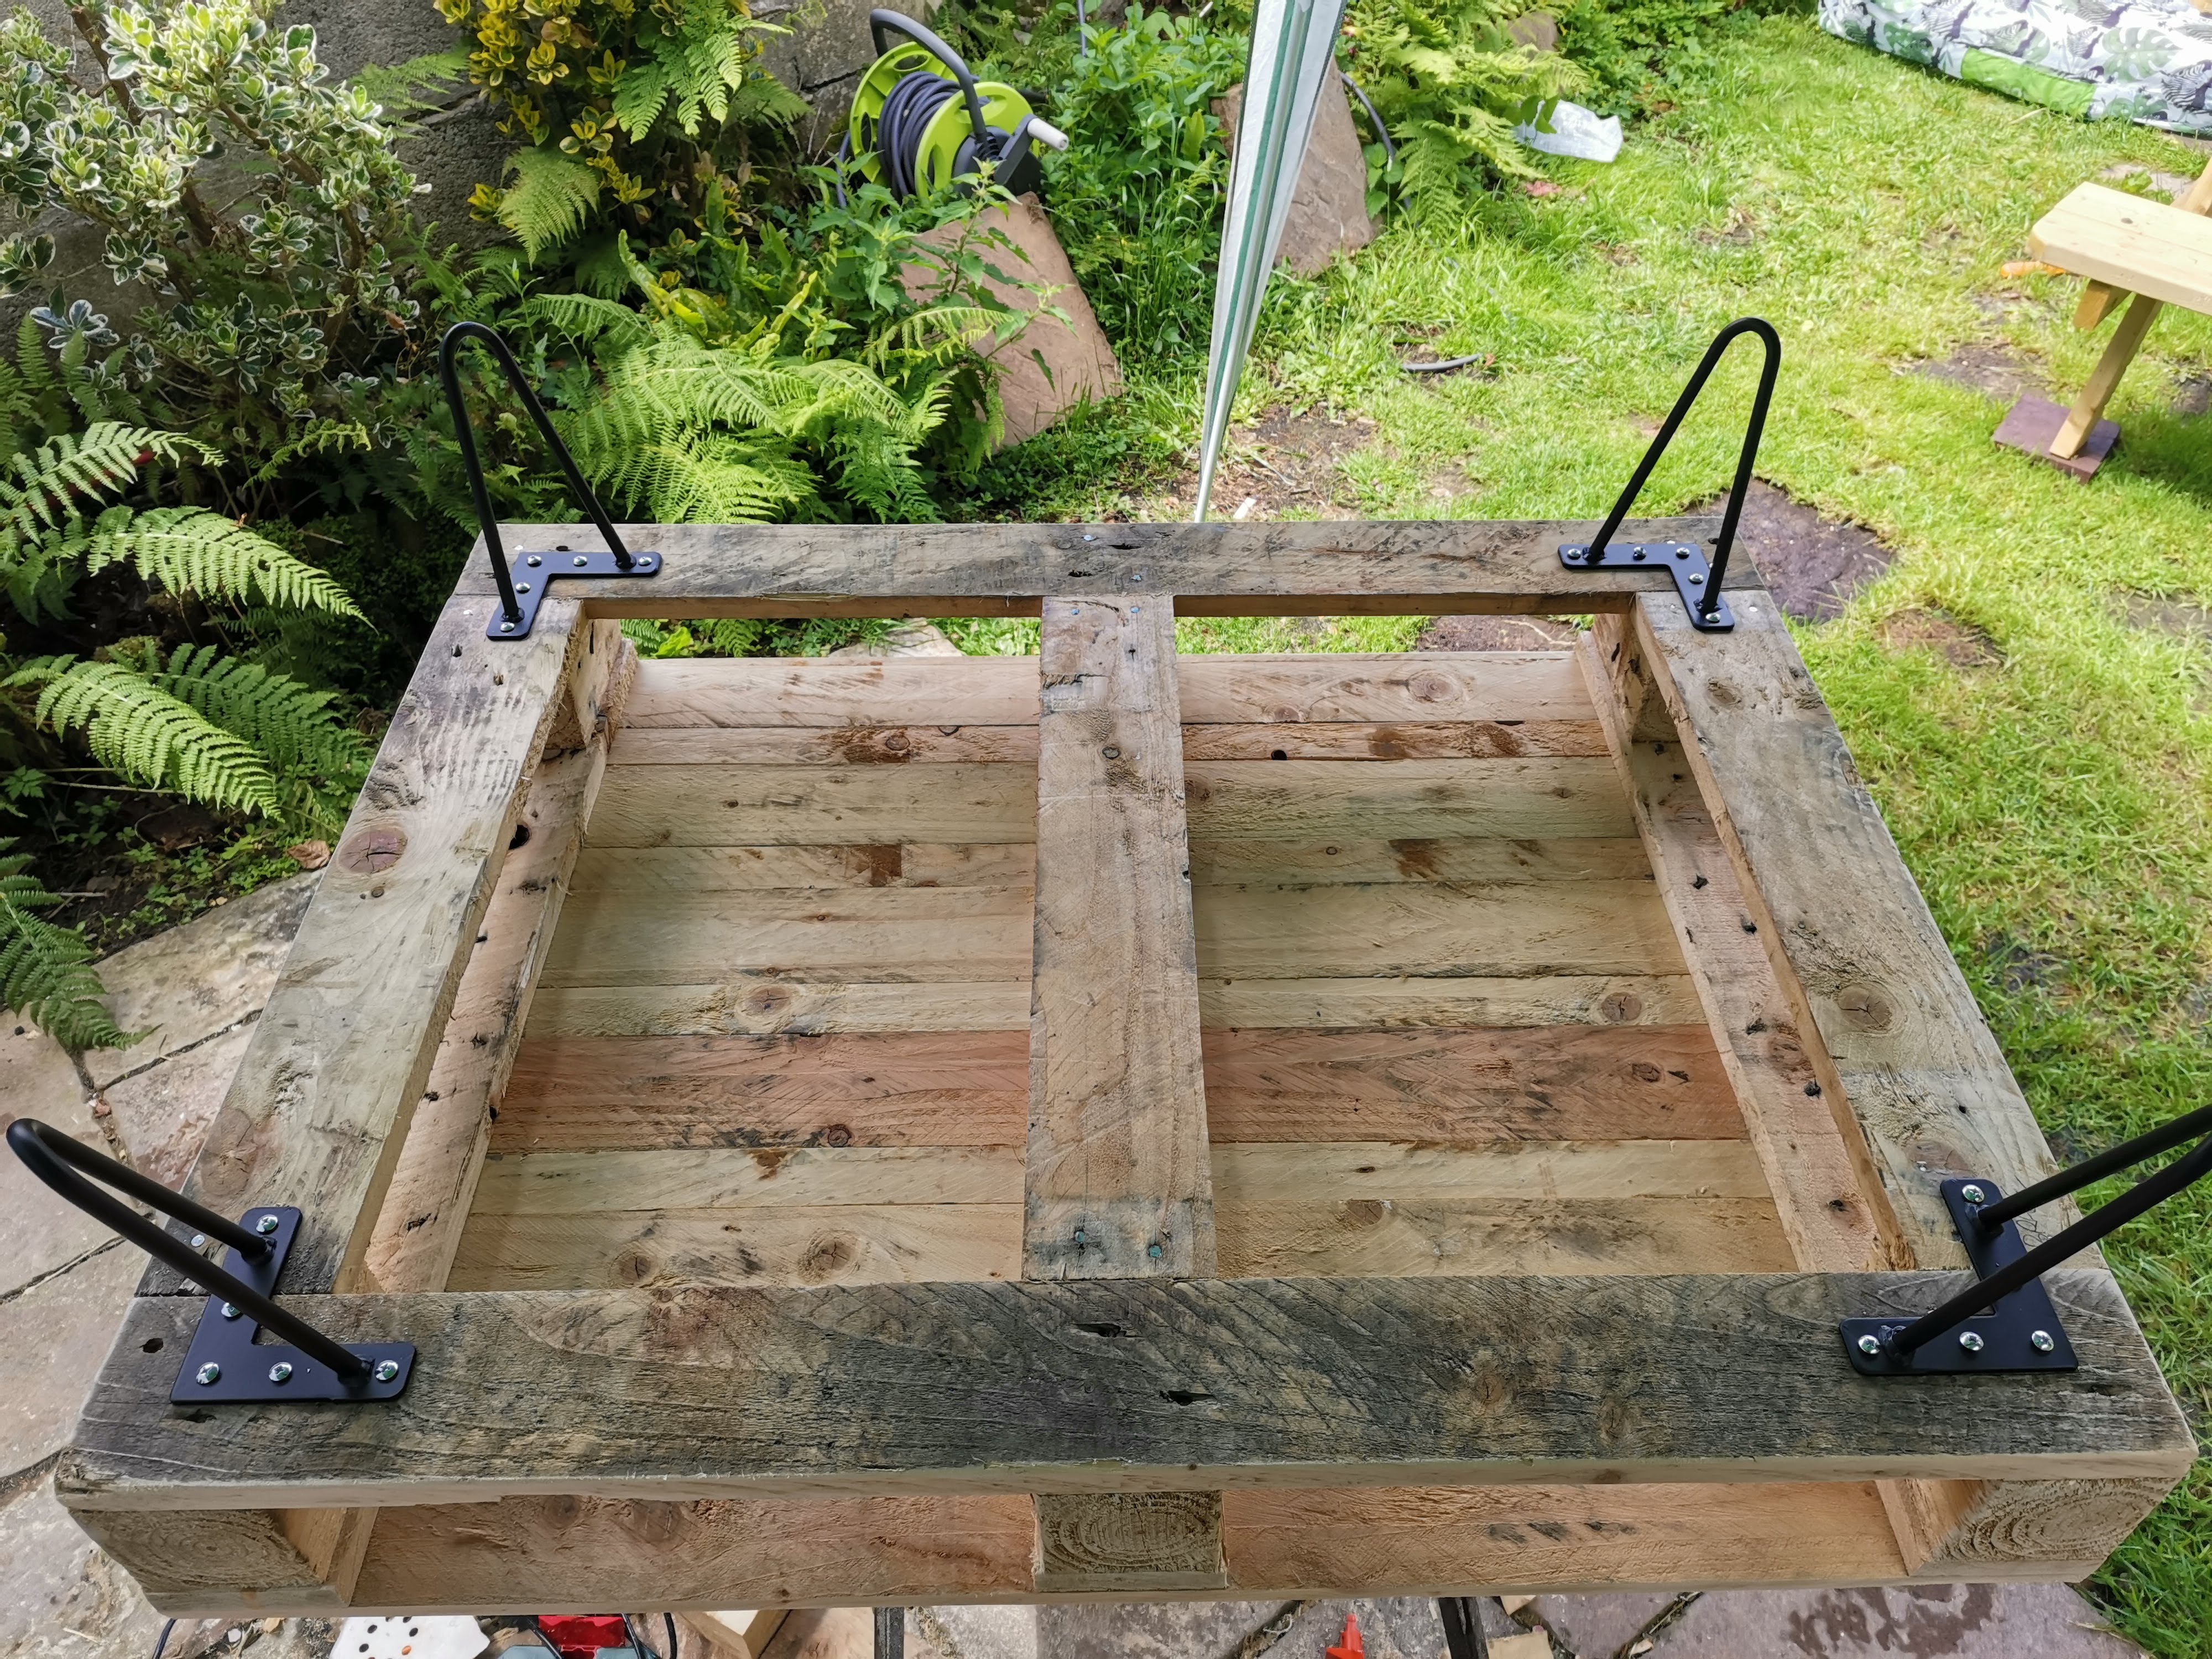
On go the hairpin legs.


Then I oiled it. I used Danish oil which is a mix of boiled linseed oil and a light varnish, just to make it a bit more hard-wearing.


That looks better!


Ignore the mess of wires. There it is again, in-situ.

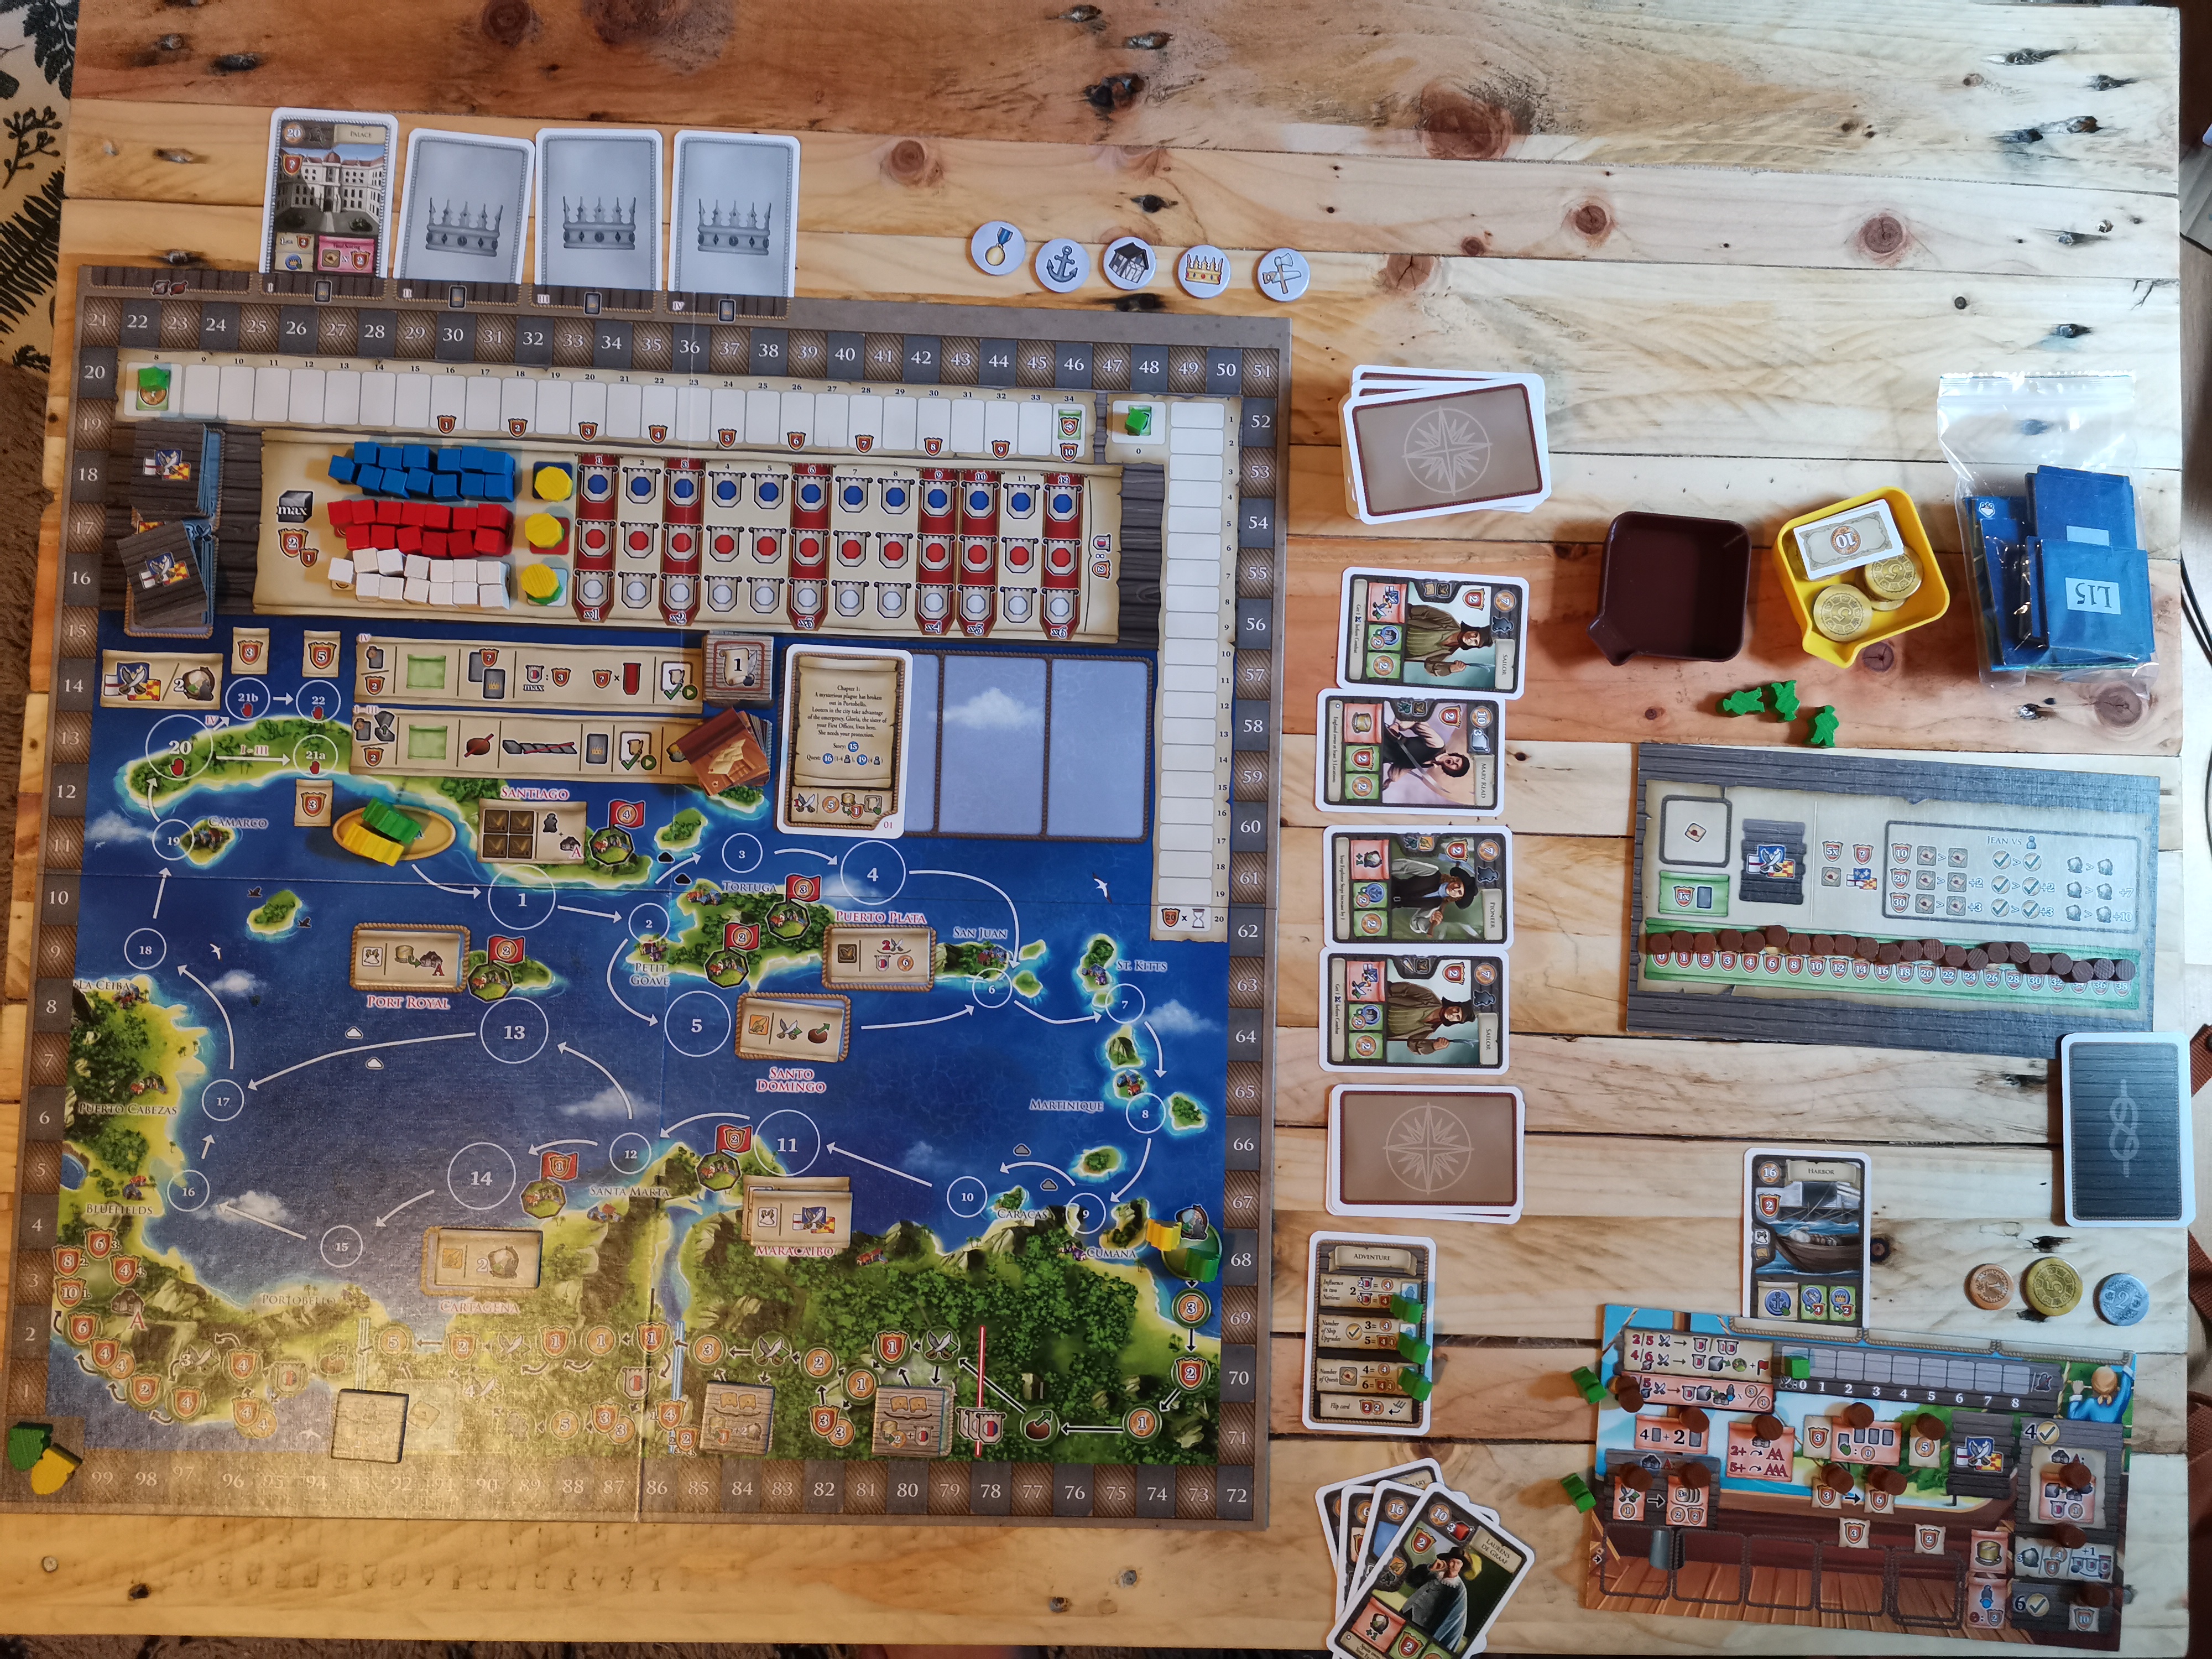
So far so good. I played the biggest game I could find this morning (Maracaibo) and it fit handsomely. I need to get some baskets/trays for the openings to finish it off and add some storage, but I’m really pleased with how it turned out.

19 Likes

Awesome! Love the idea for the baskets.

1 Like

Fantastic

I reckon these would fit in the gaps…

https://www.ikea.com/gb/en/p/trofast-storage-box-white-80089239/

Do you sit on the floor to play?

I was nodding along thinking “nice, makes sense”… but the hairpin legs are entirely new to me. Interesting! My first resort would probably have been 2×2s and angle brackets.

Very nice! Pallets are great; I used to have a bicycle-hutch made out of them plus a tarpaulin in my garden.

2 Likes

No I sit on the sofa or armchair. Because it’s nice and low, for big games I can see everything and reach everything without standing up, which I can’t do on the dining table. Here’s Maracaibo from this morning for example:

Plus my son can play with his toys on it when he’s sitting or kneeling on the rug.

Those trays would probably fit, thanks. I’m after something either in rattan, or preferably something like black wire letter trays, something a bit chunky that’ll match the legs.

2 Likes

What is a bicycle hutch?

1 Like

The big advantage with the hairpins is that it’s not as easy to bash your toes on them, plus I like the way they look.

1 Like

Grand.

I remember we played at our coffee table sat on bean bags. In the morning my abs felt like I’d done a thousand sit ups!

Dining table ever since

Nice! I’m a big fan of hairpin legs for coffee tables. Fitting those 1/2 width spacer boards with a jigsaw is something to be proud of. I love Danish oil for color, but combined with the pallet wood, it may begin to fray at the edges over time. Once it’s cured for a week or two, I’d recommend a clear water based finish to lock everything down.

Looks great!

Thanks very much. What would you recommend for the finish? I was going to oil it again, let it soak, then maybe regularly beeswax it? I know it’ll get scuffs, but I can keep on top of it.

I actually like wax better than other finishes for something that’s going to get touched as much as a gaming table, but it can be finicky.
One downside is that wax can be hard to apply when there’s small gaps between boards, (it can build up instead of rubbing in) . Another danger with wax is that it limits your ability to re-finish later.

For this table, though, If you can do multiple thin, really careful coats, beeswax over Danish oil is good.

My strategy would be to get one or two more coats of oil in, let it cure fore a solid week at low humidity and high temps (if it’s damp and cool, just give it an extra week) and then rub in a few coats of beeswax. Once wax is on, make sure to enforce a strong coaster policy.

If the wax is scary, then leave it as is for another week or so, then coat with a water based finish. (I like matte or satin polycrylic).

Both wax and polycrylic dry fast, with little smell, so you won’t be out a table very long as they cure.

1 Like

Looks good.

I’d finish with water based wiping polyurethane. Probably another coat or two of the oil you used, let it cure for a while, then four or five coats of wiping poly.

be aware that heat treated pallets are treated for insects, not moisture content. Pallets are made of the cheapest stuff suitable for intended purpose, which doesn’t include furniture. Don’t be surprised if it moves, now that it’s inside. It might not – depends on what the moisture content of the wood was and how old the pallet is, and where it lived its life.

Did you sand the bottom? You should, splinters suck.

2 Likes

A cross between a bicycle shed and a rabbit hutch. It consisted of nine pallets (five sides of a cuboid bracketed together, then four more to make a tube), some old lino on the bottom and the tarpaulin over the top. It kept my bicycles out of the rain, and also out of my house which was quite crowded already.

Photo from 2007. I moved out of that house the next year, kept the fixings and gave the pallets back to the local market. The tarpaulin, which had come from Freecycle, went the same way.

5 Likes

As an idea, with some plywood cut to measure, you can cover the underside gaps and have some handy storage for games that you are playing, or bits during the game (like the box or some bits that are not used) and make use of the pallet gaps beyond the width of the lower boards

1 Like

Wow, what an awesome table :slight_smile:
This looks so great, I hope you get to play lots of great games on this table.

2 Likes

Fantastic job, well done. It looks really nice

1 Like

A quick update. In the end I couldn’t find anything I liked as drawers. They were either too expensive, the wrong size, plastic etc. So in keeping with the aesthetic I used some zinc coated eyelets and some natural rope and made a net to go underneath.

Looks good, didn’t cost the earth, and it means I can use the whole area underneath for games.

12 Likes

That is brilliant and fantastic looking. I hereby give you the official Stoic Nod of the Woodworker.

4 Likes

I can only envisage Ron Swanson. Cheers chap, we’ll just ignore the hot glue I’ve used to keep the knots held together :wink:

1 Like

Just call it Thermoplastic Adhesive. :+1:

2 Likes