I dont think we have one.
Any ideas for a tower for an El Grande PnP?
I dont think we have one.
Any ideas for a tower for an El Grande PnP?
My PnP efforts are pretty epic at times.
For an El Grande tower? Should be pretty easy to find a 3D print, or construct it from greyboard or foamcore.
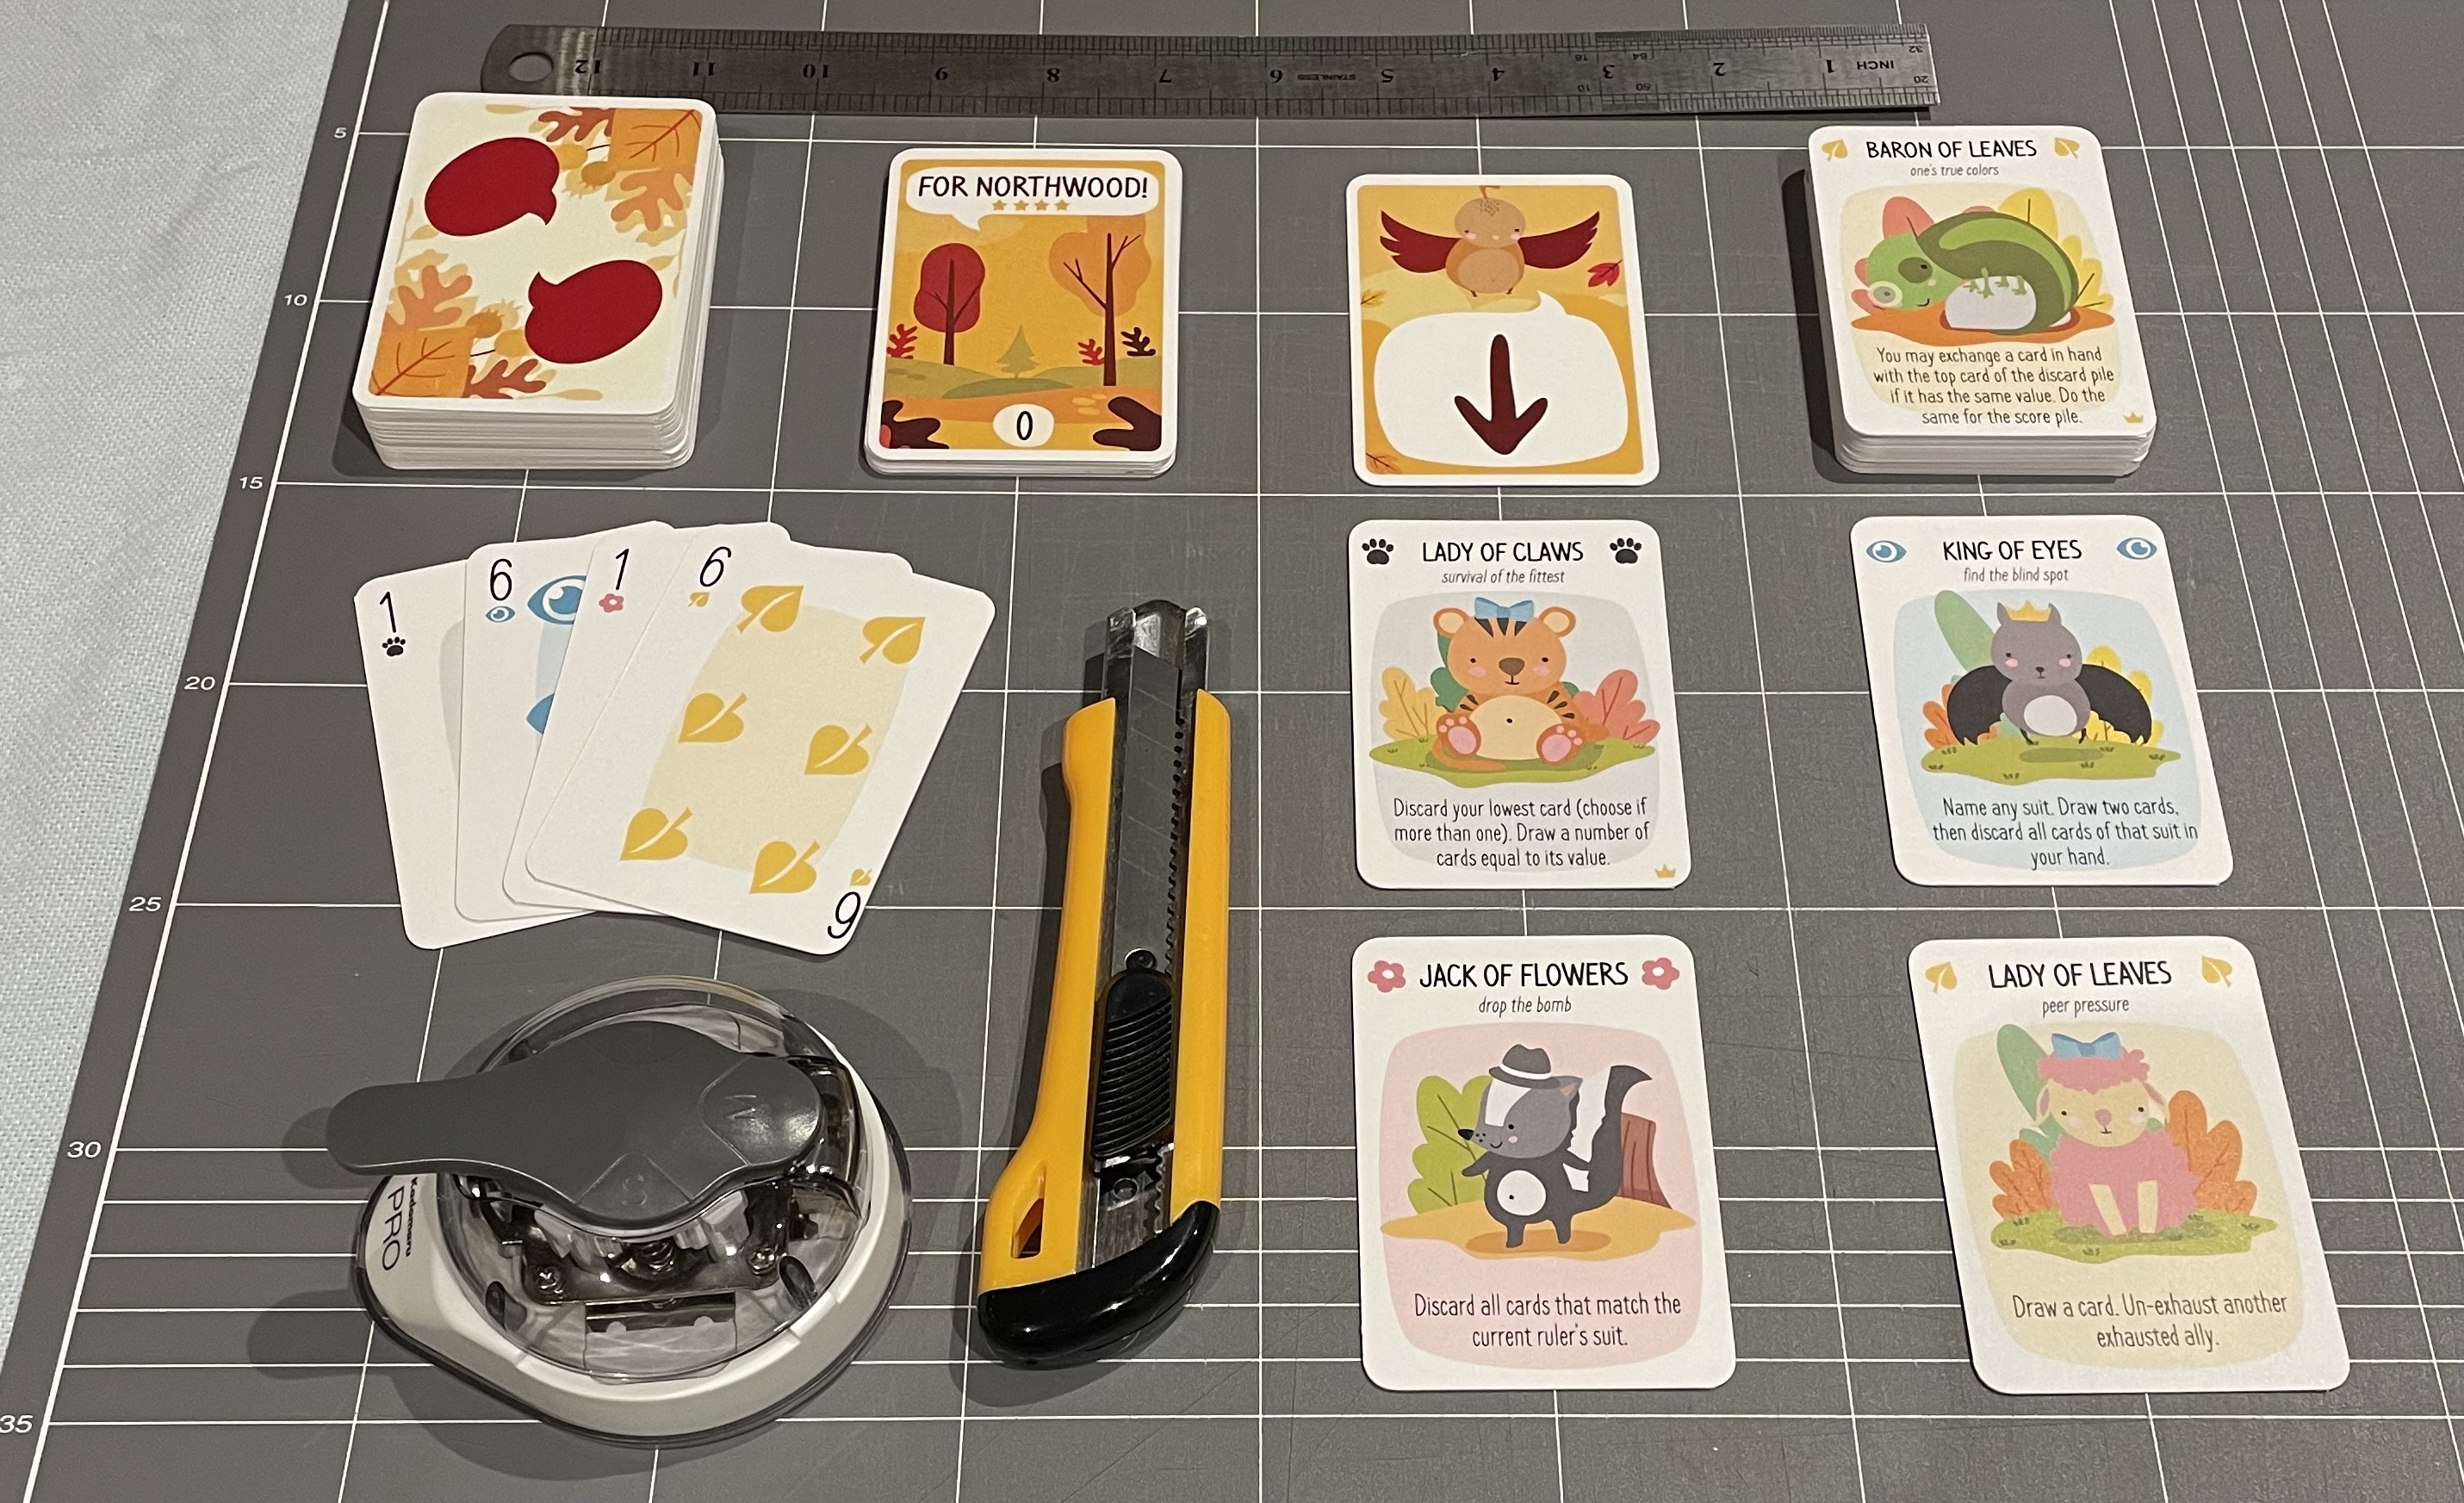
From the “Last Game you Bought Thread” on my 18EU. I quite the process of making a PnP so I’ve purchased tools to help me. Context, this game is available from Golden Spike Games, but would be over £200 to bring to the UK. BGG user Broggles has redesigned it in the style you see here and released the files as a PnP, as they work/worked in the printing industry it comes with cut lines and everything!
TOOLS
A3 self healing cutting mat
600 mm steel ruler, it should be cork backed but I didn’t go for that
Craft corner rounder, mine does three radii, 4 mm, 7 mm and 10 mm
Craft scalpel with spare blades
Rotary cutter
12 mm, 29 mm and 16 mm circular cutters
CONSUMABLES
Sticky things - Gorilla Glue, Pritt Stick (sometimes coloured), Spray Mount, book binding tape. I’ve found cheaping out on these sometimes leads to poorer results, buying off-brand is possible but it’s a risk
Whole label sticky printer sheet
Regular old 200 gsm card
1500 um greyboard
WEBSITES THAT ARE YOUR FRIENDS
www.cube4me.com - excellent selection of shapes and colours for wooden components. I use over spielematerial.de and/or bgextras.co.uk as they also sell the trays seen here and sturdy white boxes
doxdirect.com - high quality printed materials in paper types and laminations that are better than my home laser jet/laminator. I used the 130 gsm white satin for the trains, tokens and tiles.
PRINTERS THAT ARE MY FRIENDS
The large format printer at work, I have found where I can load approx. £5 onto my print account to pay for an A1 print. The map was printed using this and cut using the guilltone into A4 for a Z-Fold map.
My home HP Laser Colour 150 printed the company sheets on whole label sticky backed sheets. Unfortunately the drivers are Linux/Windows only, so it doesn’t play with my shiny new Mac.
ASSEMBLY
The next part would be known as ‘sweat equity’ in property circles.
I prefer to laminate the 200 gsm card into two sheets, for this I needed 32 sheets for the trains, tokens and tiles. That is, use the spray mount to stick two sheets together and leave them to dry. I do this in my garage because aerosols
Once this is done stick the sheets onto each laminated pair
Cut with the rotary cutter, steel ruler and cutting mat. Follow the cut lines! Small errors can be corrected with the craft scalpel or sharp scicssors. Like foamcore, several passes gives a better result overall than one tough pass. As I learnt during this build, you can also split the rotary blade by pressing too hard! Anywhwere that isn’t glued after cutting can be fixed with the Gorilla Glue
Apply the whole label sheet to a piece of card and cut as above, I don’t bother with the two card lamination here as they are effectively player mat.
The revenue tracker is printed on A3 and glued with pritt stick onto the 1500 um greyboard, book binders tape covers the edges. Once cut the map is done the same way, the board is 6 A4 sheets that Z-Fold away. Either sit and work out where the hinges need to be, or look up tutorial online.
Tokens are cut with the 12 mm circle cutter and glued with Gorilla Glue onto 15x10 mm cylinders. I tried with the whole label sticky sheet but the cutter couldn’t cope. There needs to be a rigidity to the paper for a clean cut!
The box cover is stuck on using spray mount.
REFLECTIONS
The final quality is similar to my handmade Marflow 1876, and better in some places.
I’m thinking a Fiskars Hex Punch and scaling the map to fit the hex size could speed up the cutting process considerably. I estimate that the hexes alone took me about 5 hours. The largest one is 2.5 cm on a side and 5 cm across the widest point, the other size 3.8 cm across the widest point. The tiles here are 2.3 cm and 4.5 cm respectively.
I’m not sure what I’d do if I didn’t have access to the large format printer, my attempts at slicing the map into A4 were very unsatisfactory due to printer margins
Future me may not bother with the Z-Fold board next time. I can print clips (at work, again) that can hold the board together.
Most of this is done when my lovely wife is out and I’m being the Main Parent for the Kids™ after they’re in bed. Usually Tuesday as that’s her Guides evening.
@yashima Hope that helps. Happy to field and questions
Sweet! I was considering PnPing 1828 and The Old Prince
I have the The Old Prince ready to print thanks to @pillbox
It’s next on my list to do
I have that very model of corner-rounder!
Also.
(waffle for 10 characters)