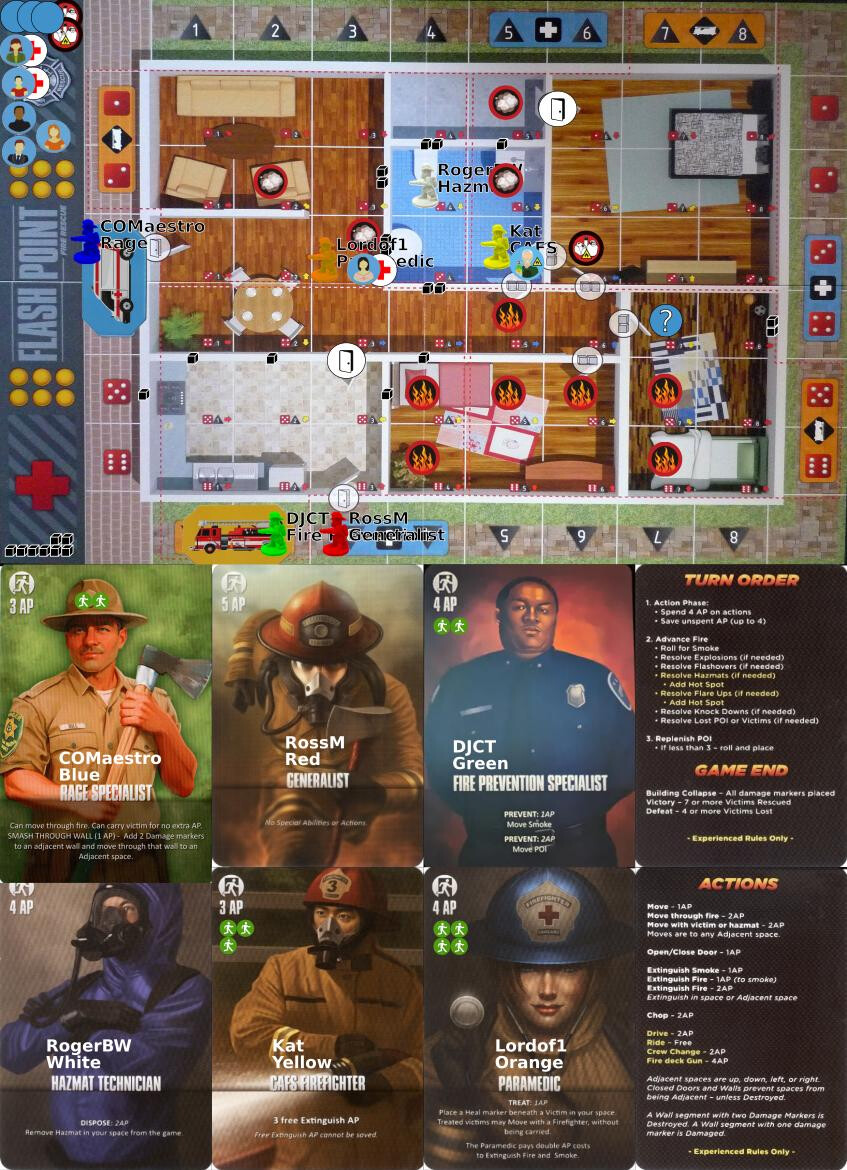
Sorry, no, your Prevent moves have to be towards the nearest official exit (they represent signage and training).
That’s a silly rule
1 Like
So if you move it to Kat will it be revealed?
Edit or just walk and reveal it
Yes, either would reveal it. (Though it can’t go to Kat as that’s not the shortest route out - it would have to be straight along the central corridor, then out through the south door.)
lol. I meant the other poi
(3, 4) would have to move onto Kat from where it is, yeah, which would trigger a reveal.
Roger I am trying to see where the fun is in this role!
Boo!
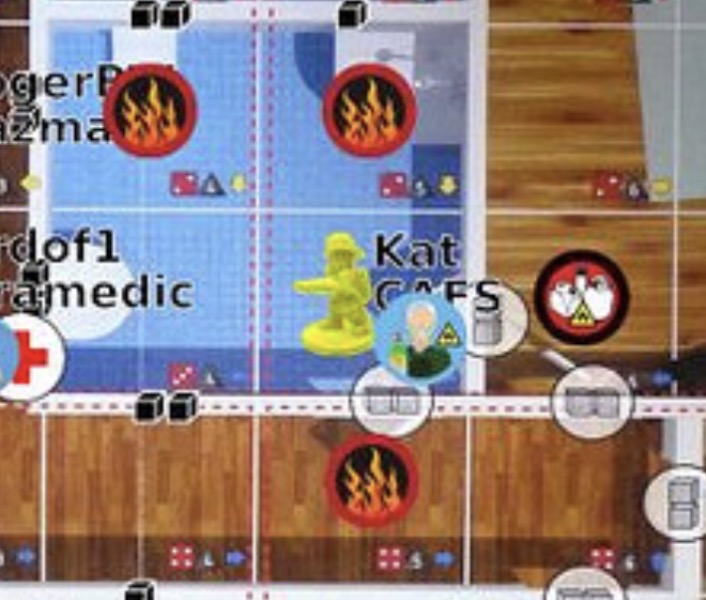
So i will move dude on to Kat, smoke out the south and smoke out the west as far as the AP goes …
OK so…
- PoI at (3, 4) moves E [2]. It’s the victim with the oxygen tank: double move costs, and explodes if Lost.
- move smoke at (4, 2), E, N, E [3].
- move smoke at (6, 3) S [1].
You have 2AP after that - you could move out that northern smoke, or save them. (Note that you can walk in and fight fire too.)

Yep that is fine, save the ap
1 Like
@RogerBW asked for a die roll:
The Fire Rages
d6: 3 d8: 3

- fully extinguish W [2]
- fully extinguish E [2]
- move E [1]
- single extinguish E [1]
@RogerBW asked for a die roll:
The Fire Rages
d6: 2 d8: 2
- Extinguish fire 4,5 (2 FEAP)
- Move to 4,6 (2 AP)
- Extinguish fire 5,6 (1 FEAP + 1 AP)
- Move to 5,6 (1 AP)
- Extinguish fire 5,5 (2 AP)
@RogerBW asked for a die roll:
The Fire Rages
d6: 4 d8: 8

Move victim to 4,3 (1AP) and leave them there for the mo
Move to 3,5 alone (3AP)
Treat hazmat PoI (1AP)
Move hazmat PoI to 4,3 (3AP)
Group huddle everyone! Nobody smoke!
Ideally would have extinguished smoke next to us but too expensive for me. It’ll be fine. Fine.
Got some bad news for you, I’m afraid - the victim with oxygen tank is Heavy, so you’re still paying 2AP/space to move them even after treating them.
(I’ve added a “heavy” icon to the counter image to make it clearer.)