4, 2
OK, the Death Cheater now has a clear run to plant the charge and get out of there again.
E, E, get crowbar, plant charge, west
OK. Sapper will go west twice.
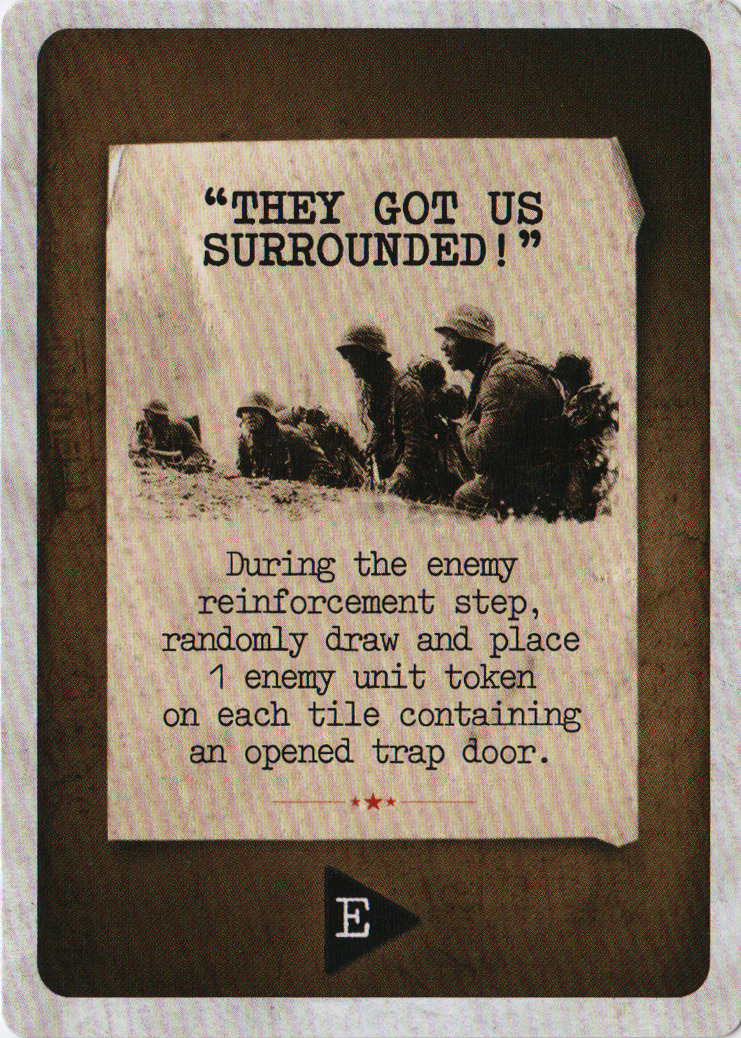
- Enemy reinforcements
enemy-2-hammer
enemy-3
enemy-2
enemy-2 - Free enemies move: north
- No enemy firing
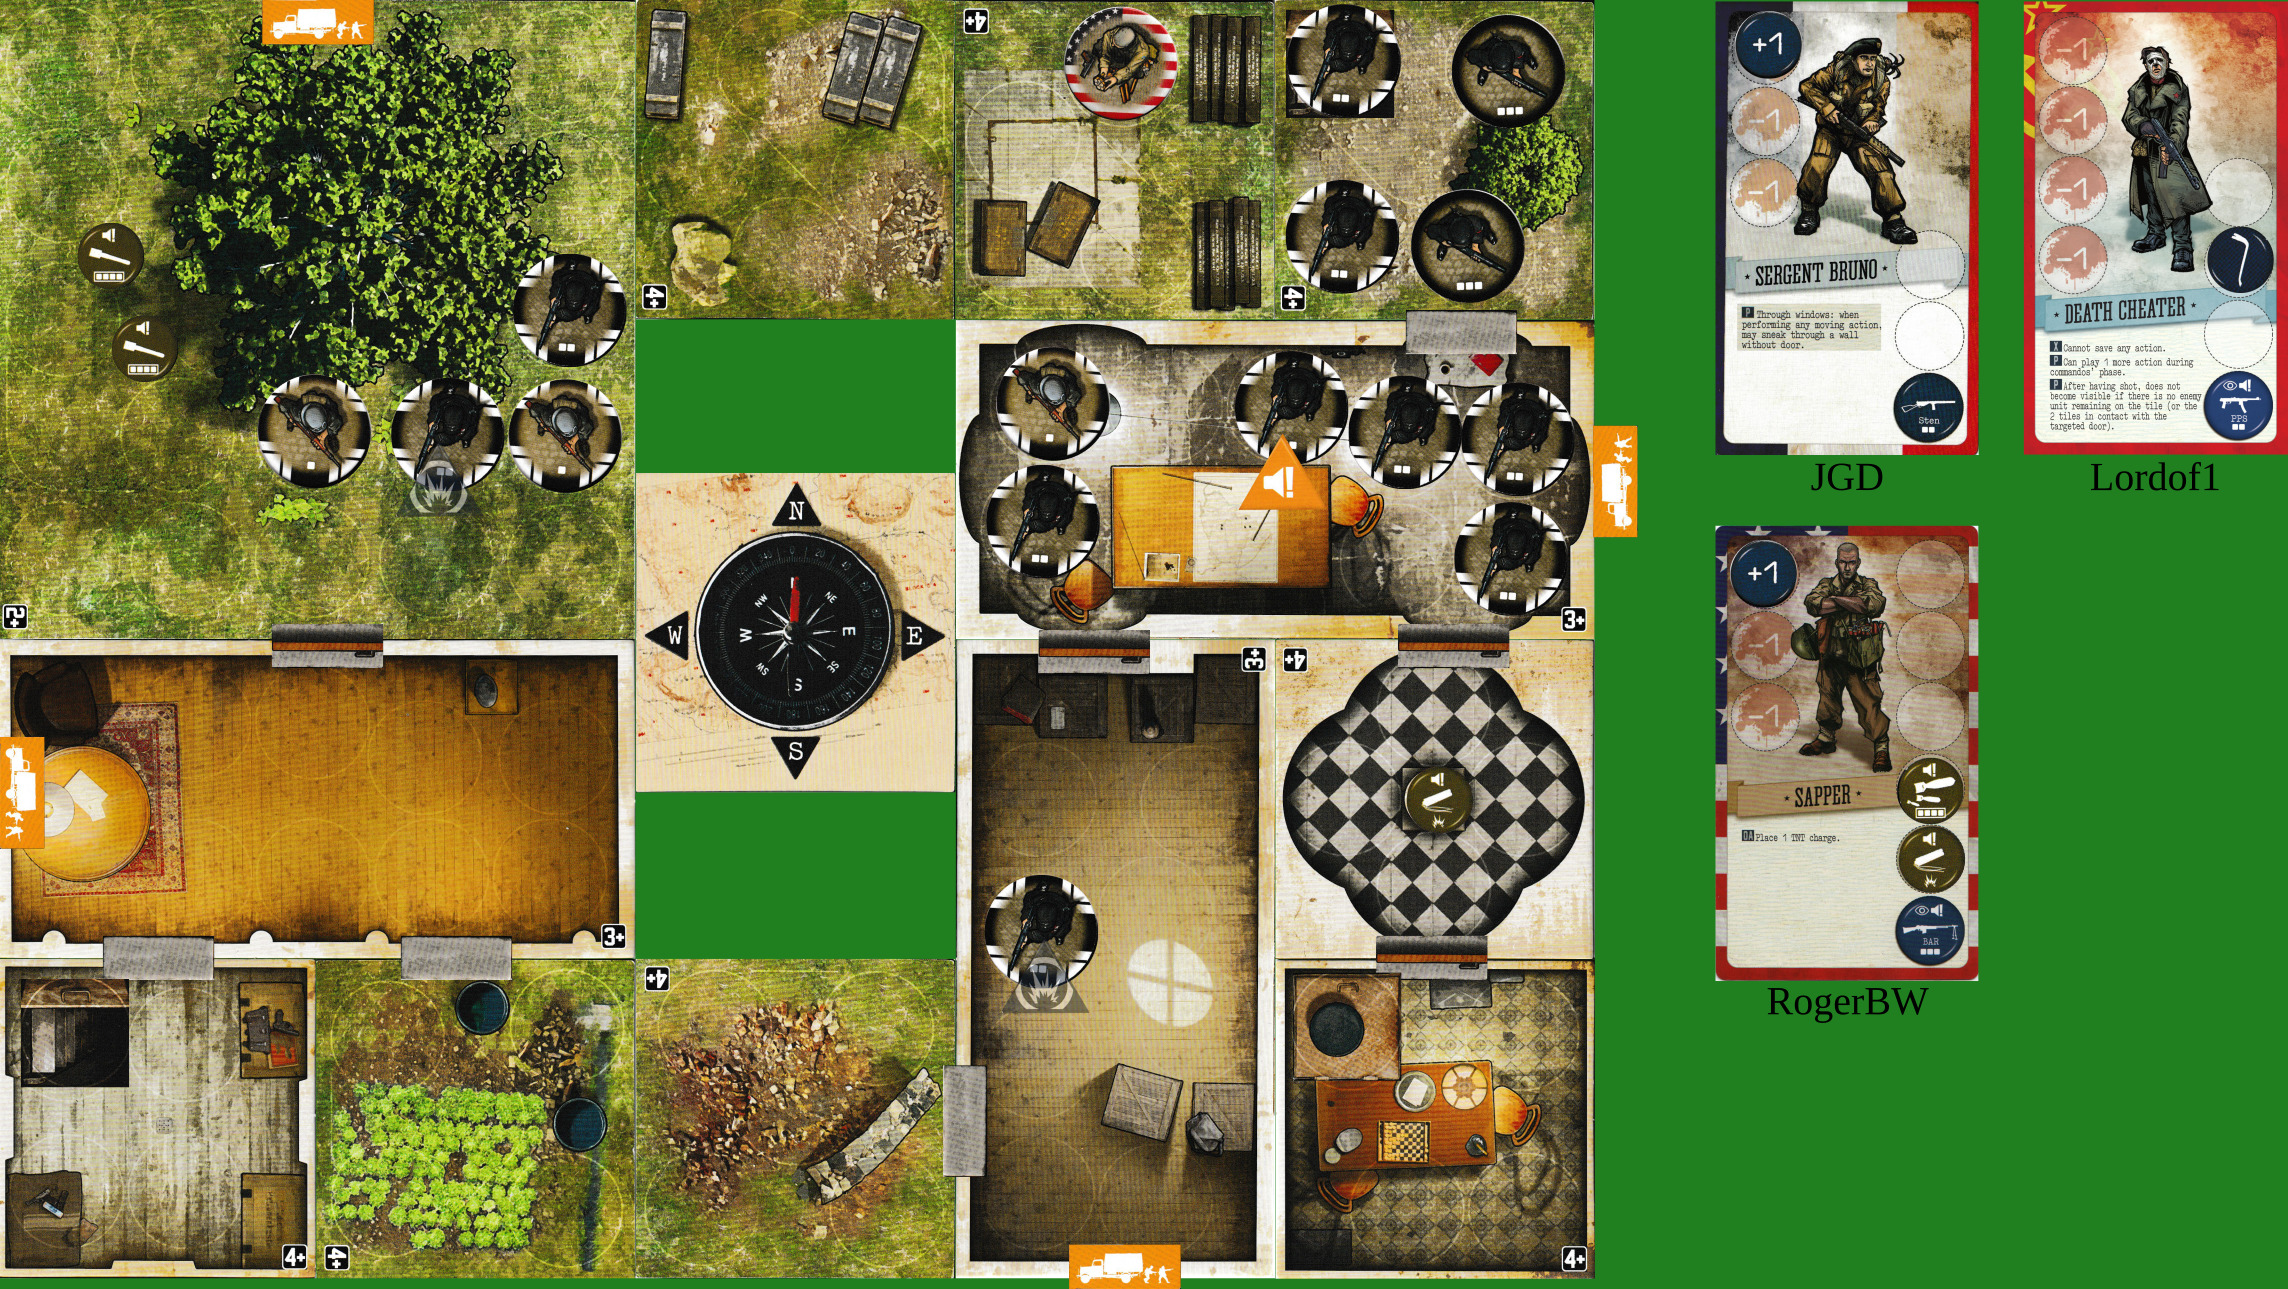
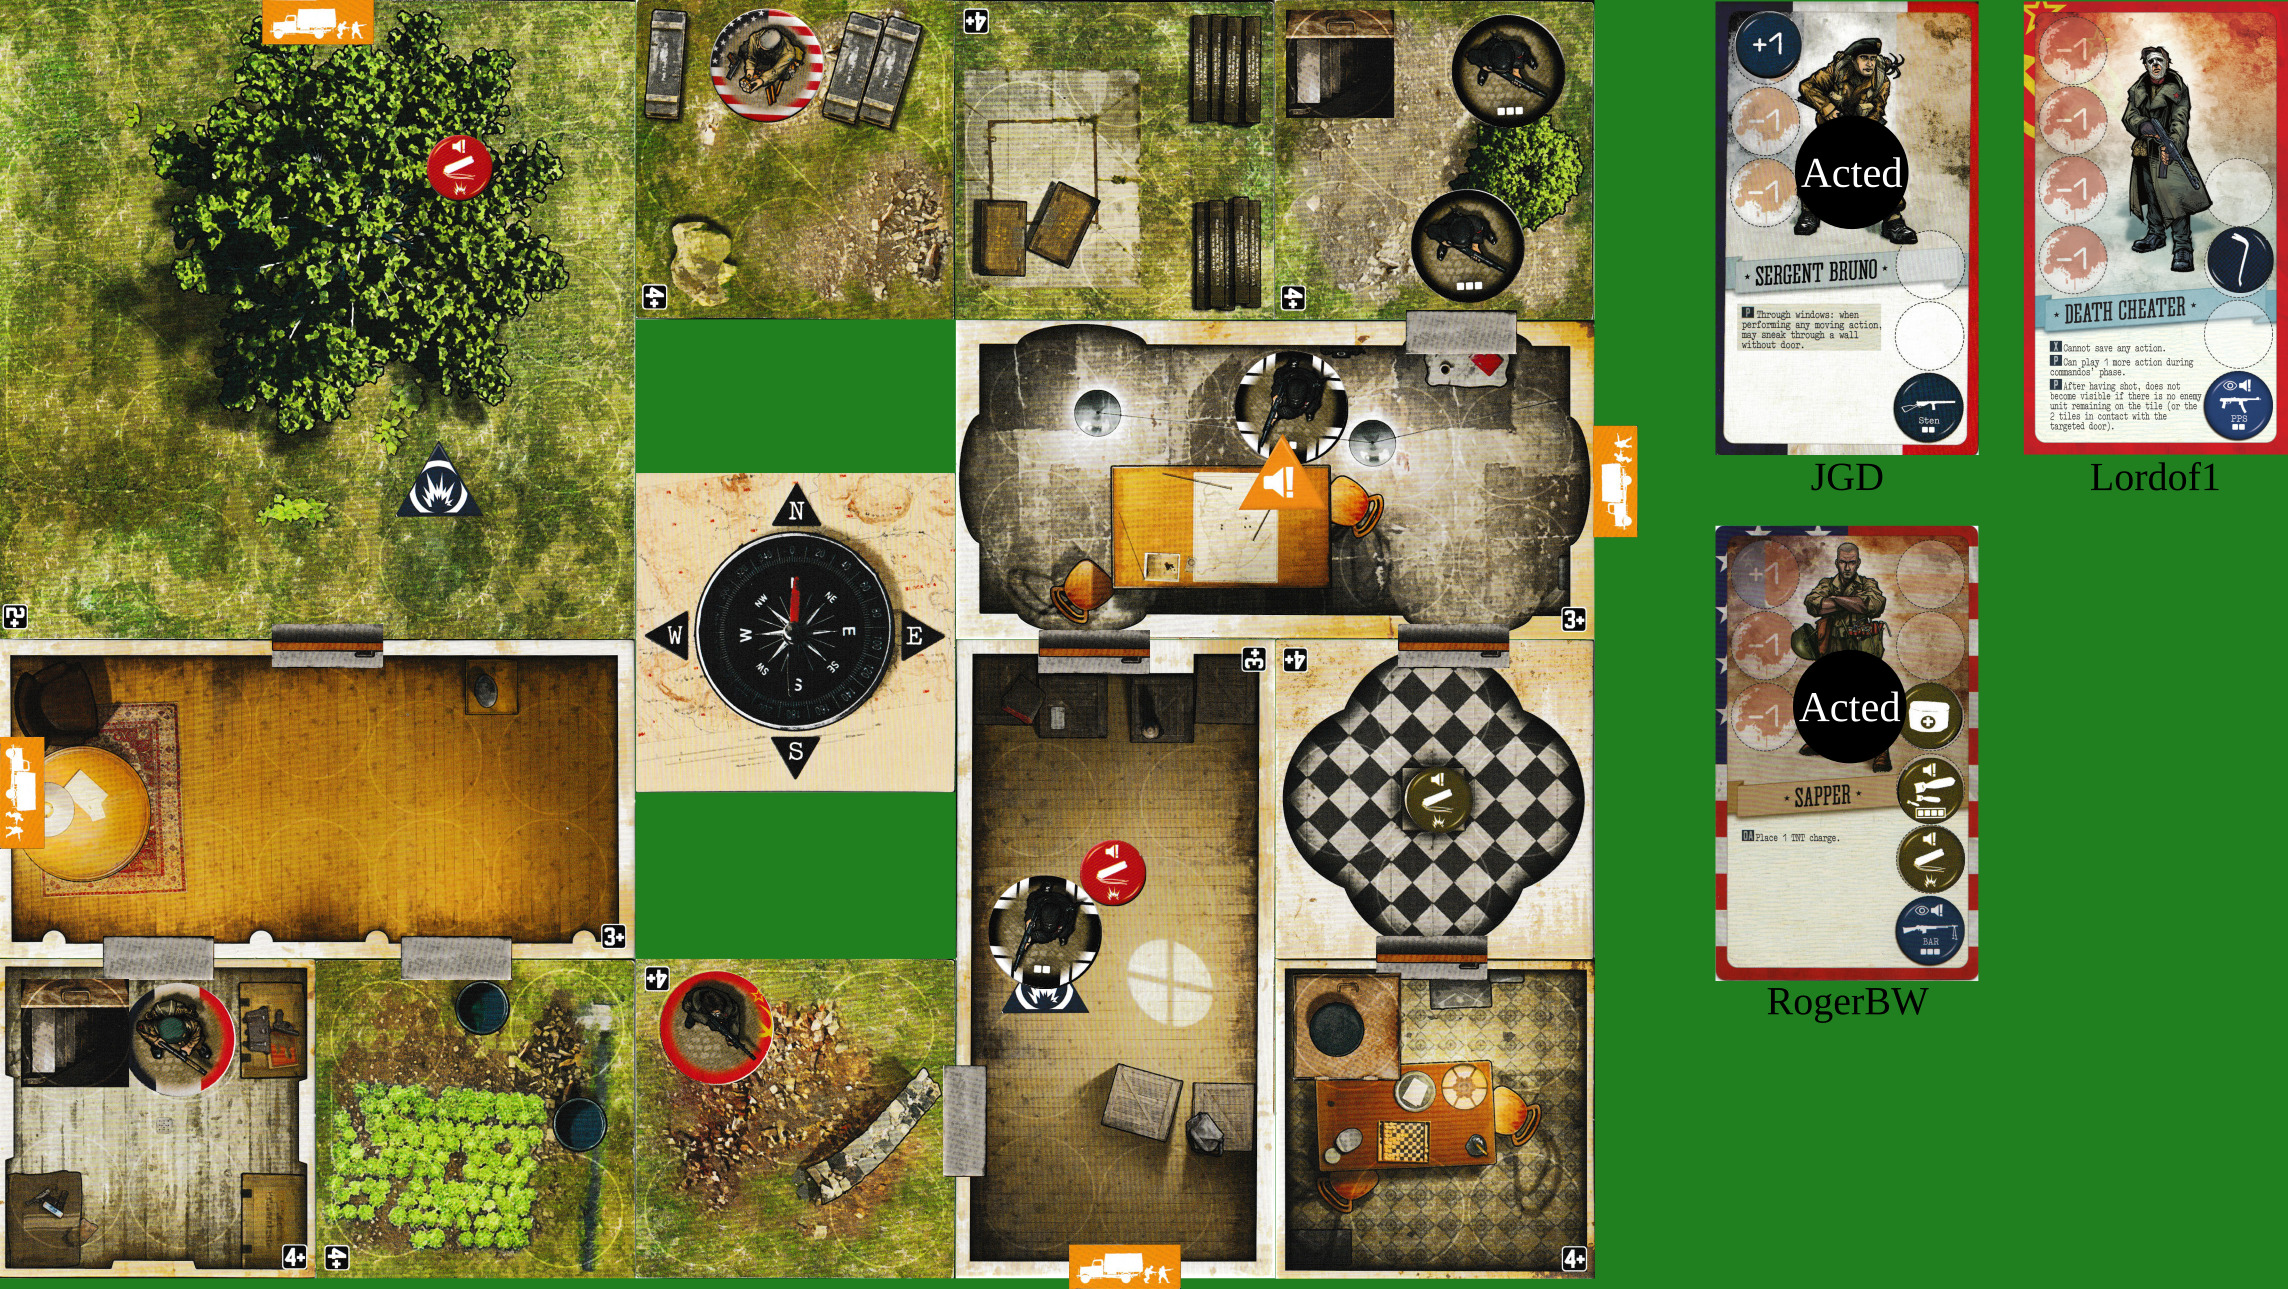
Turn 3


(Sorry, I did mean to say “twice” since there were more than three targets.)
Drops:
First Aid
Spotted (I’m already spotted)
Bombardment
TNT
Move west [1]. plant charge [0], move east and become stealthy [1].
We only need one charge for the second part of the mission, so it’s not vital to pick up the one to the E.
OK, I’m going to take that as an omen that it’s a bad idea. Move W, wall-hop W, save.
West, north, south, blow charges, ready to escape next round.
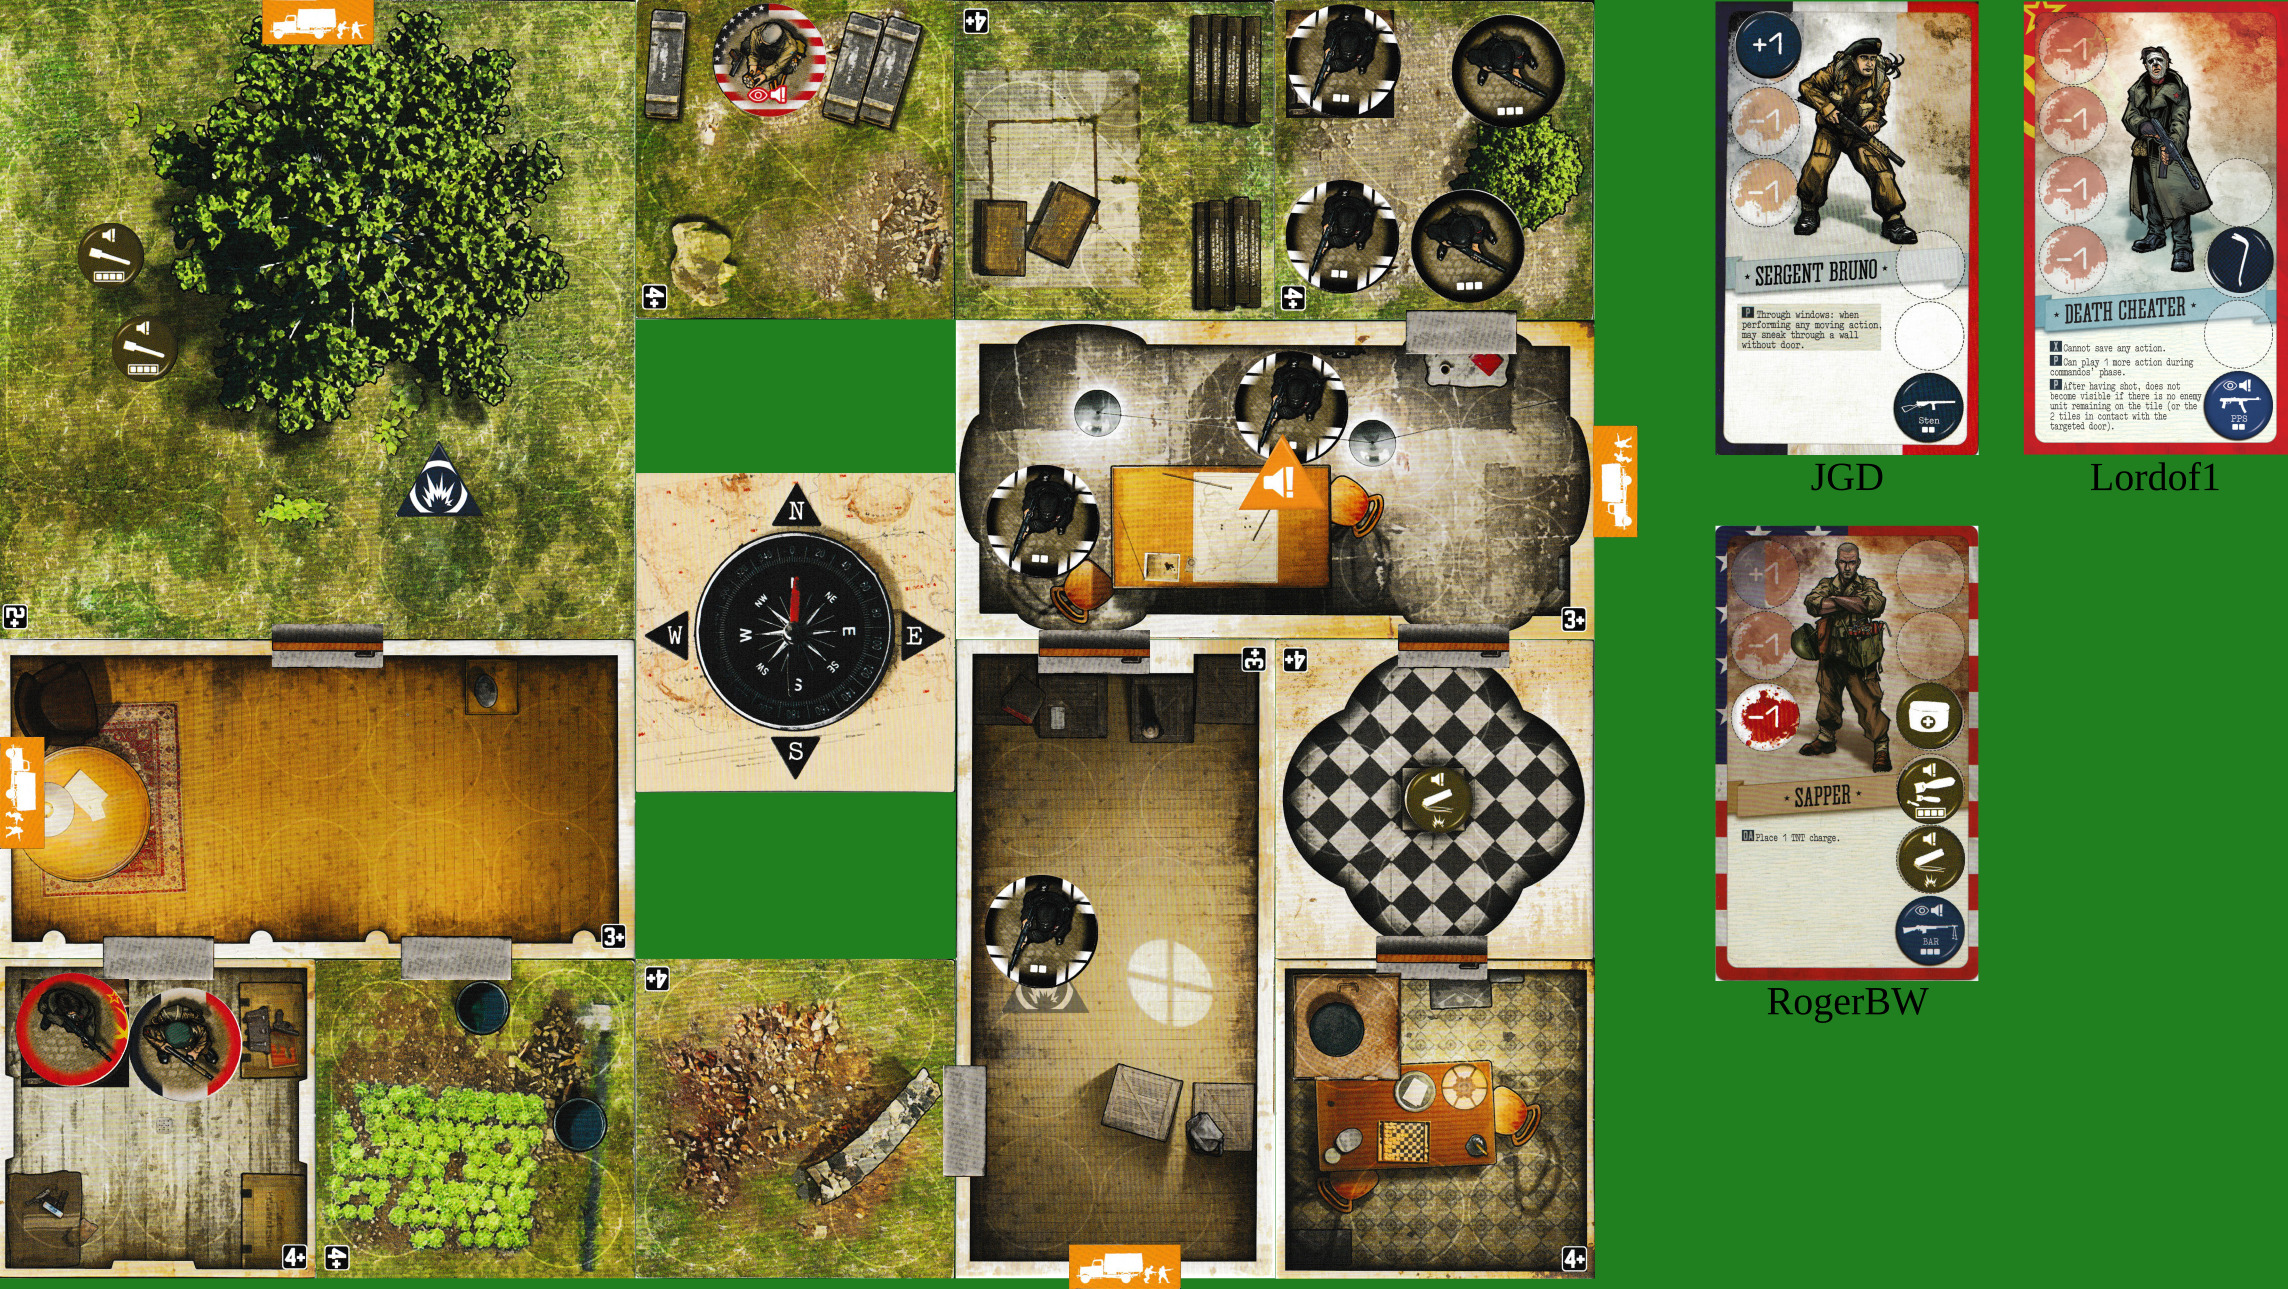
- Enemy reinforcements:
zero
zero
enemy-1
enemy-1
enemy-2
enemy-2
enemy-2
enemy-2 - Free enemies move north
(Sapper uses 0AP to detonate the second charge; two grenades dropped) - No enemy fire.
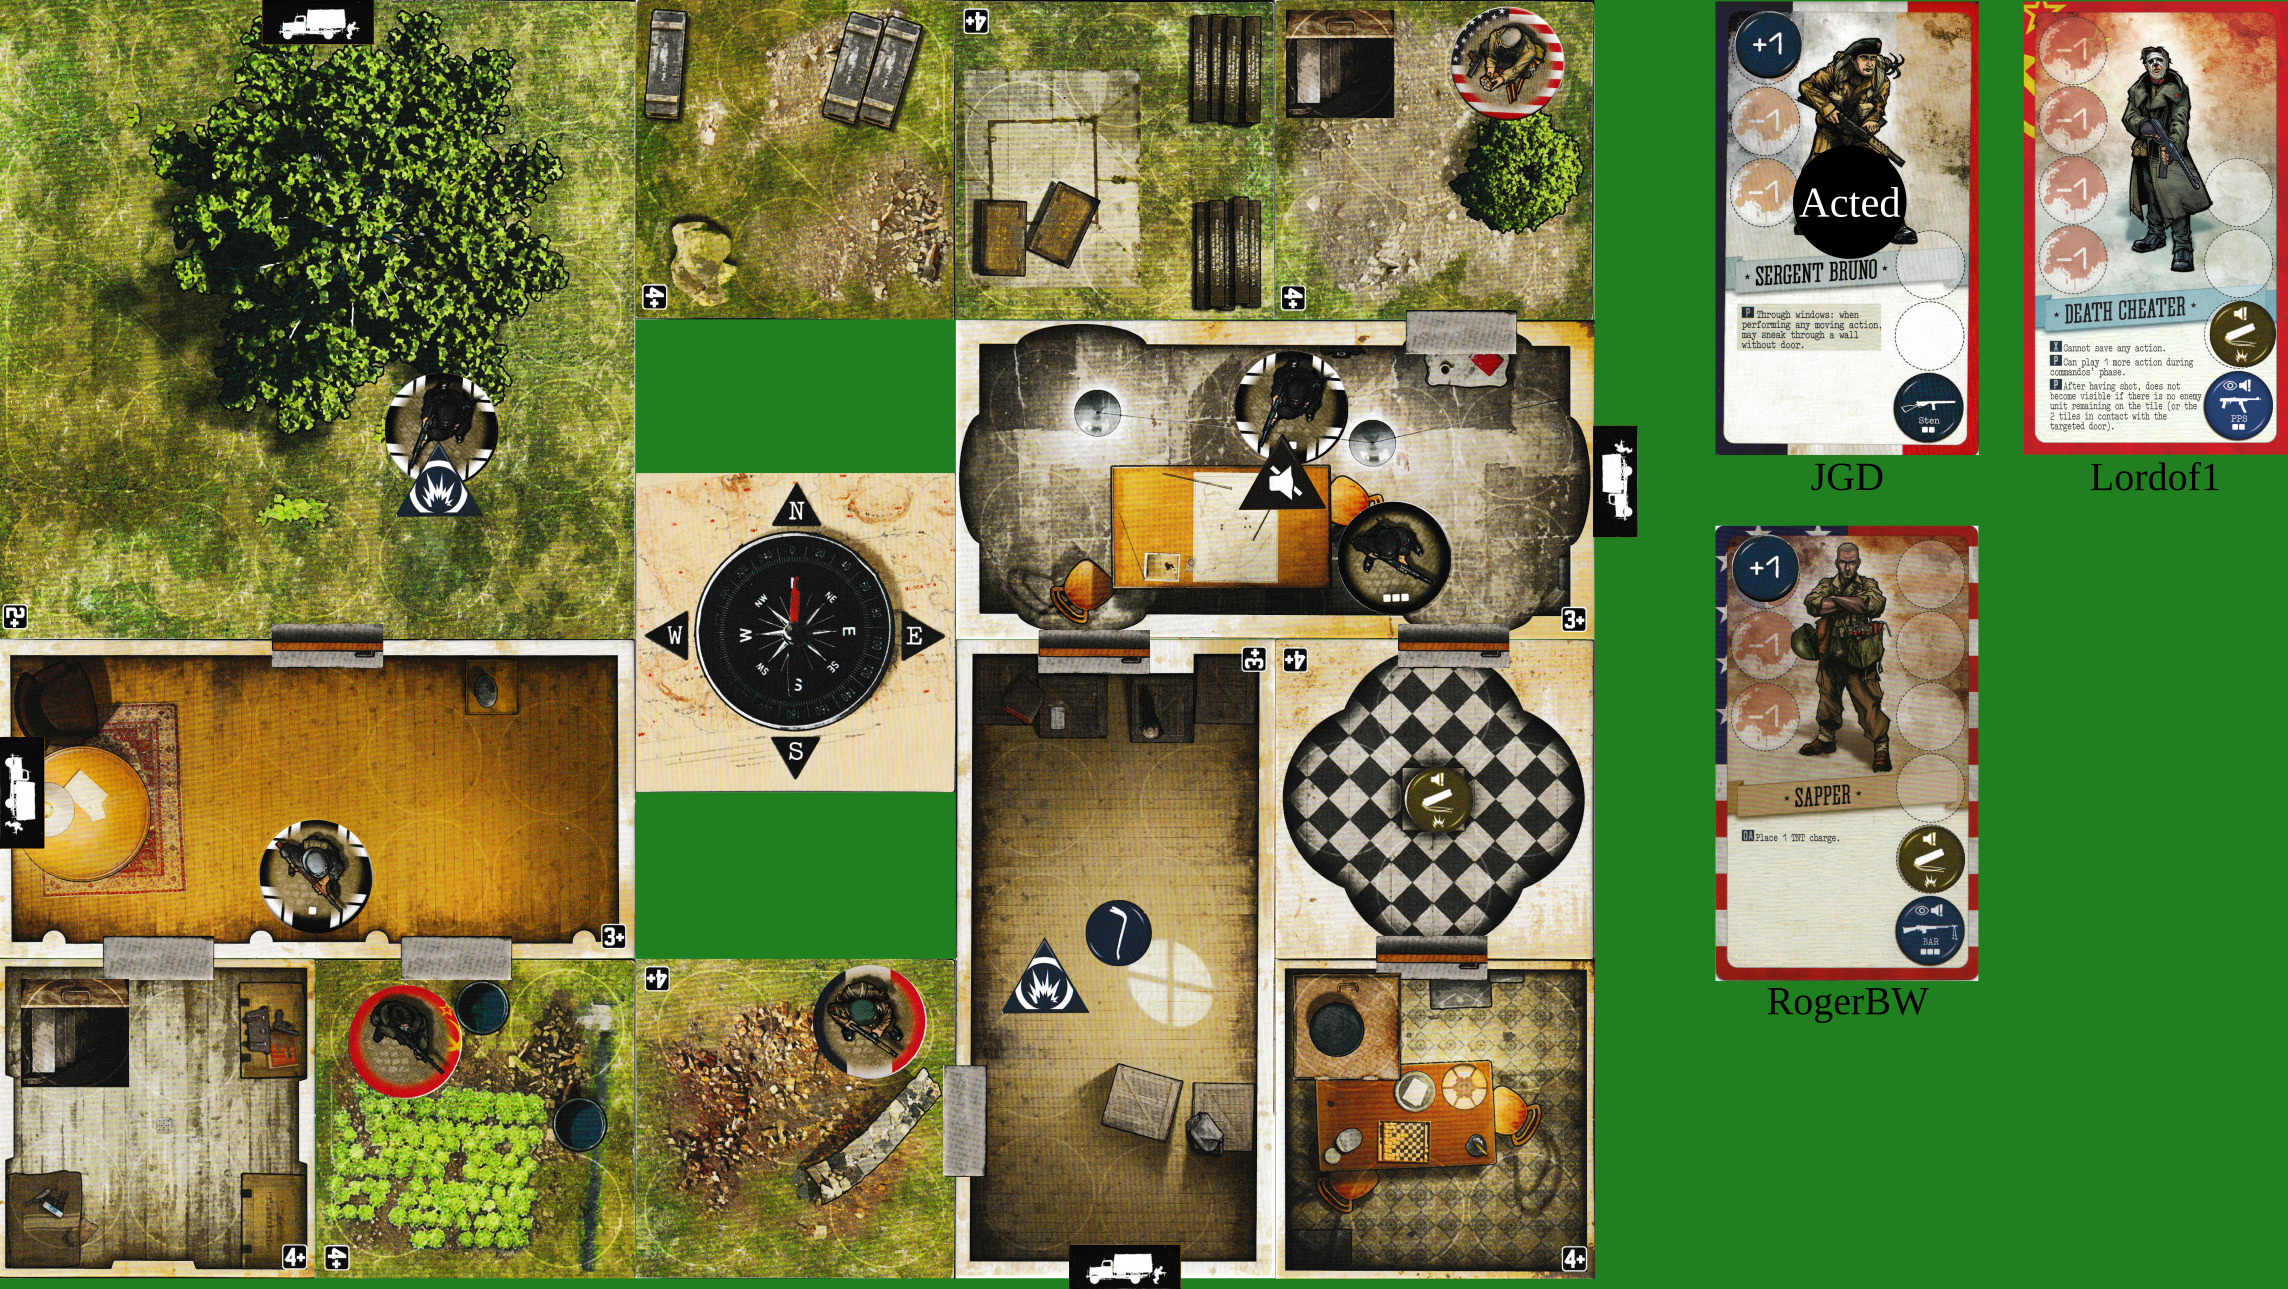
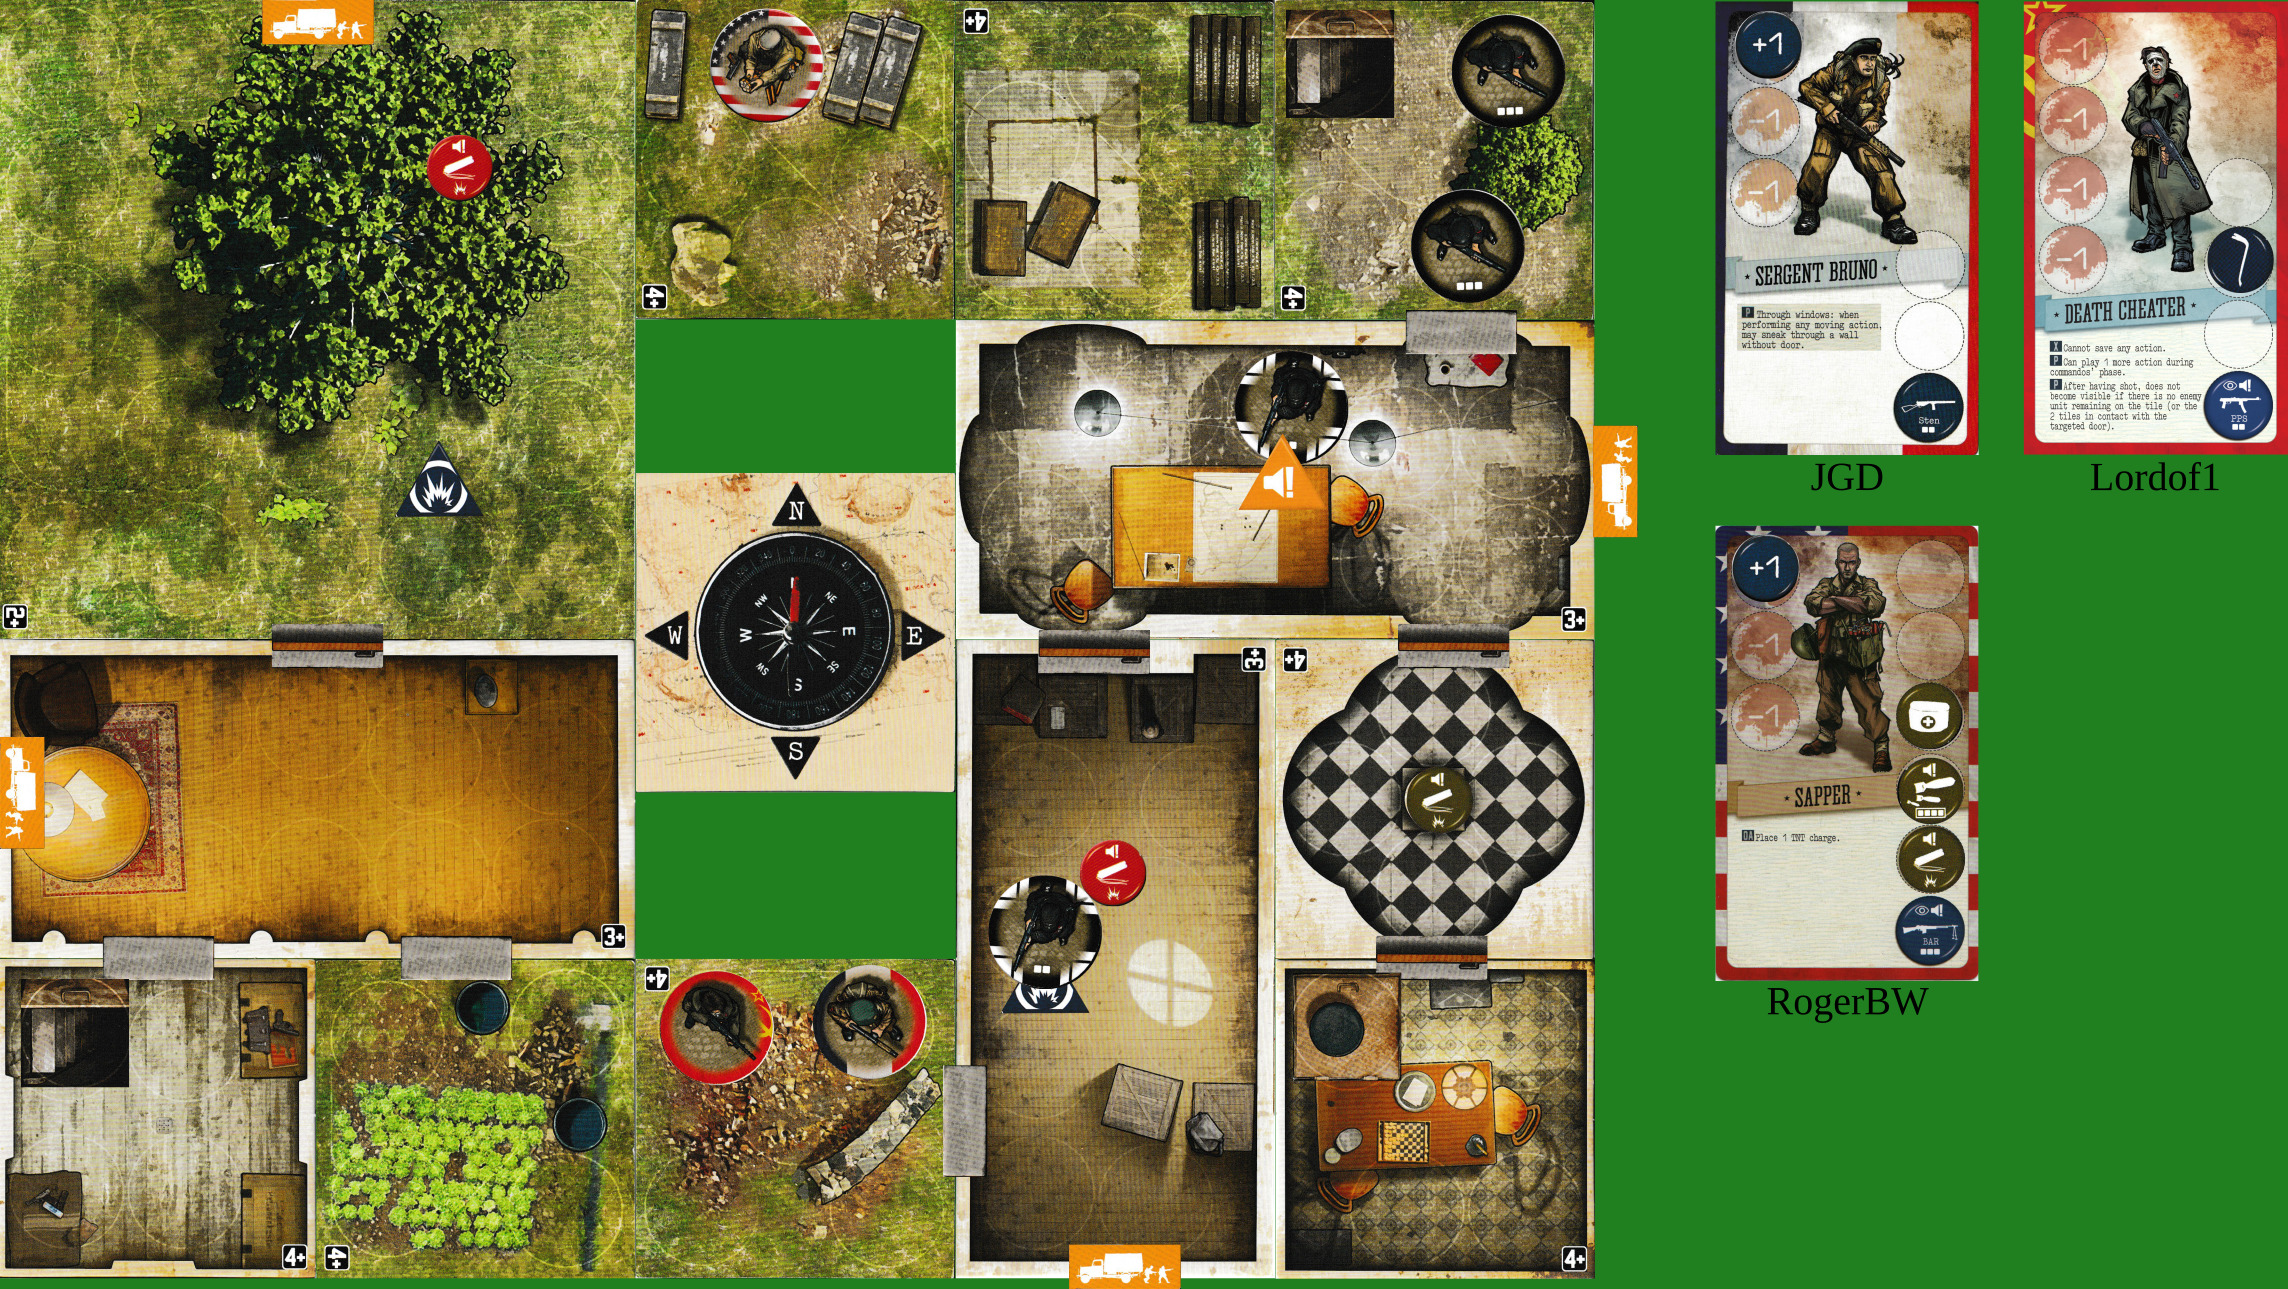
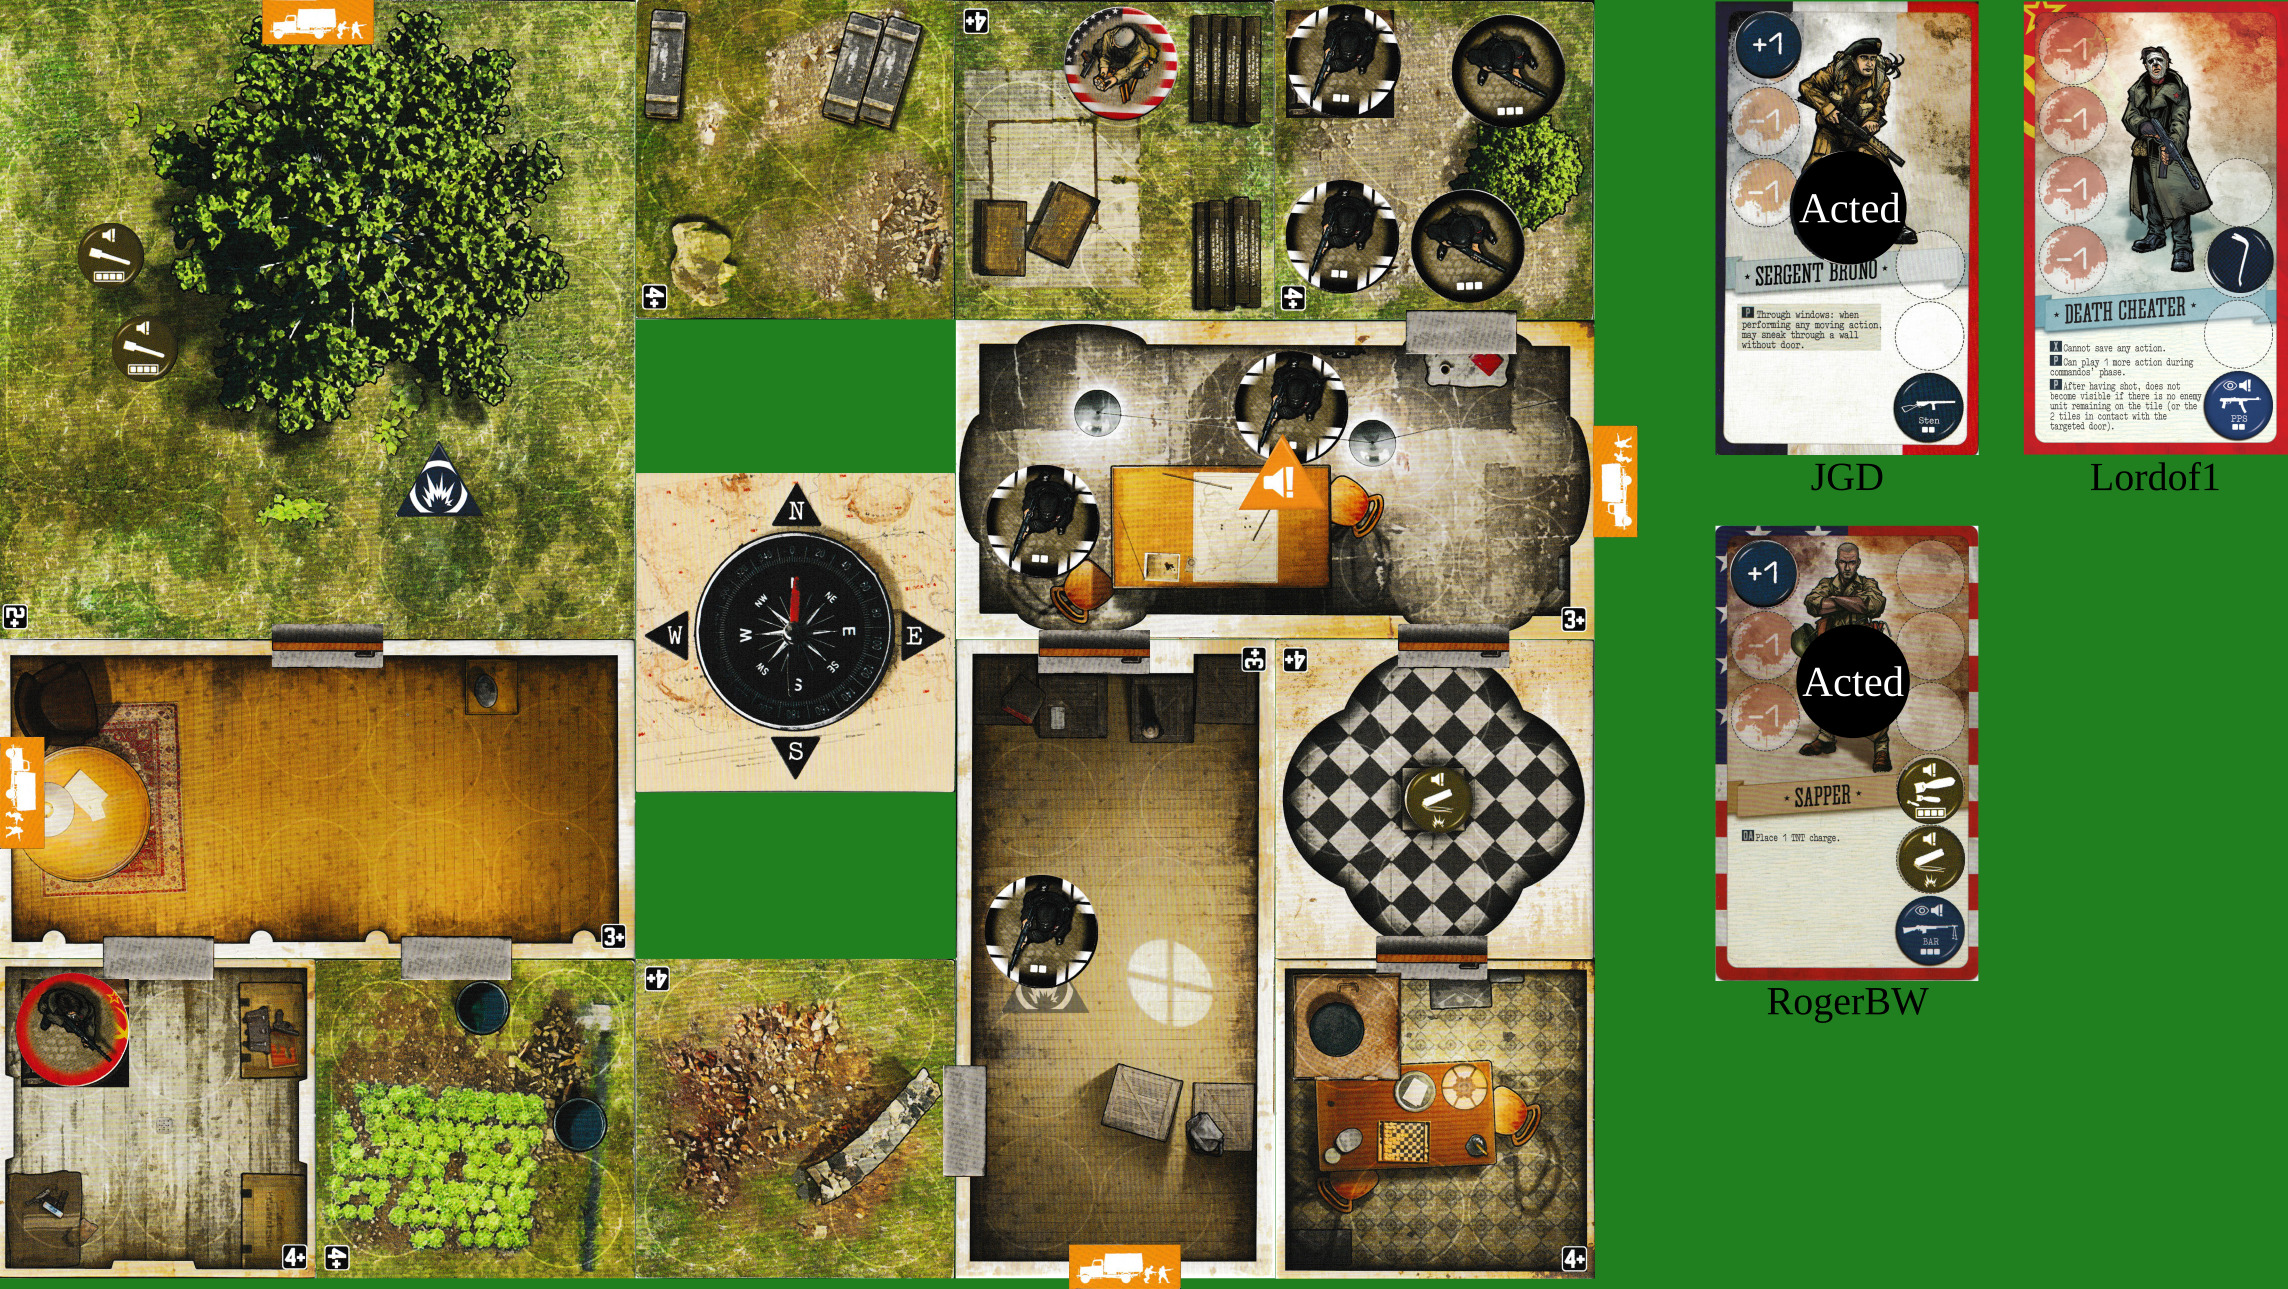
Turn 4
(error in image, will post a new one below)
That’ll be the sapper then.
@discobot roll 2d6
Sapper effectively has two actions even if he heals. I don’t think he can do anything terribly cunning.
First aid self [1], move E [1], save [1].

Bruno will pop down the hatch and save, ready to come up the other hatch if that would be useful next turn.
Escape, I don’t think we can pop up to help as the tile is full. Oh dear