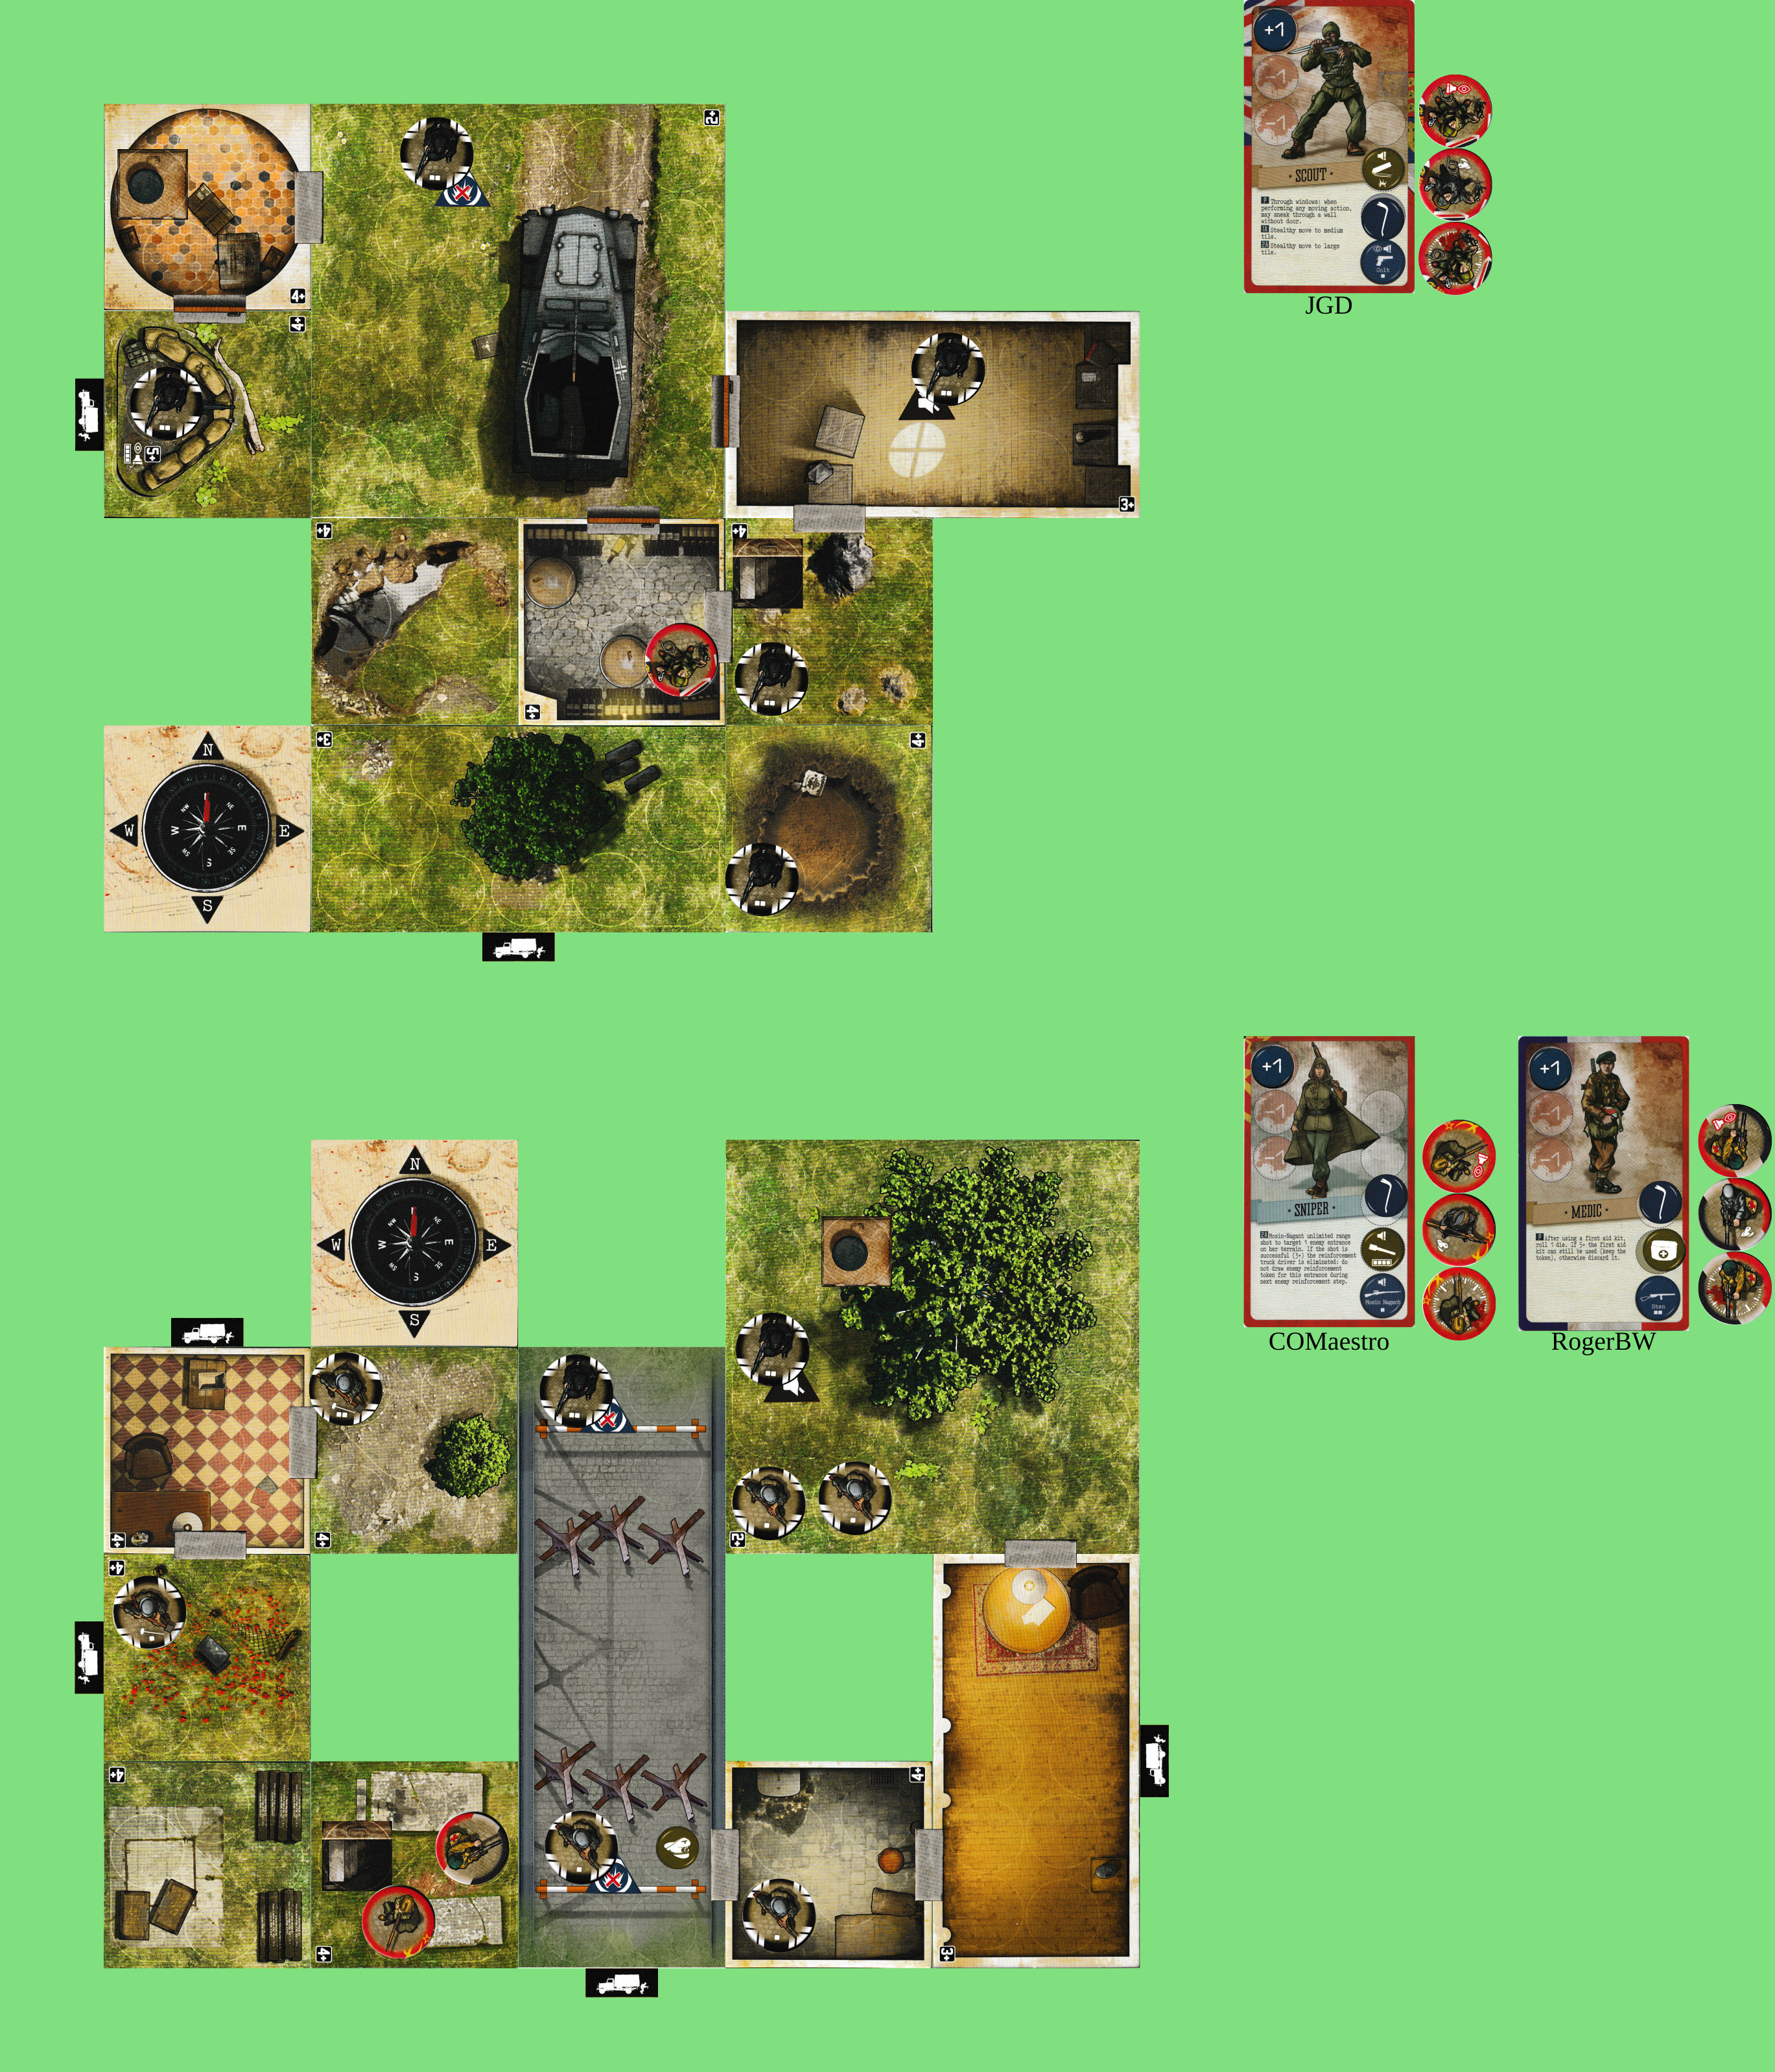
For @JGD and @COMaestro plus me. (If anyone else wants to jump in, post in the meta topic and I’ll add you to the next game.)

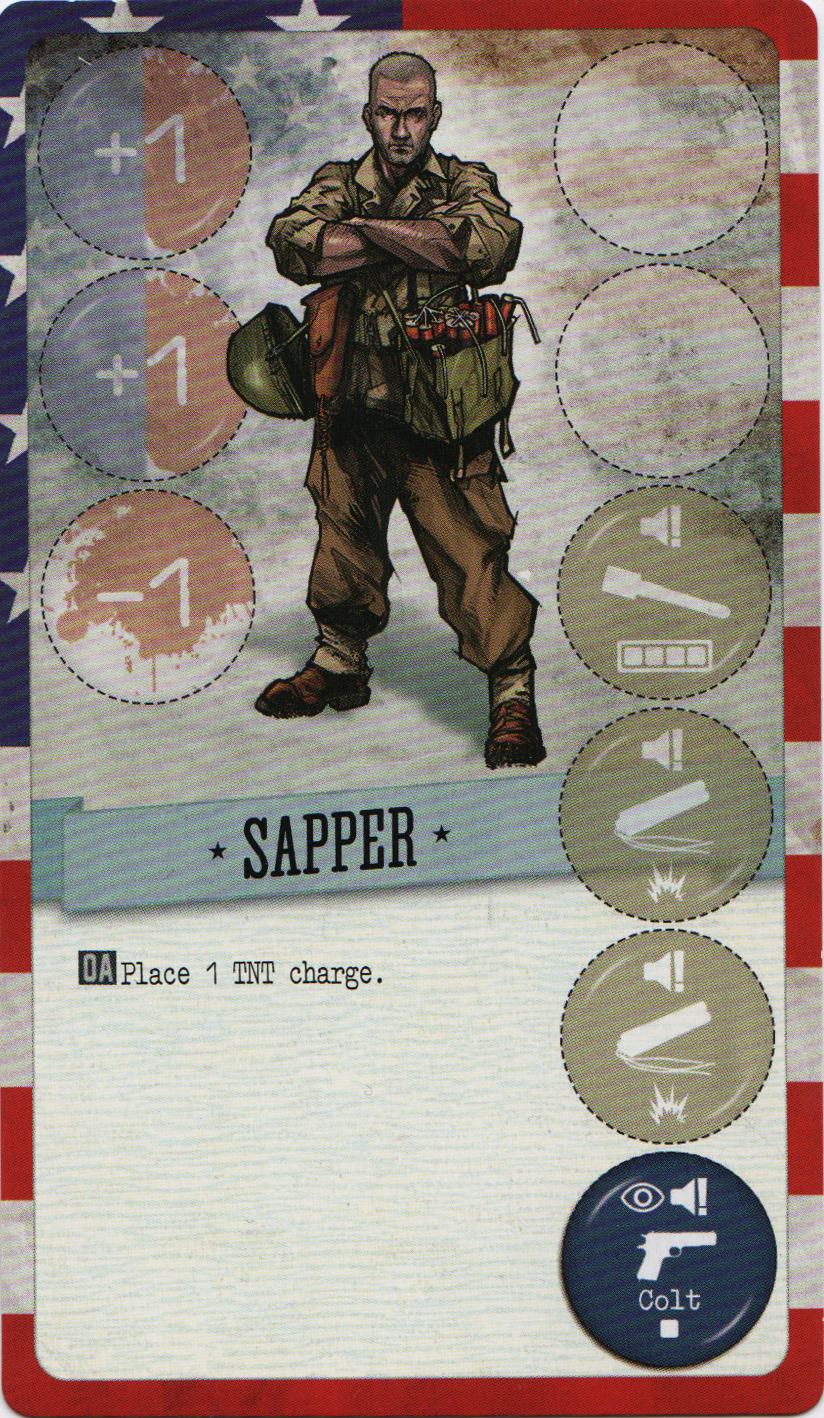
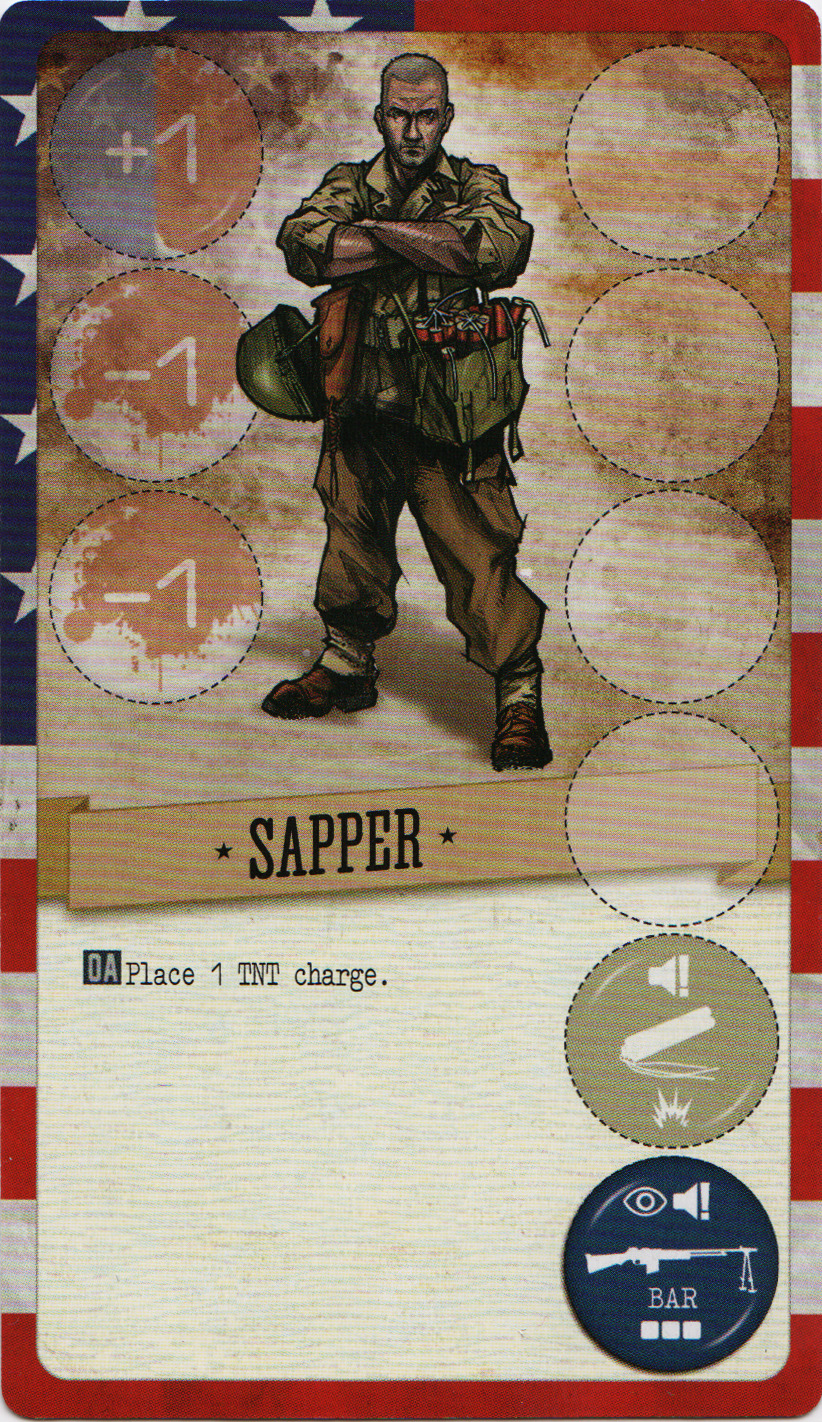
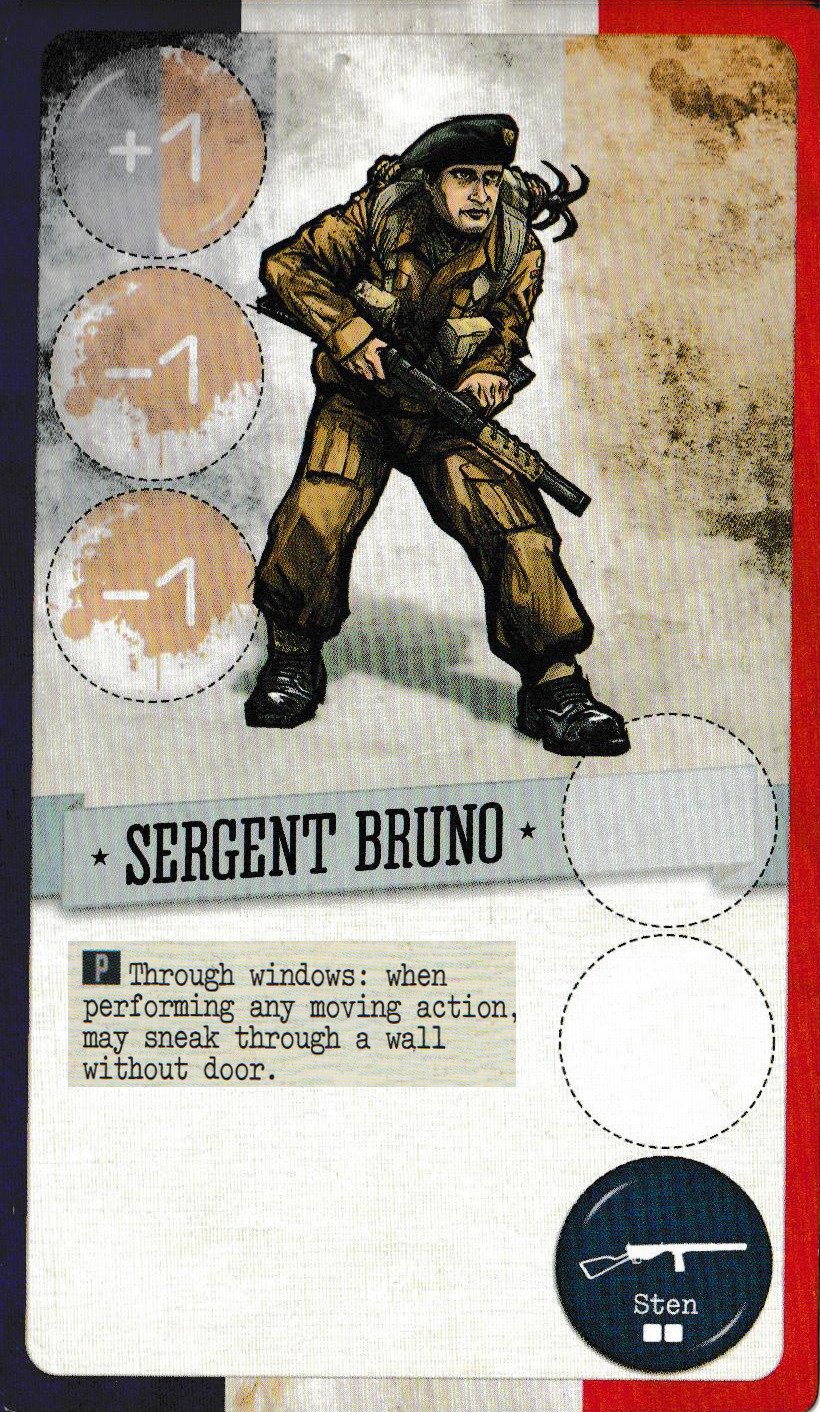
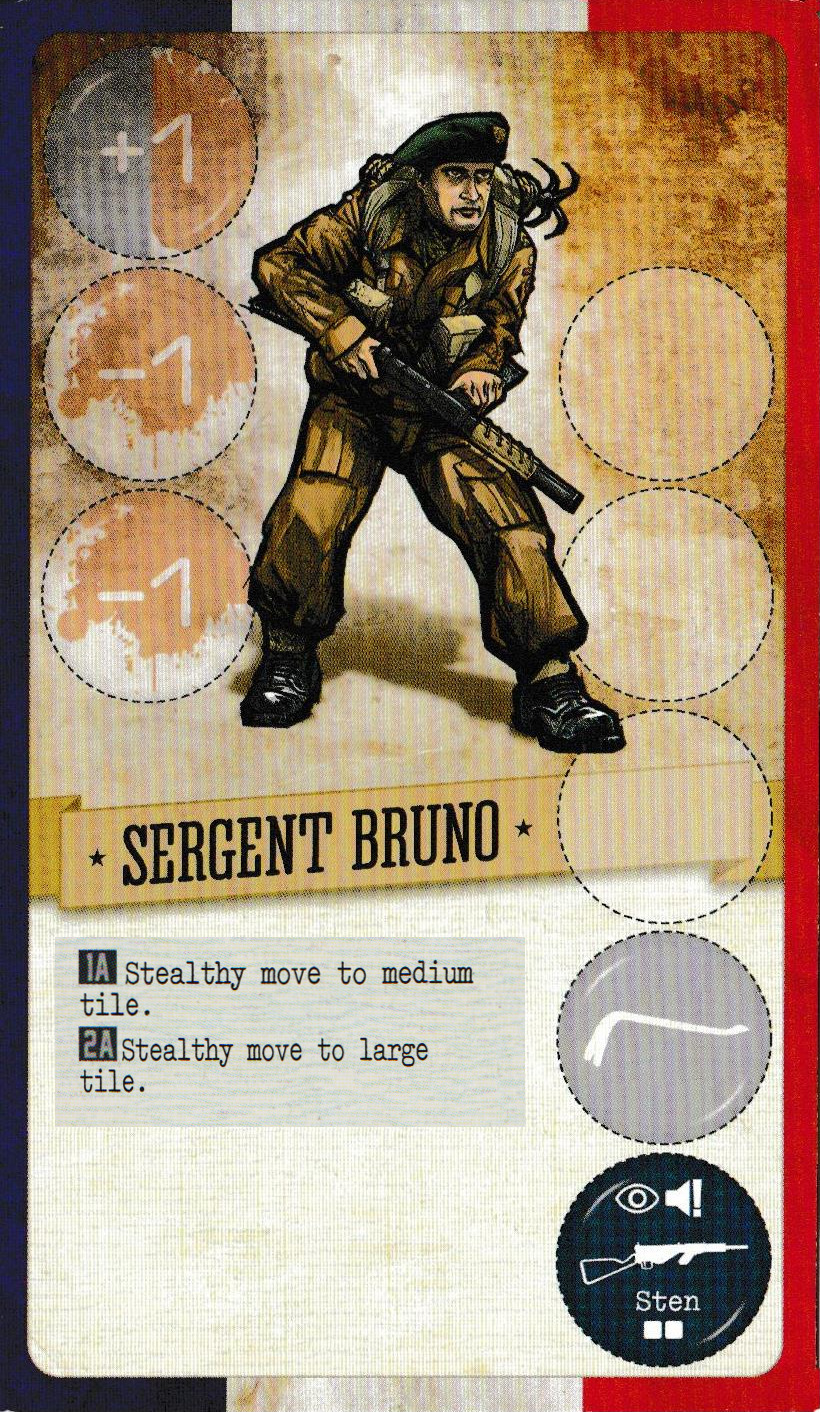
Available commandos:
For @JGD and @COMaestro plus me. (If anyone else wants to jump in, post in the meta topic and I’ll add you to the next game.)
Available commandos:
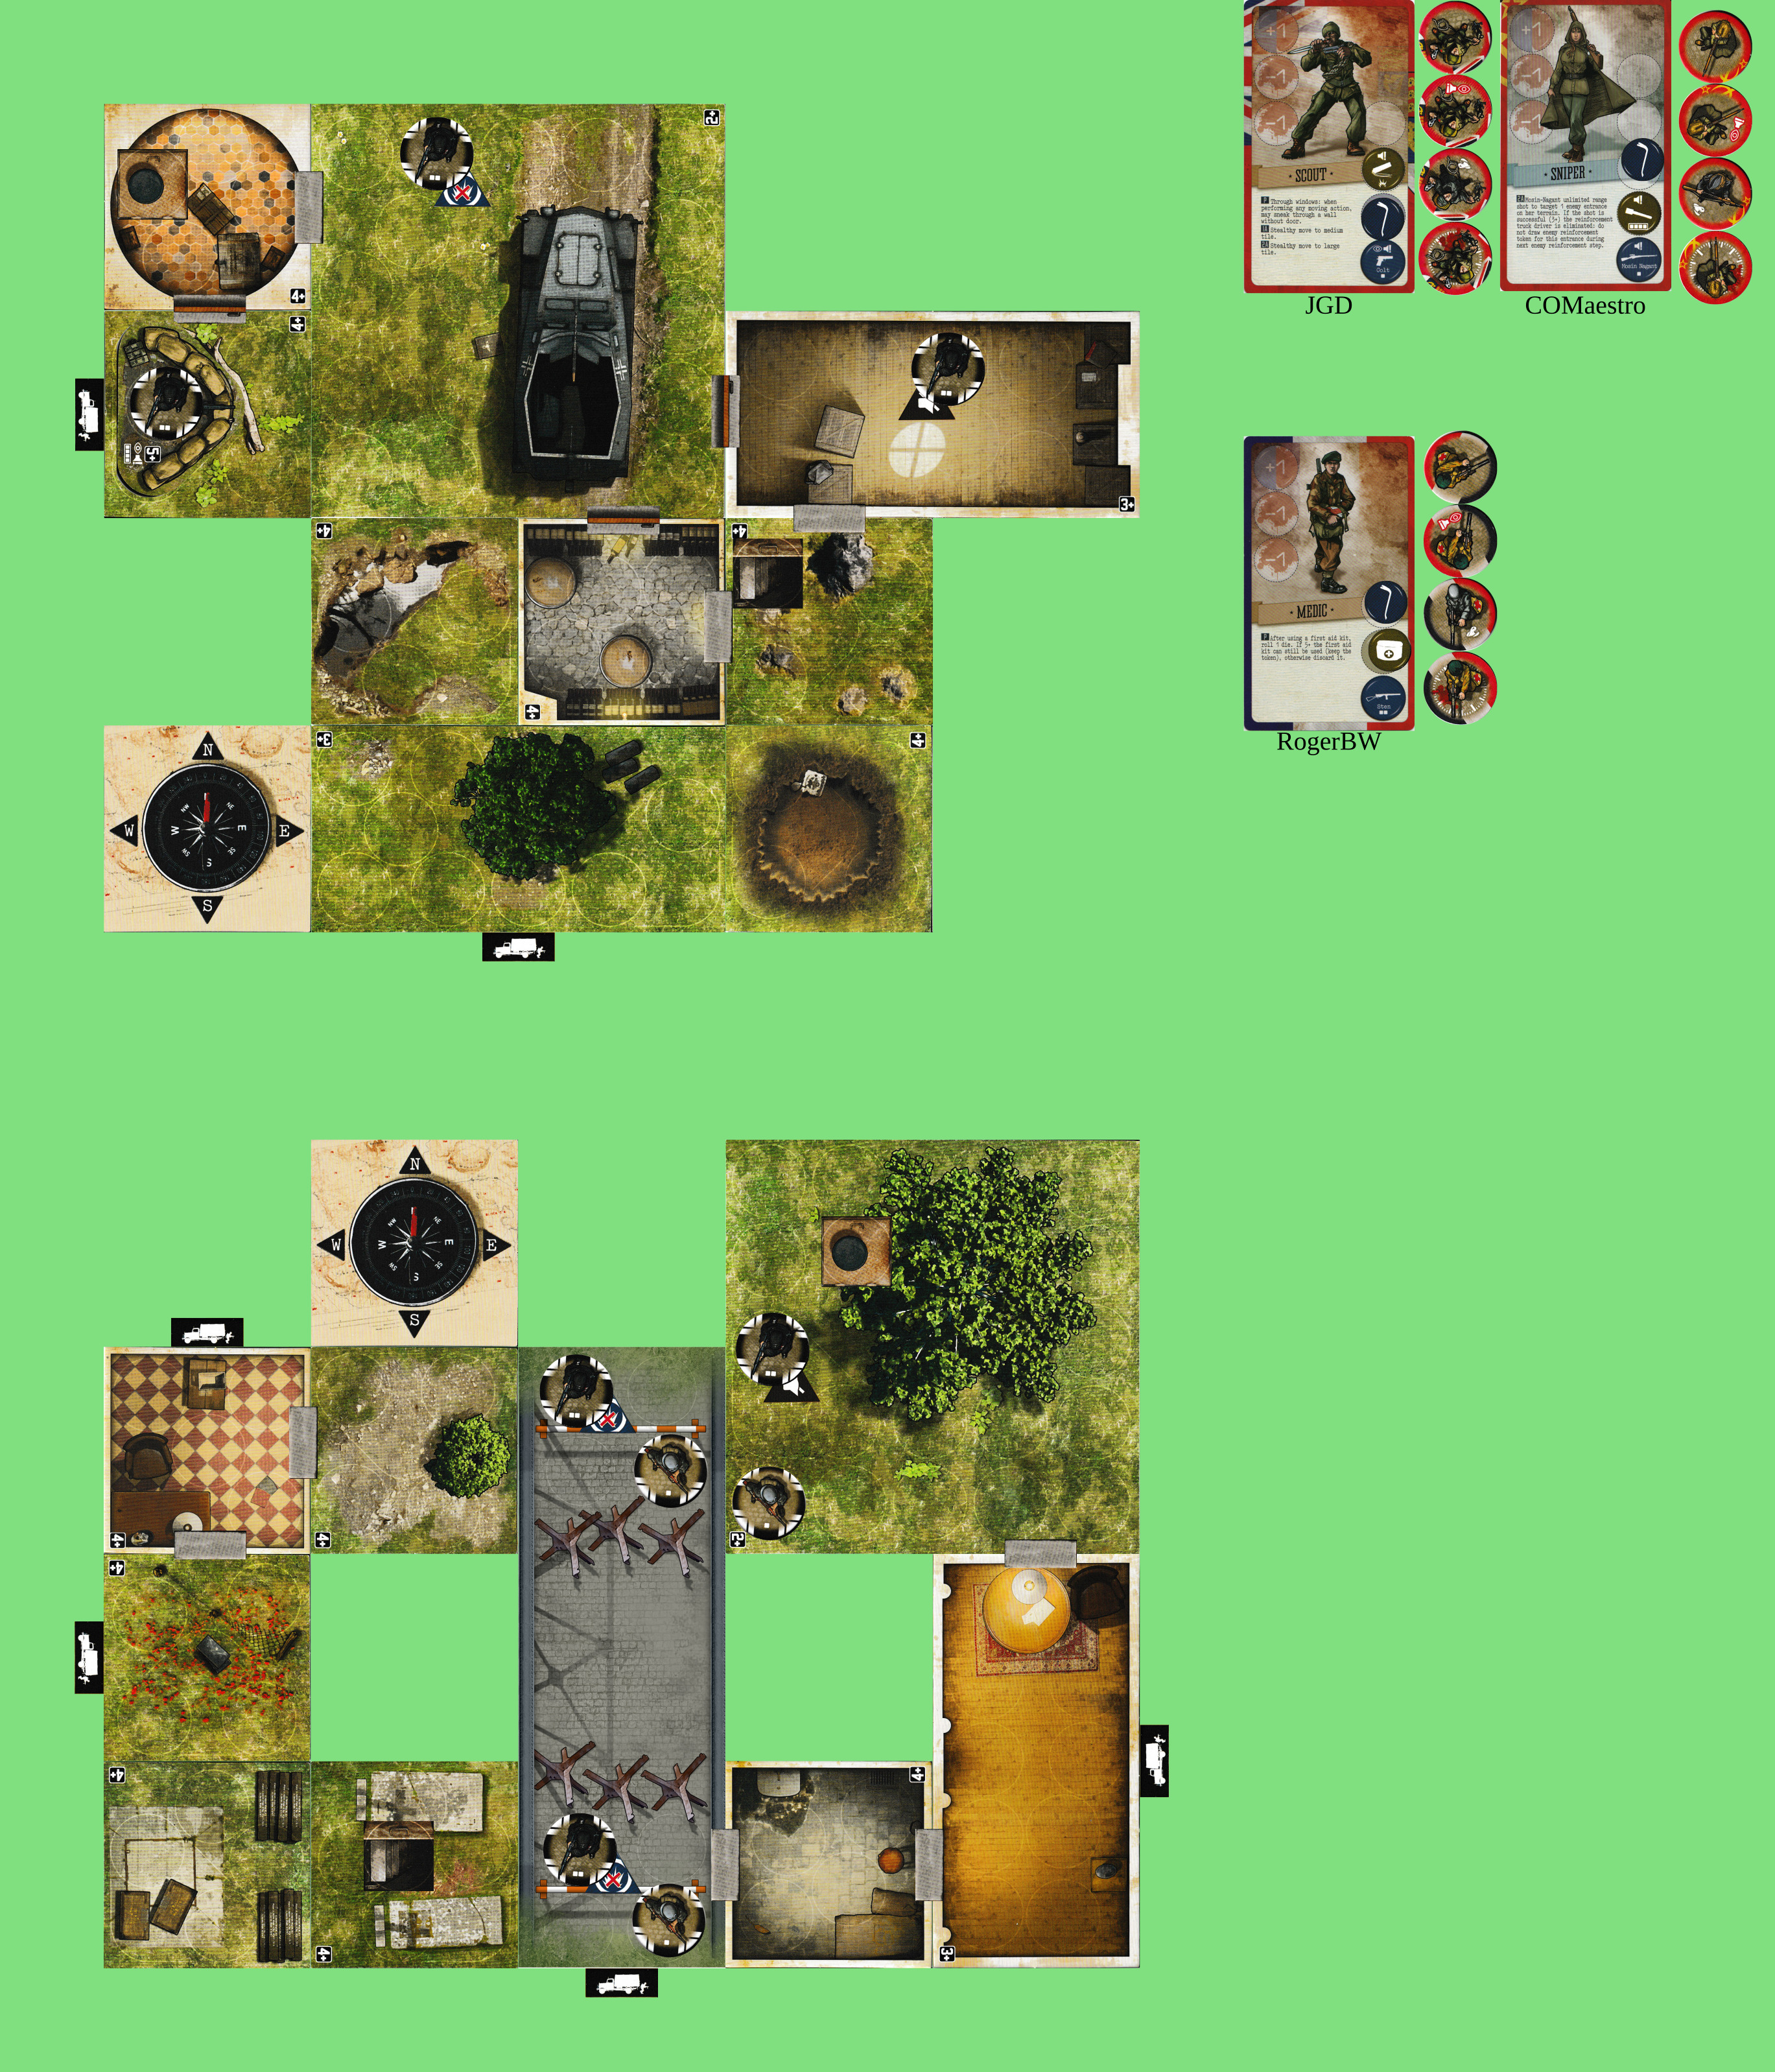
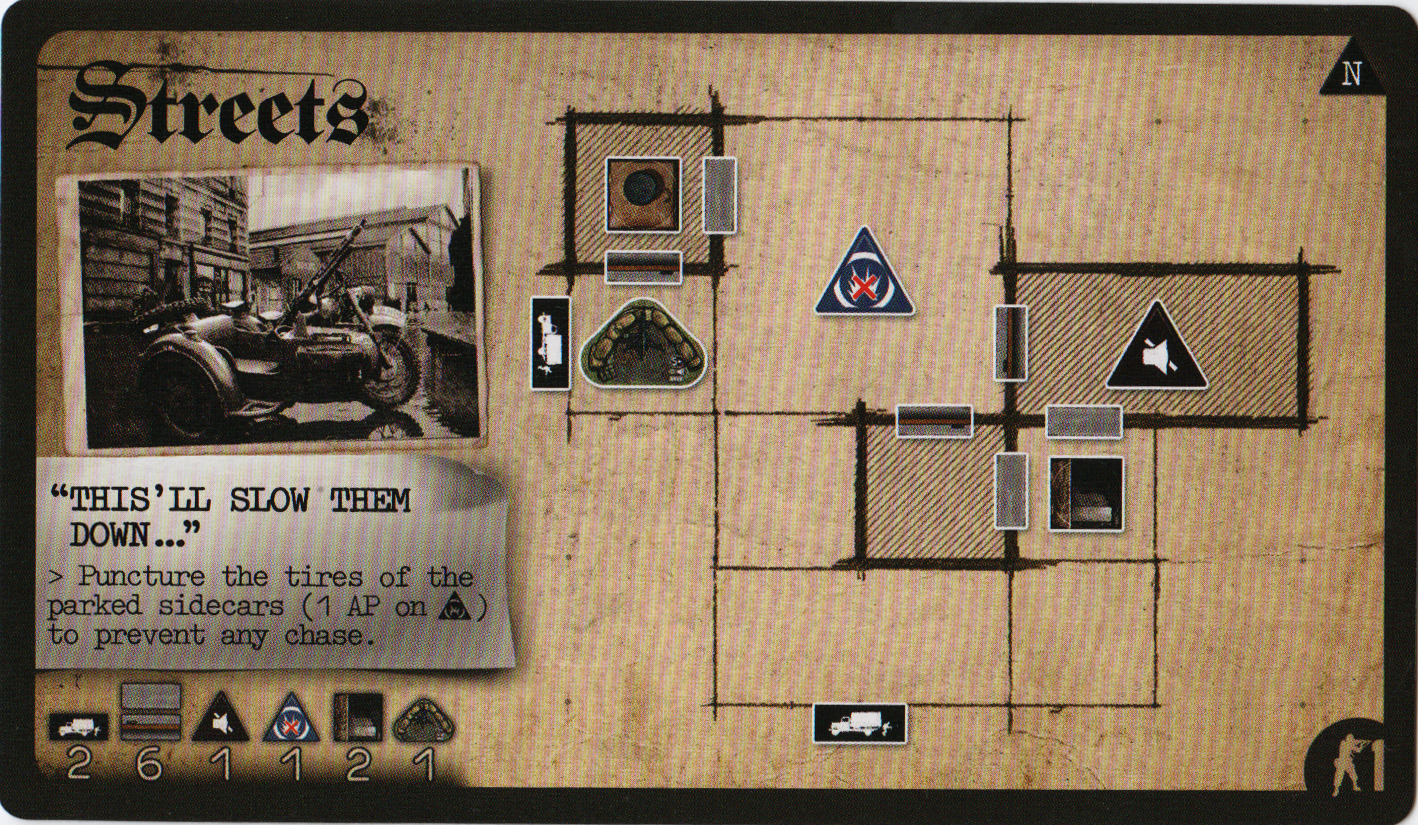
Note that “Streets” is effectively a solo mission. I’ll take last pick of commandos.
This mission definitely needs someone who can be stealthy on a large tile. I’ll take the Scout with the Colt.
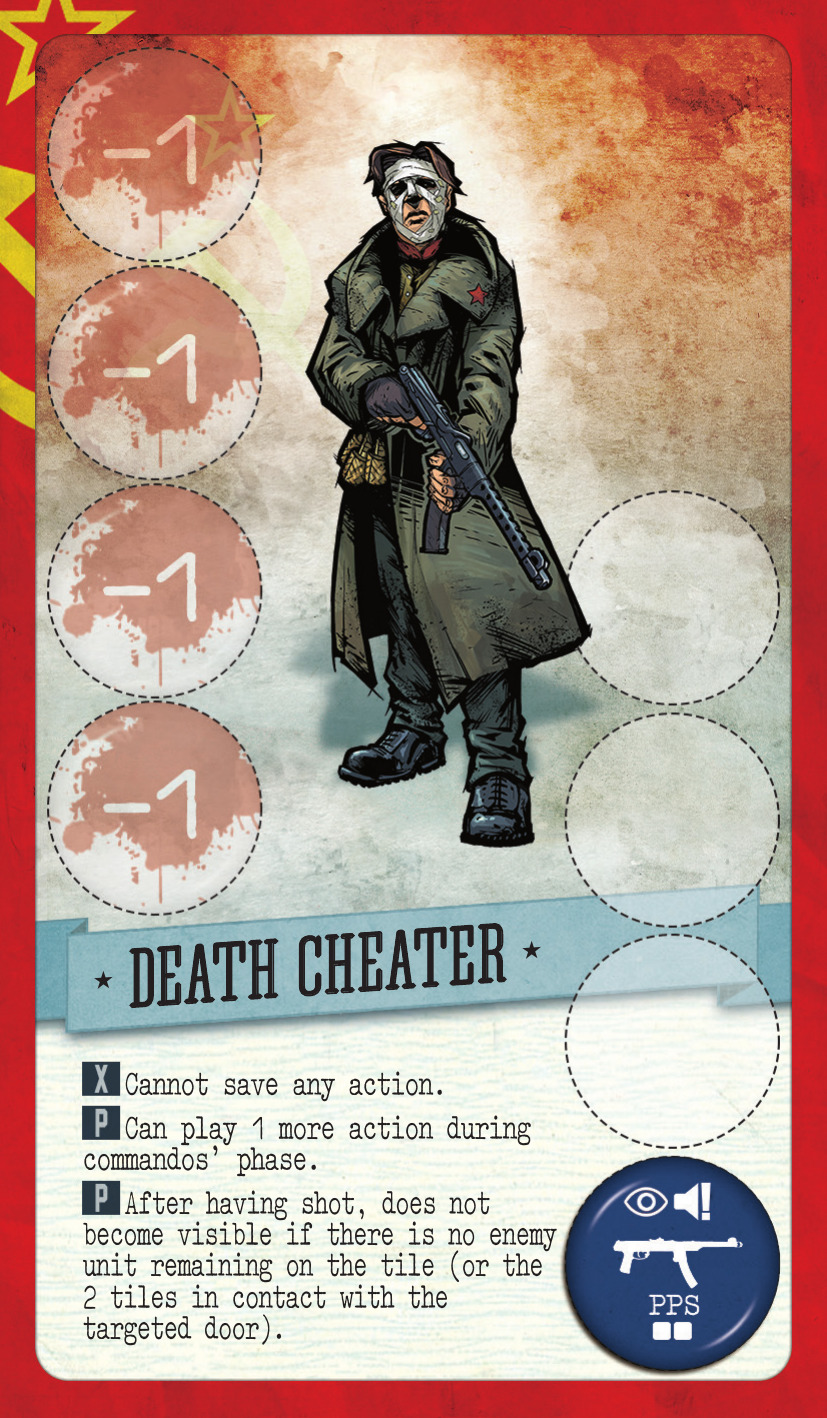
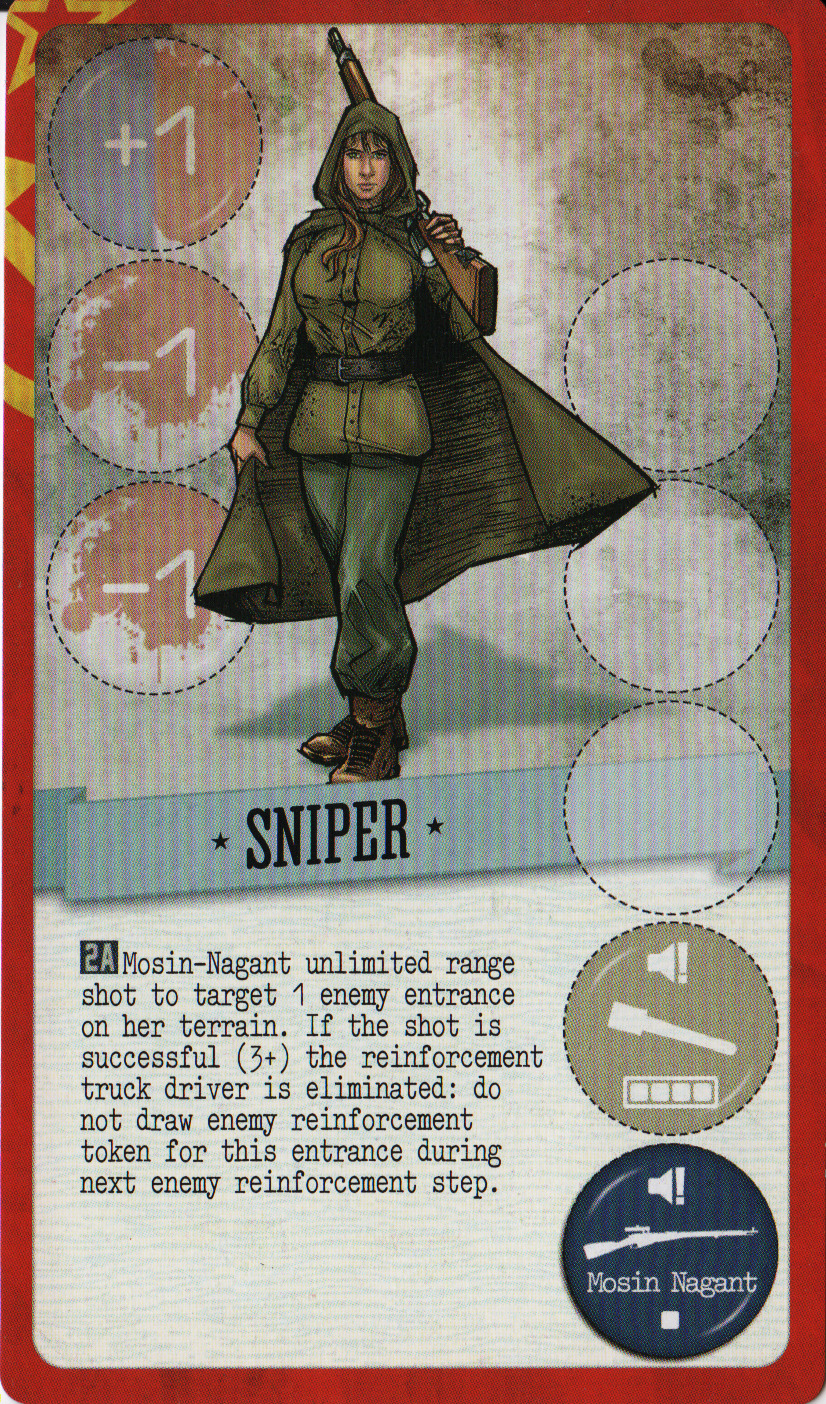
I am going to try out the Sniper that can stop reinforcements from coming in.
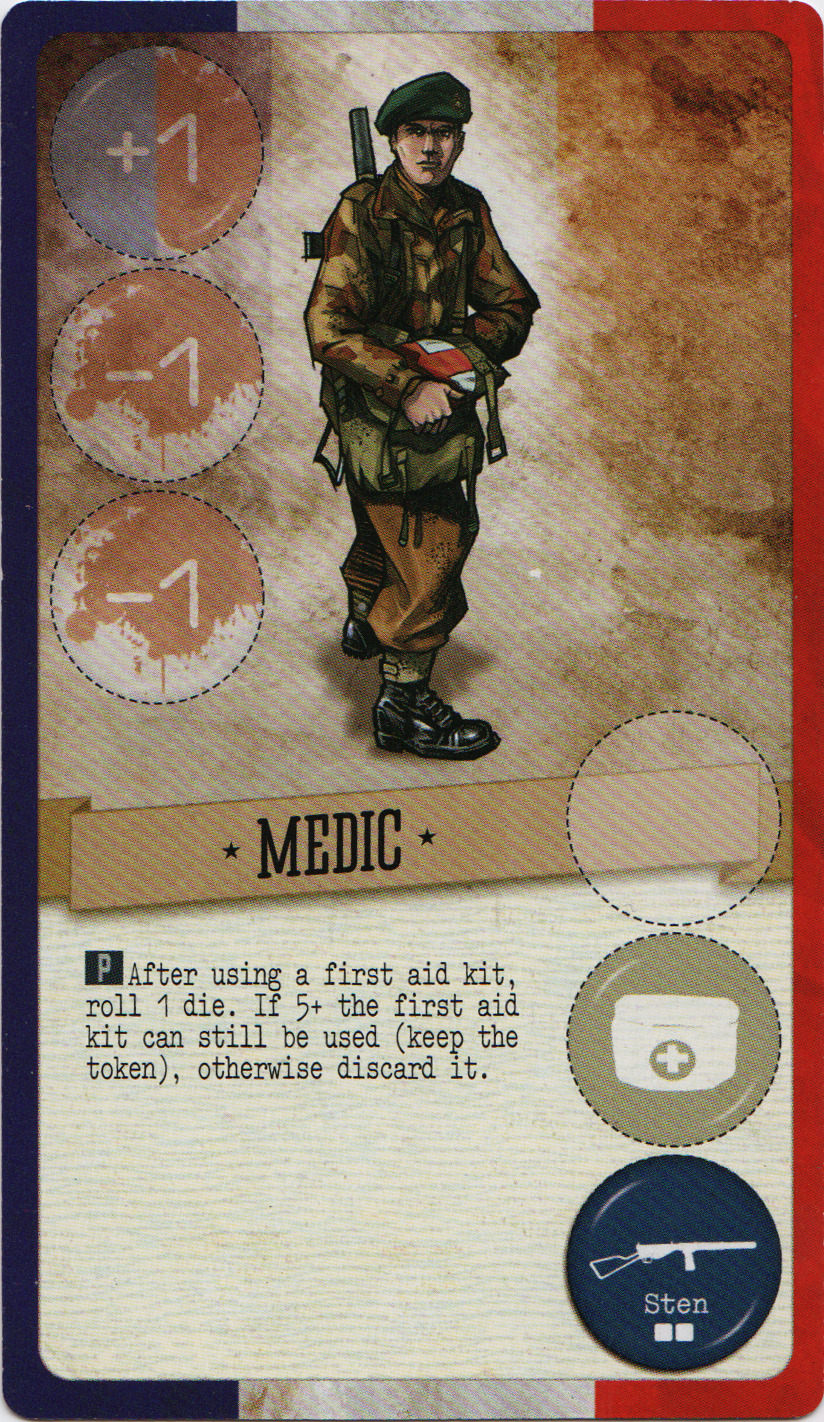
I feel an absence of silenced weapons, so I’ll go gold medic.
(building the map)
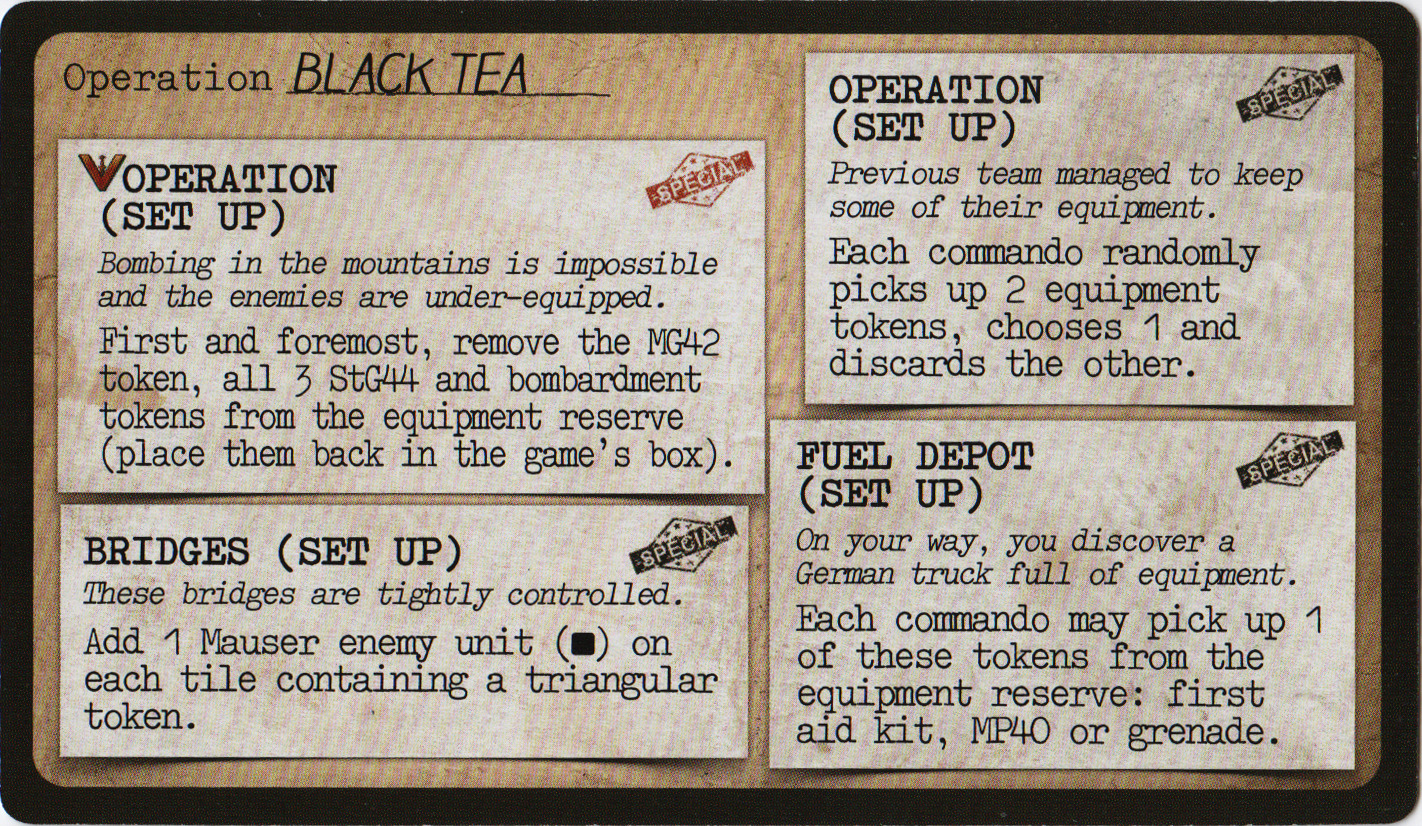
Initial equipment draws (keep one, discard the other):
I’m inclined to take the crowbar…
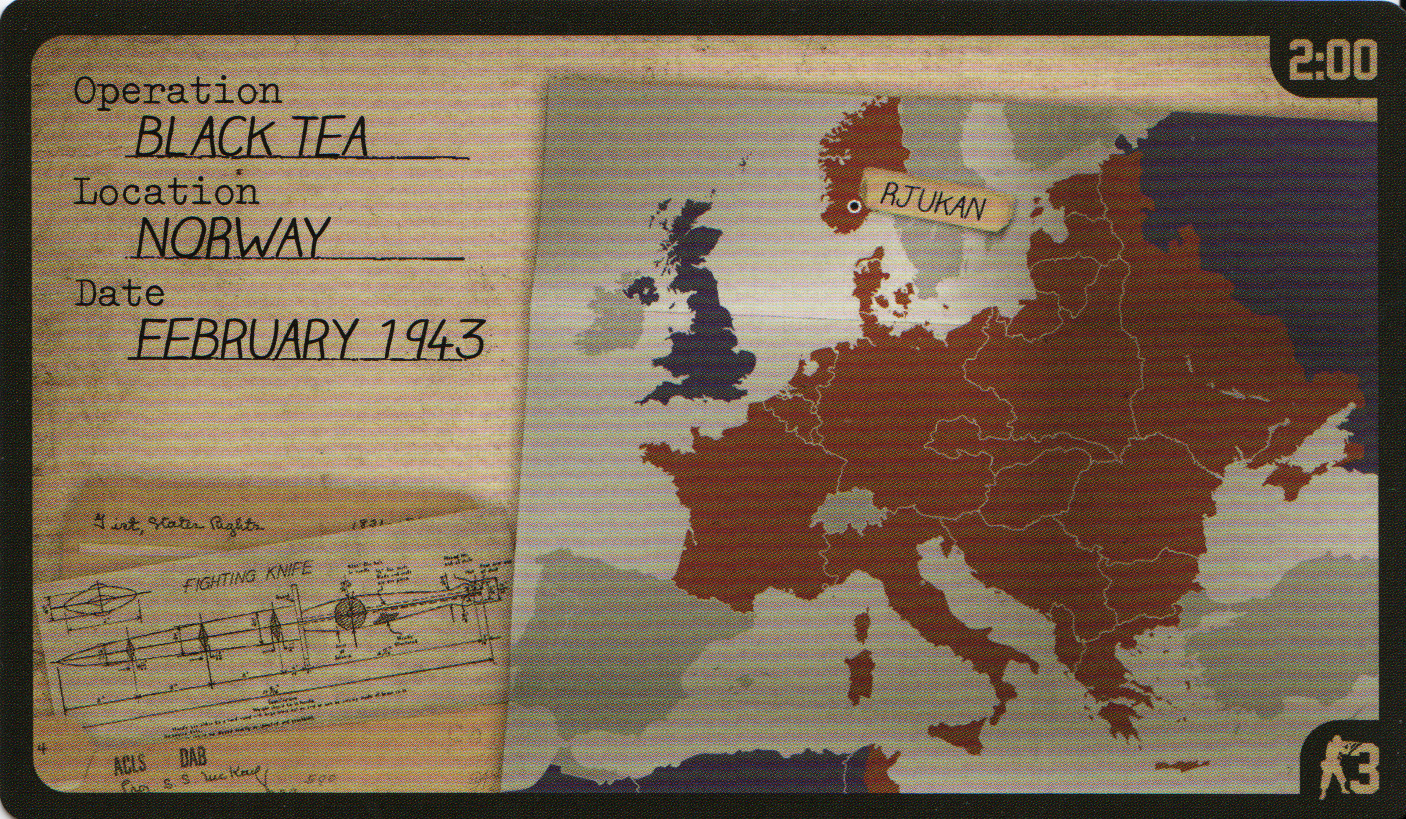
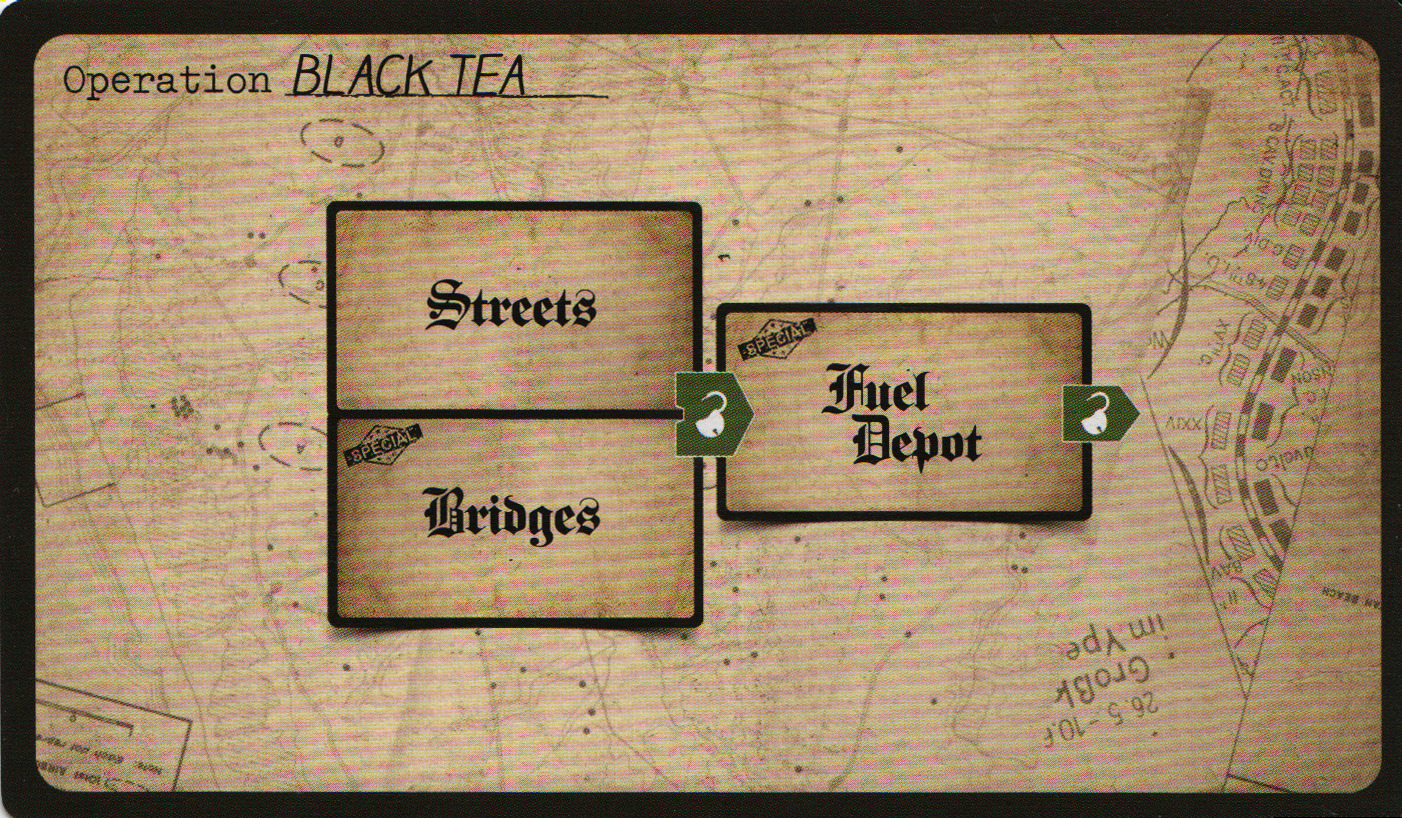
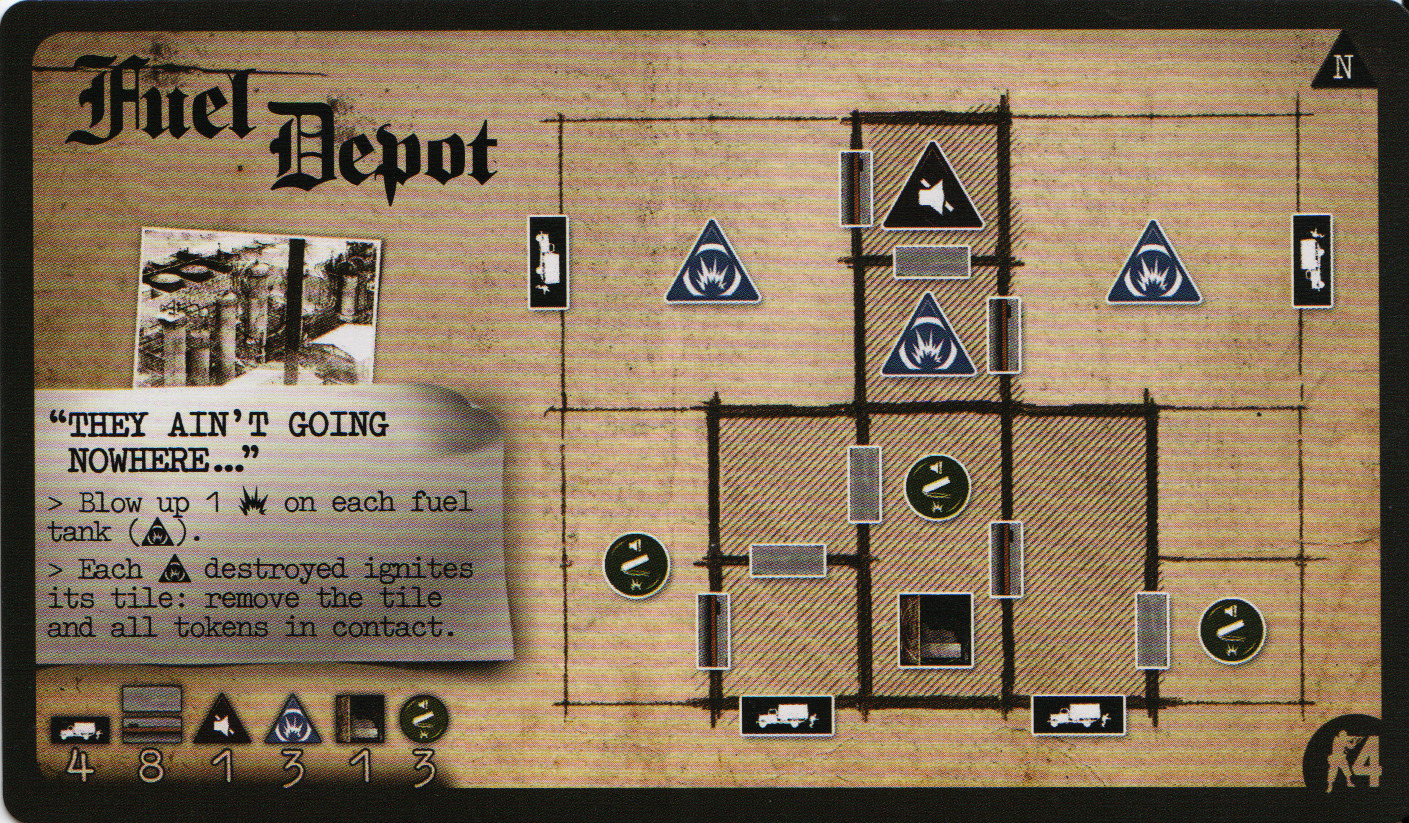
Also here’s the map. Note that the big bridge tile in the south is a promotional print-and-play thing which I’ve borrowed for this; for game purposes it is two completely separate normal small tiles at north and south, with the usual 4 spaces and 4+ to hit, and impassable terrain between.
If the Scout gets the crowbar that’s on his card irrespective of this decision, I’ll take the TNT, otherwise the crowbar.
Yes, you get your basic equipment plus one of the two items drawn.
TNT it is then.
I shall take the crowbar. Call me crazy, but I just can’t get the idea of bombing tiles where we need to diffuse bombs to jive.
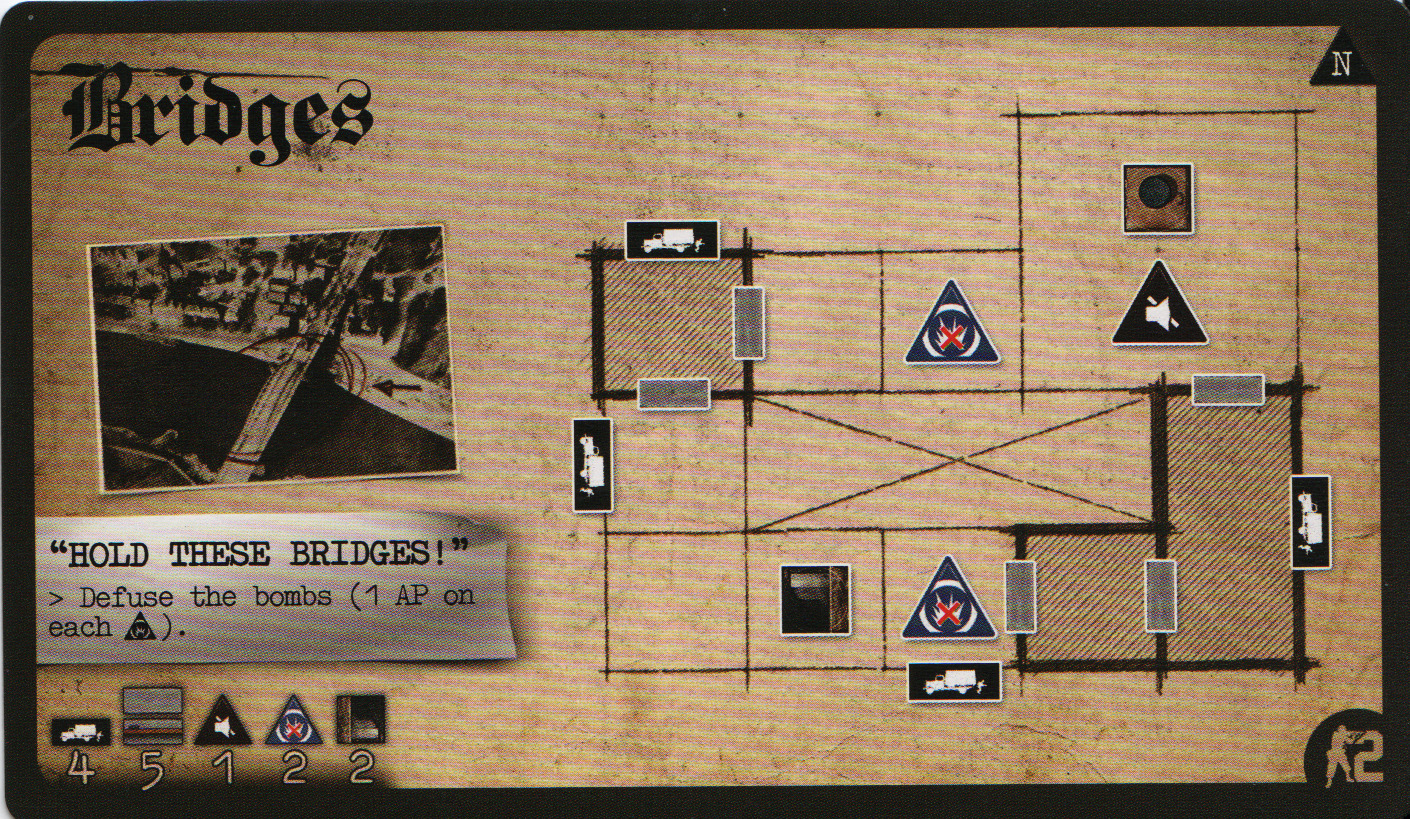
The number in the bottom right of the individual terrain card is the commando limit (1 for Streets, 2 for Bridges); if any more are on that terrain, the alarm goes off automatically. I’m guessing Scout will go north and Sniper and Medic south. The terrains stay in step with each other and mostly don’t affect each other, though you can move from one to the other by going down a trapdoor on A and next turn coming up in B.
Scout will take the north, come up, move W and save.
An idea for the south: Medic comes up, maybe shoots, saves. Sniper comes up, saves. Next turn there are two enemies in the south objective: medic shoots up to 3× then sniper goes in to get the objective and comes out again. (Assuming we don’t get a westward-moving enemy.)
Sounds good. Sniper comes up and saves.
@RogerBW asked for a die roll:
I’ll risk a shot, needing 4+.
2d6: 2 + 6 = 8
He drops an enemy uniform.
Enemy reinforcements north (S, W):
Enemy reinforcements south (N, S, E, W):
Enemy movement (E in both north and south terrains).
No enemy fire.
Use my crowbar to unlock the door to my North, retain my saved action.
@COMaestro any thoughts? Perhaps I clear out the southern bridge zone and you go in and disarm the charges? If I succeed on the first shot I might go W and shoot N, probably using the saved AP to shoot the reinforcement in case he moves south. The reinforcement coming onto the southern bridge zone should lock onto the objective unless he’s an élite.
That makes sense to me. You take out the enemy, I’ll move E, disable the bomb, pick up the enemy uniform, and then move W to return to the tile and keep my +1 AP.