Storm Above the Reich - war stories

Storm Above the Reich is a solitaire game published by GMT Games that puts you in command of an oversized Luftwaffe squadron (a Staffel) of Focke-Wulf Fw190s from early 1943 to 1945, struggling to deter the daylight bombing raids over Germany. Each mission requires you to respond to an oncoming wave of B-24 Liberator heavy bombers that fly in mutually supportive formations, which slowly evolve over time into what was known as the ‘combat box’. You have a limited pool of operation points for each mission to select aircraft, including auxiliaries and allies, and have a limited number of turns to damage and destroy as many bombers as possible whilst trying to keep your pilots alive as they challenge the formation escorts and brave the defensive fire of the bomber formation.

The game is built around a campaign system that strings missions together, with options of short, medium and long campaigns based on a number of seasons that follow the progression of the war. I’ve jumped into a short campaign, starting in early 1943 and based in the Mediterranean theatre. The season is only 6 missions long, and success is based on the cumulative number of bombers knocked out over those missions, balanced against retaining a pool of active pilots.

I thought I would keep a record of how my campaign progresses for anyone interested in following along, likely with very intermittent entries based on how frequently I seem to get games onto the table these days.

(Here’s the link to the game page on GMT Games if anyone is interested.)

5 Likes

Early 1943 – Mission 1.

My starting roster of 18 pilots (named alphabetically from Ahrens to Zick for ease of distinction) includes 4 aces (which have a skill each that helps them in play). My goal for the season is to retain a minimum of 14 pilots on my roster, whilst losing no more than 8. Victory requires an accumulated total of 20 VPs over the 6 missions, whilst scoring less than 10 VPs is a loss. VPs are awarded for causing bombers to fall out of formation, or to be destroyed, with value varying if the formation is inbound to their target location, or near/outbound from the target. This season is 6 missions long.

Play starts with setting up the mission situation. Dice are rolled to generate what type of formation the bombers are flying (which dictates the board in play), the amount of Operation Points (OP) available, whether the formation are inbound, near the target or outbound, and the flight limit (i.e. how turns before you have to break off and return to base).

For my first mission the bombers are in a proto-formation, as per the image in the first post, and they are near-target. I have only 4 OPs, and a Flight Limit of 5 turns. Clearly this is a scramble to intercept a force at the edge of my operational area. I select three pilots from my Staffel, Ahrens, Bar and Ehlers and get their Fw-190s airborne. Ahrens and Bar are two of my aces, and their extra talents might add an edge during critical moments. I also organise a pair of Italian Macchi MC202s to join my pilots, figuring five planes should hopefully compensate for the short Flight Limit. Once my force has been decided, I roll to see what sort of escorts are accompanying the bombers, and find a light screen of P-40 Kittyhawks. They are due to peel away on Turn 3, but have taken up position trailing and above the bomber formation. This is unfortunate, as it gives them the best field of view to detect oncoming threats and makes them more responsive to the presence of my fighters.

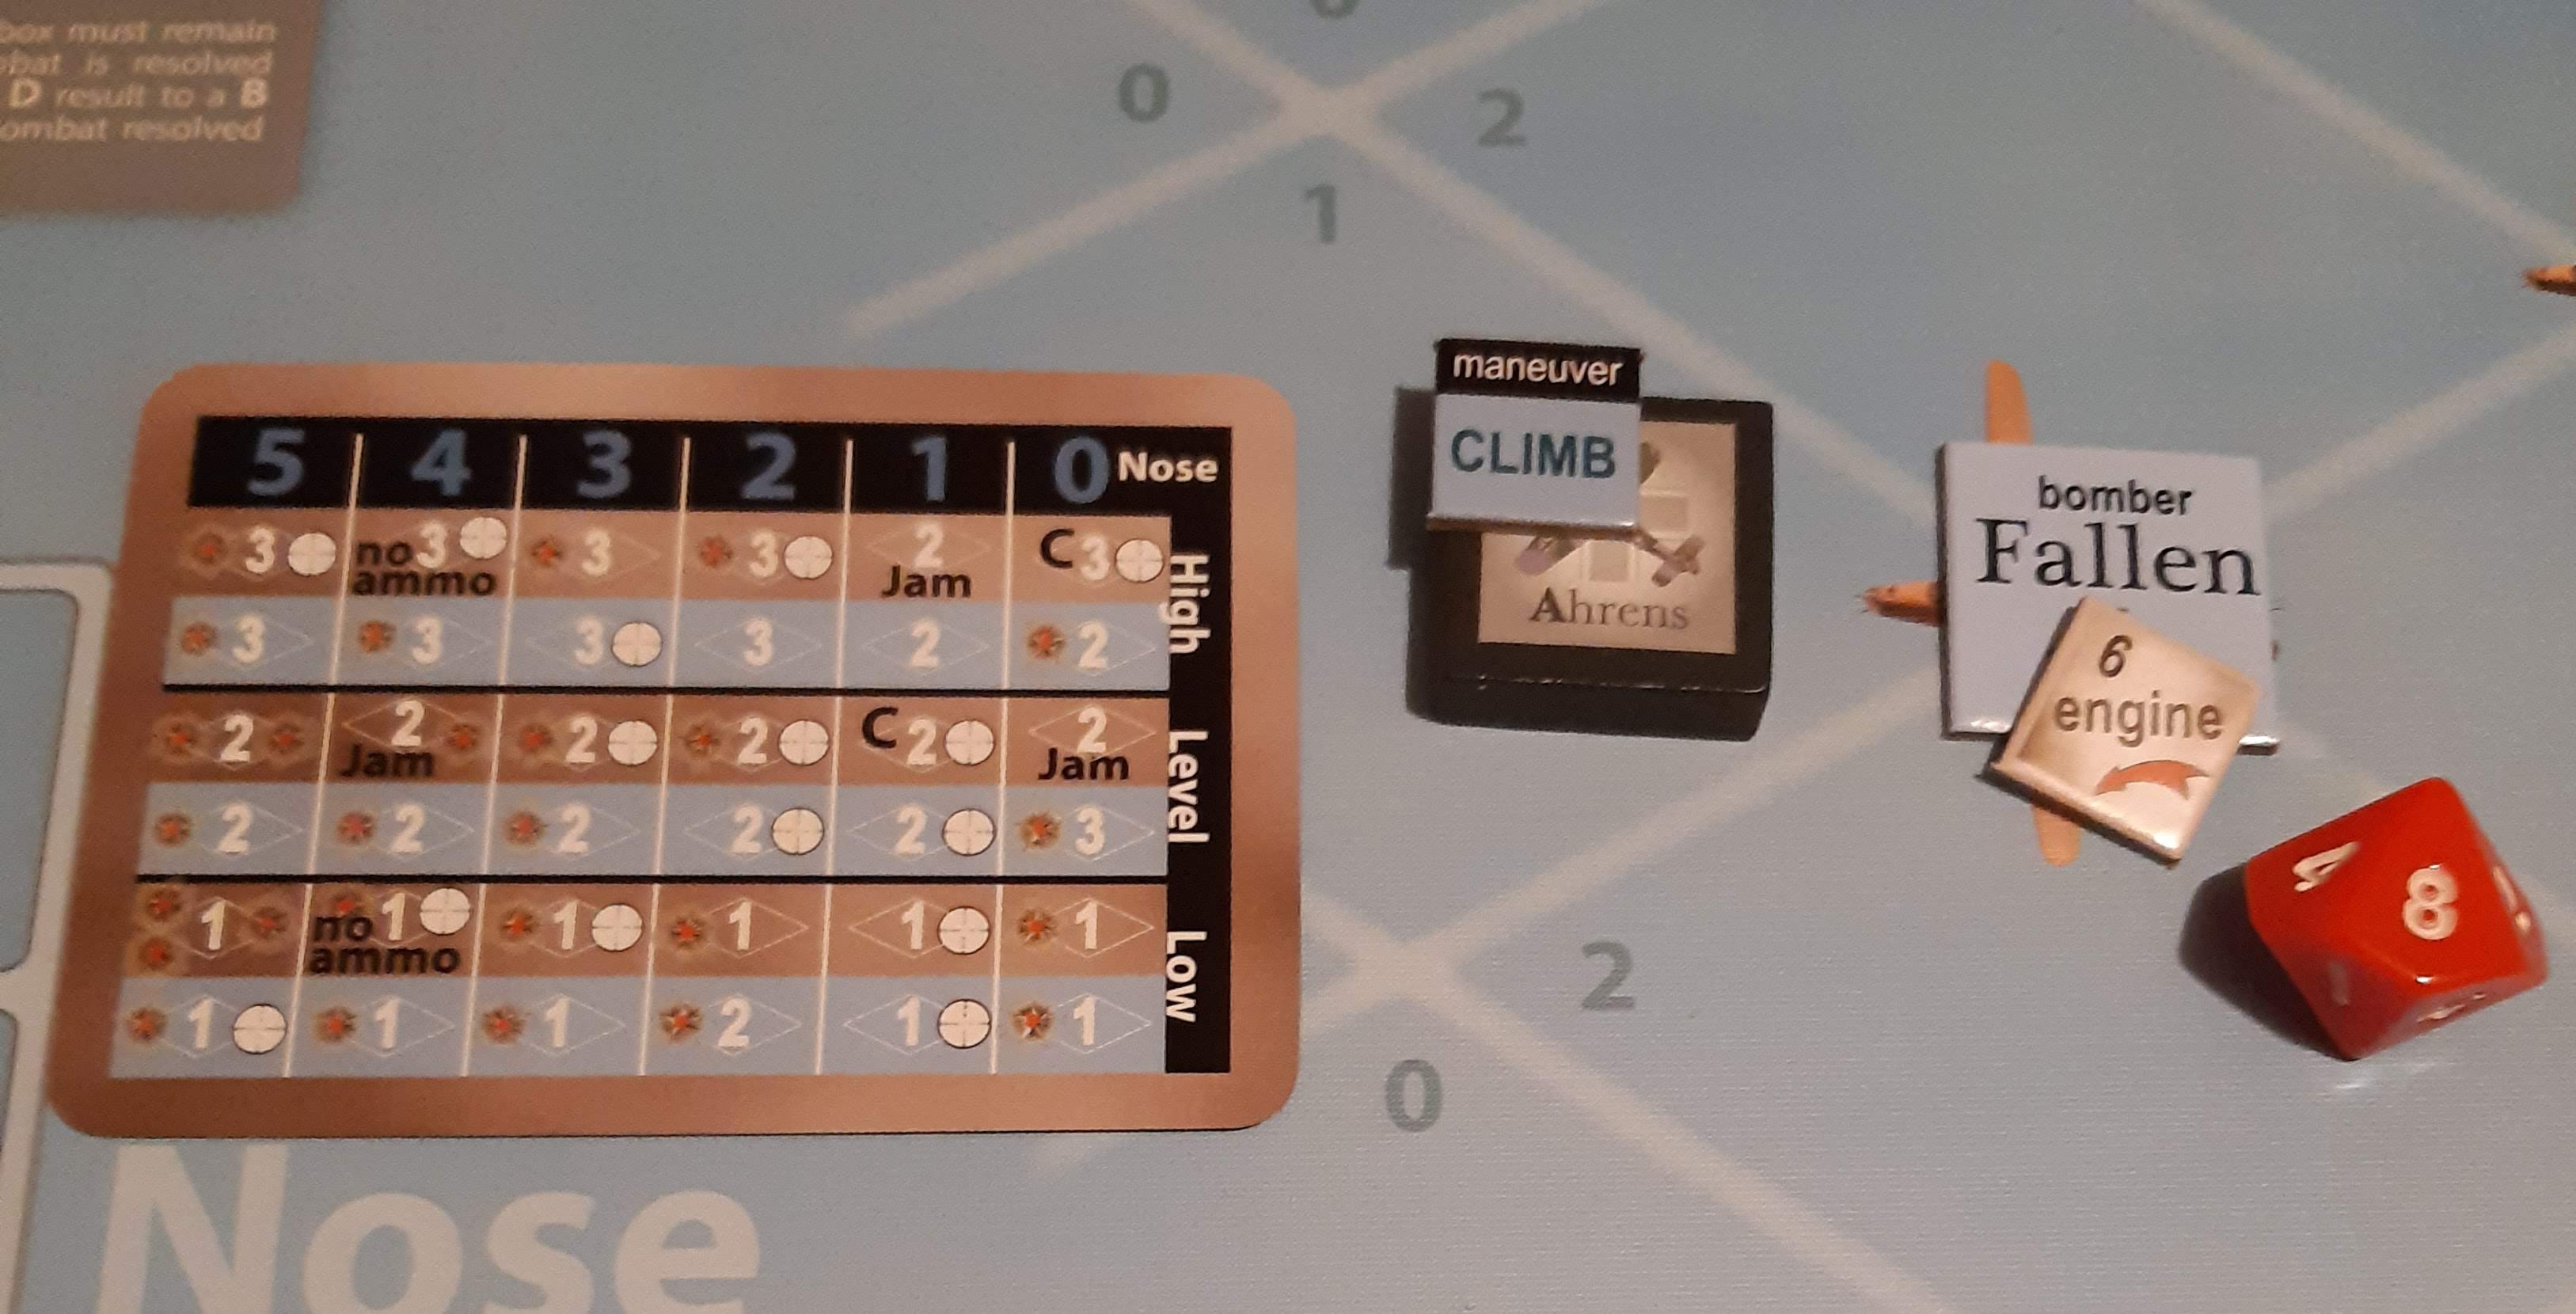
I ponder my options. Fighters enter the map at low altitude from any of four sectors – the nose, tail or on either flank of the formation. The sun is high on the flank of the formation in the 2-4 O’clock position, which gives some defensive advantages to any fighter approaching from that angle. It takes a few turns for fighters to gain altitude or to move around to alternate approach sectors. Tactical Point (TP) can be used to help shift planes around faster. These are rolled for during set-up, and I managed to get only a single TP. That combined with the 5 turn Flight Limit effectively means I can either get one pass with time spent to co-ordinate approaches and to get better height advantages, or I can rush in early and maybe come around again for a second pass. I decide to go for the former- Ahrens starts low on the flank at the 2-4 O’clock, intending to climb him high to make use of the sun. Ehlers and Bar are on the other flank at formation’s 8-10 O’clock. The two MC202s enter tailing the formation.

Before any plan can come together, the escorts quickly interfere, with the Kittyhawks swooping down onto the MC202s from their tailing-above station. They force one MC202 to break-away, but manage to shoot the second one down, with the pilot failing to bail out. Not an auspicious start – one turn in, and I’ve lost 40% of my fighters! One escort has exited after the MC202 who was forced away, the rest peel back to trailing below the formation.

The next couple of turns are comparatively uneventful. My Fw-109s gain altitude, moving to level with the formation, and then higher than the bombers. The escorts switch station, heading back to trailing above, but thankfully have to exit before they have the chance to take any further actions.

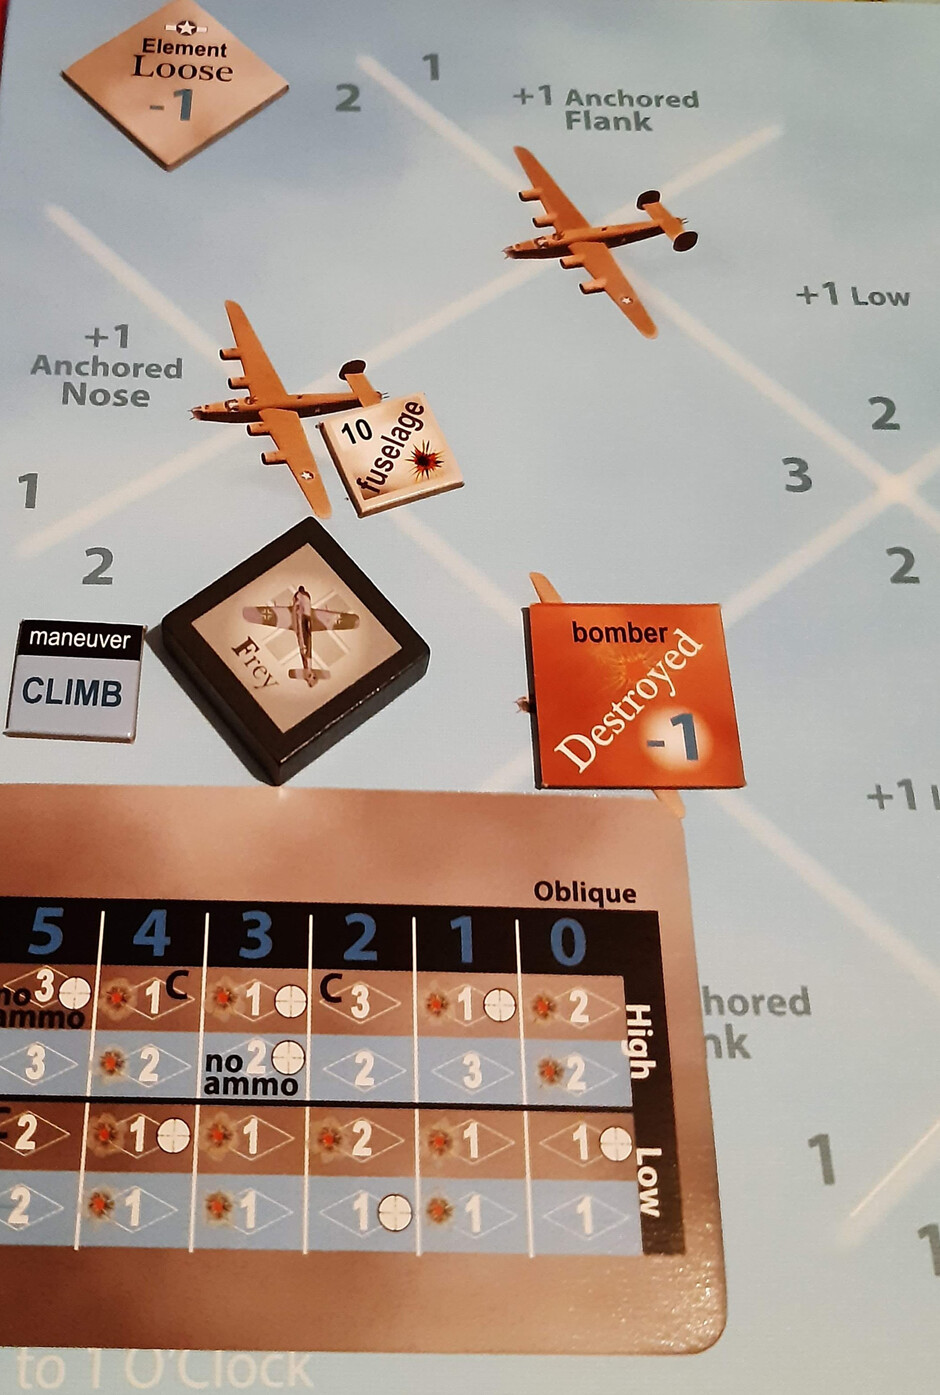
Turn 4 sees my three Fw-109 move into the approach boxes, ready to make a pass on the bomber formation. As the formation is near the target, they have been hit with flak every turn, causing some damage on a pair of bombers at the outer edge towards the 8-10 O’clock. The accumulation of damage has not been enough to knock them out completely, but it has caused the formation to first lose cohesion, and then fall apart entirely. These leaves these damaged bombers potentially vulnerable, and certainly a less dangerous proposition to attack.

(Mechanically each turn you roll a dice against the number of markers within a formation element; if you roll low, you get to add ‘loosen’ and then ‘kaput’ formation token, which modifies the lethality of the defensive fire from the bombers).

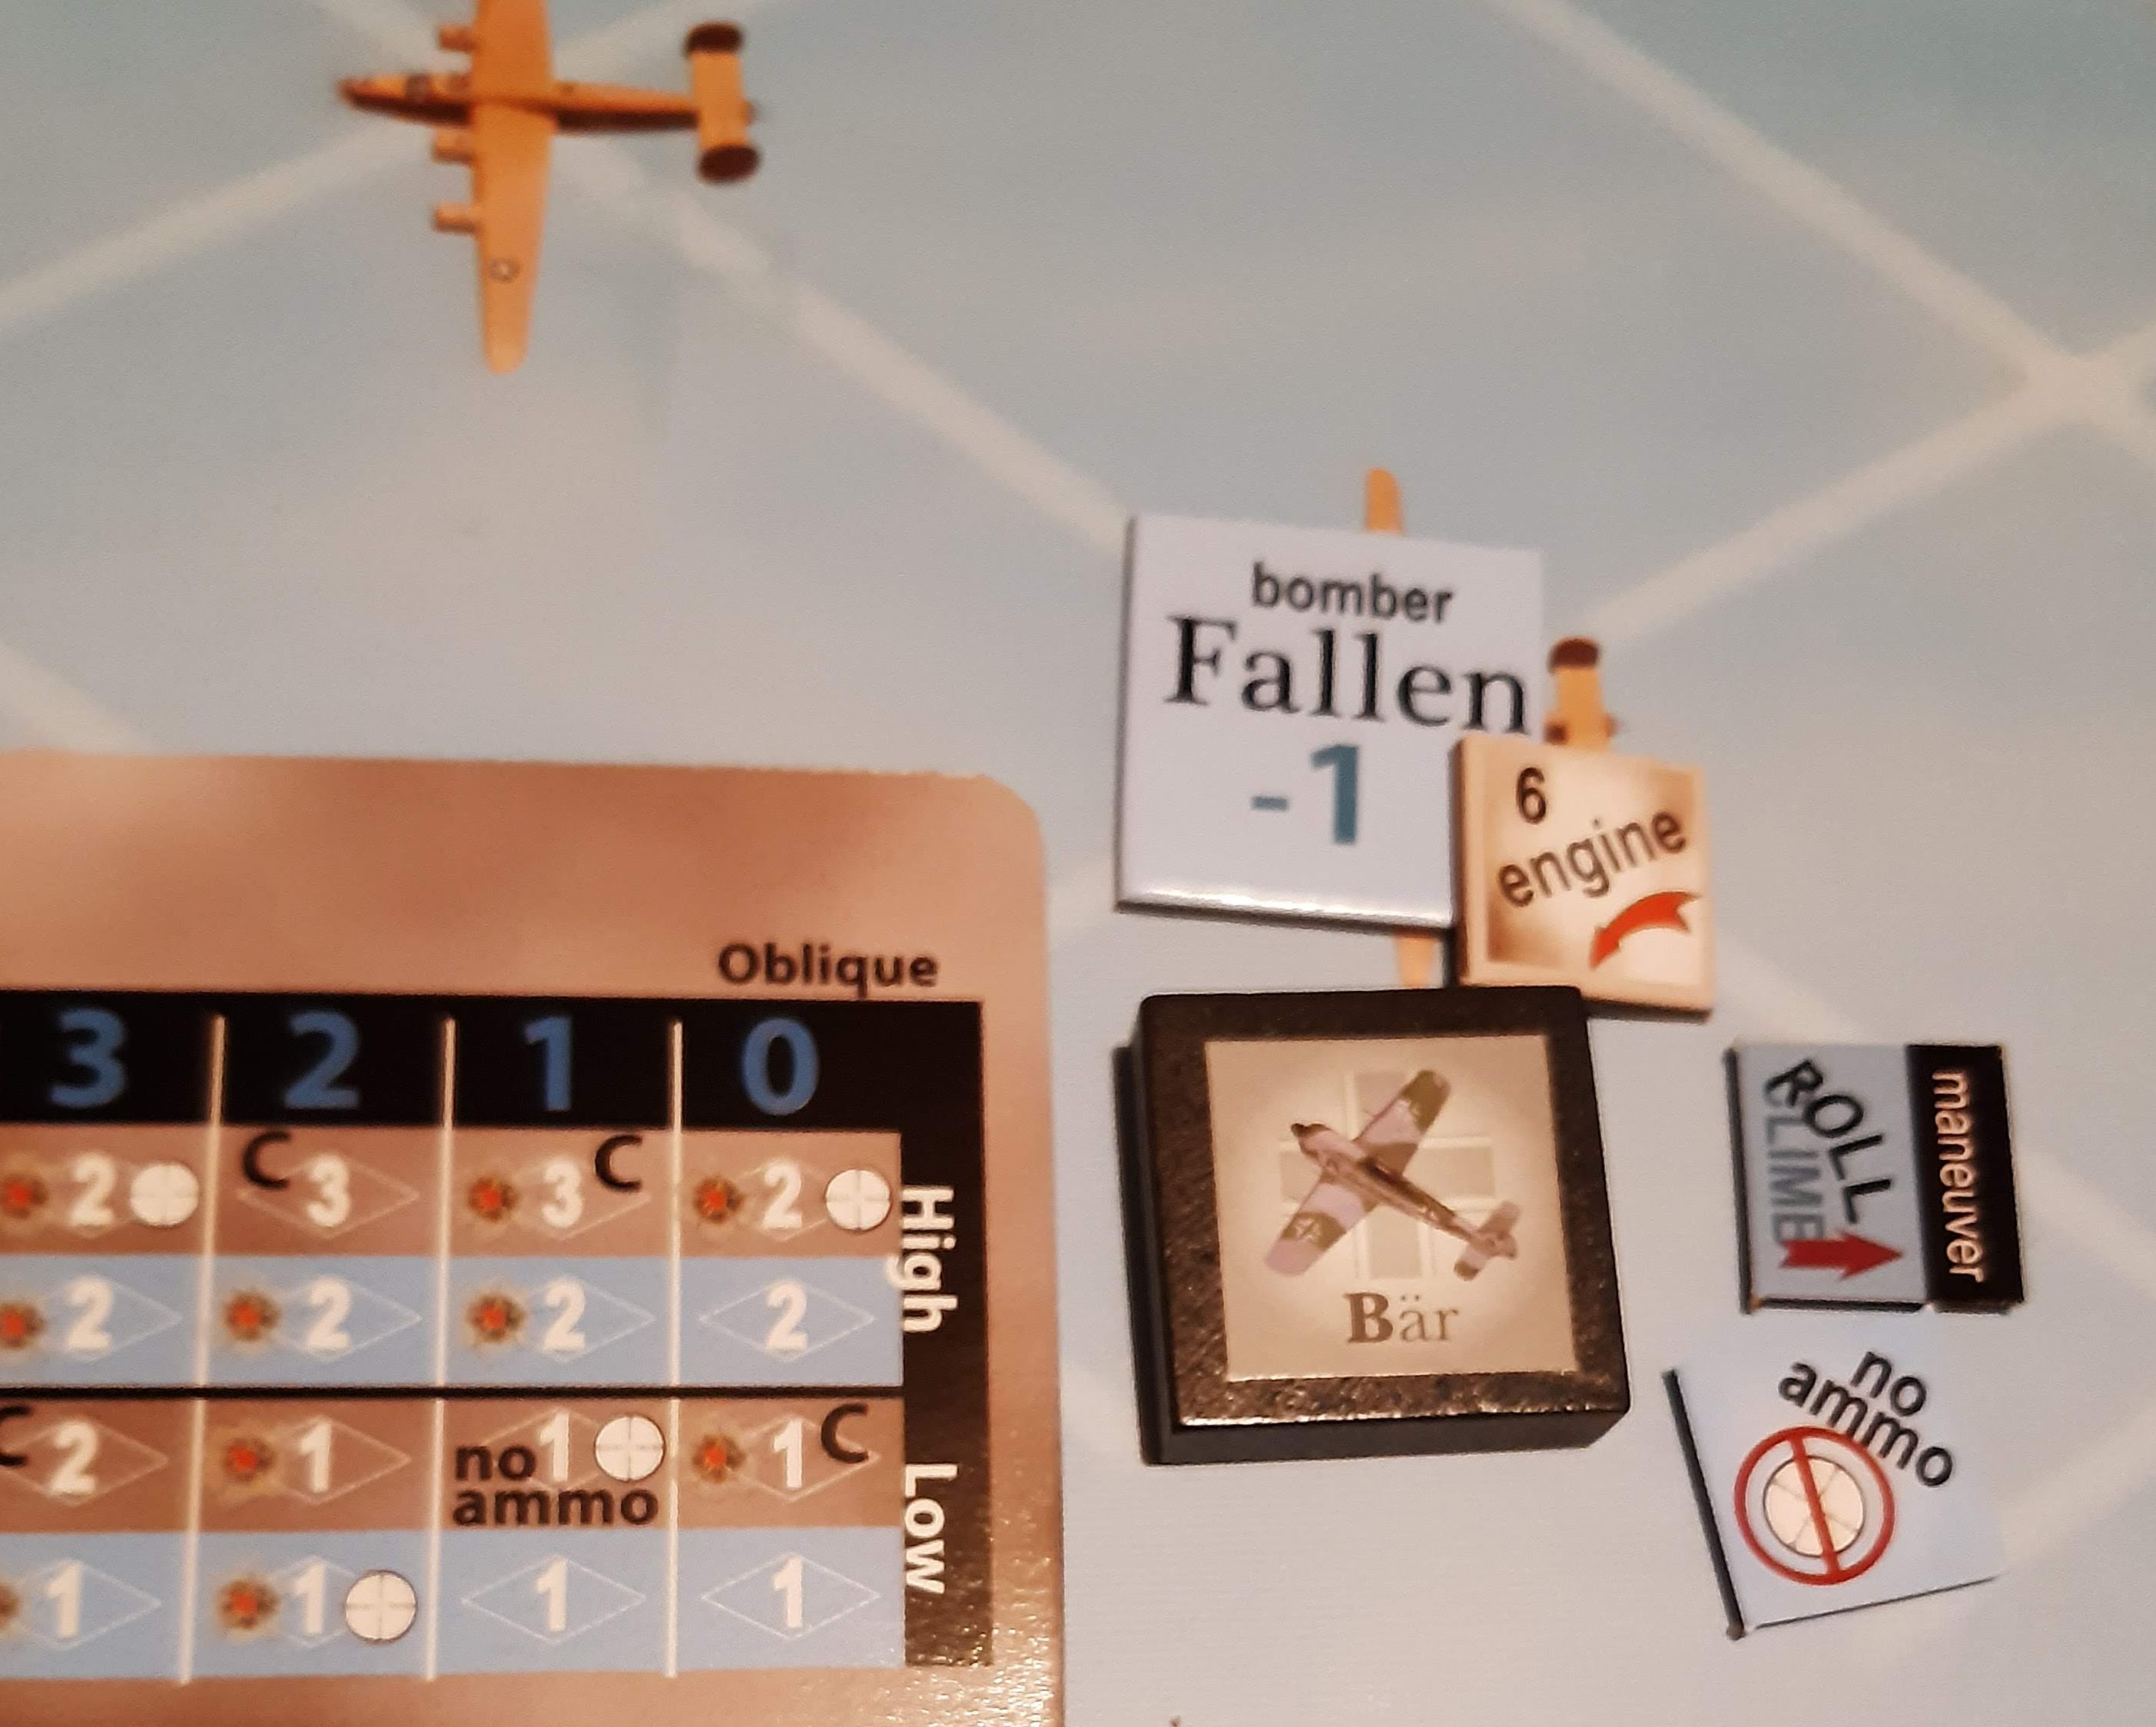
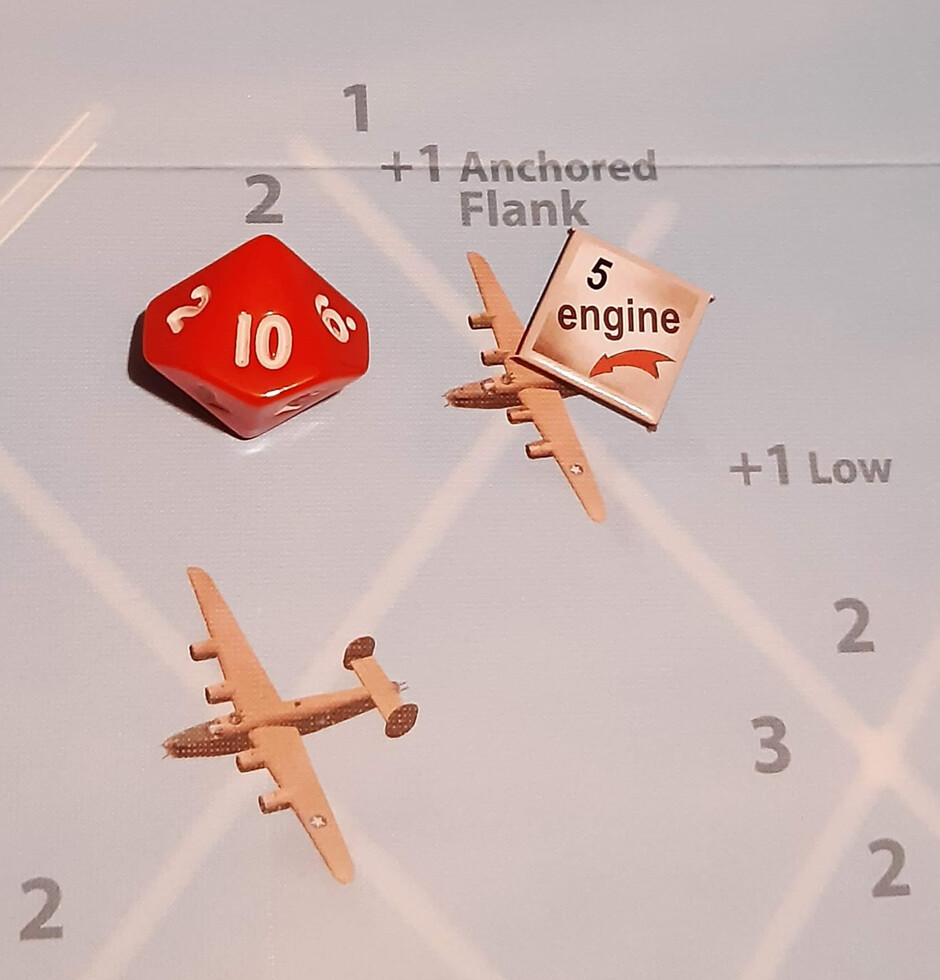
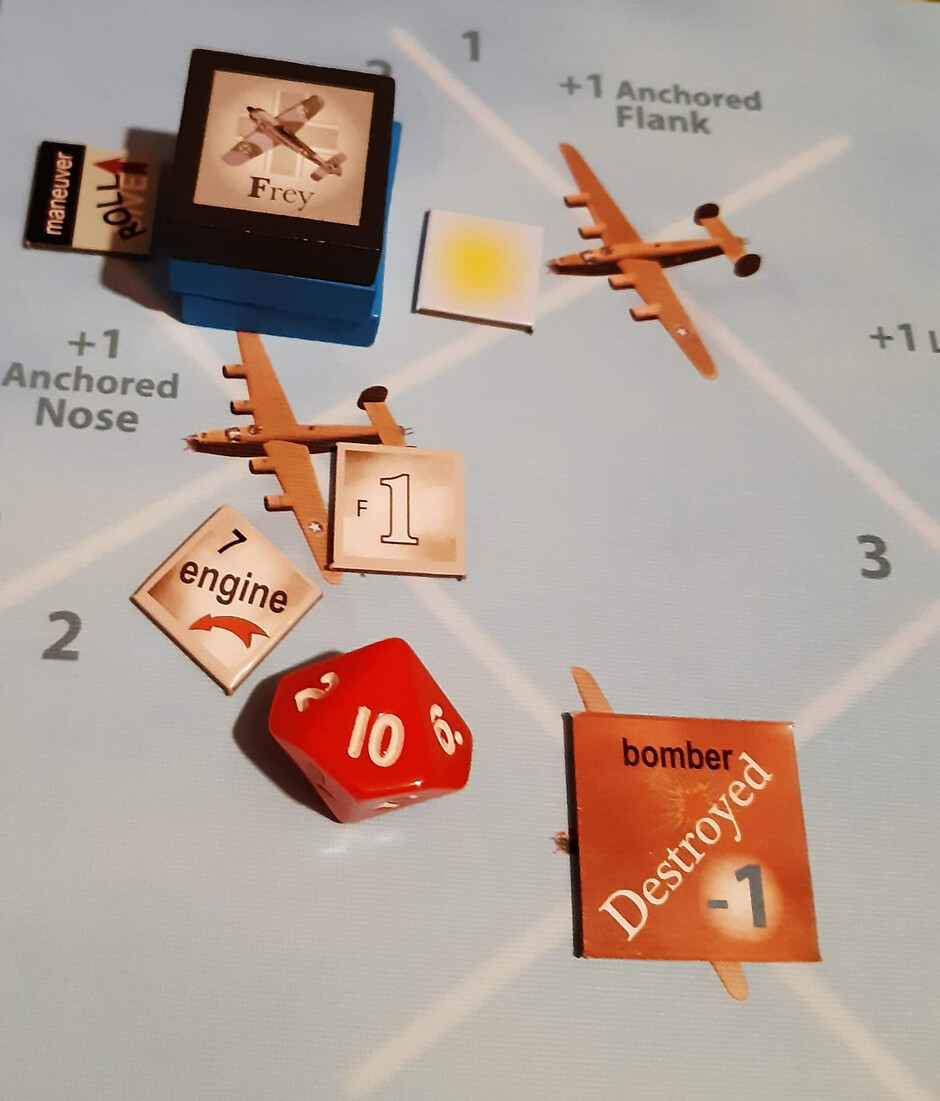
By chance, turn 4 also heralded a cessation in the flak barrage, so there is no danger to my approaching fighters from friendly fire. A lucky roll, but it seems like carefully planned co-ordination. I move my fighters onto the map around the damaged bombers, Ehlers and Ahrens attacking one B-24 from either side, both swooping down from high, whilst Bar makes a lone run on the second bomber. I messed up a bit here, losing a chance to get some attacking advantage by having fighters target a single bomber from different altitudes and approaches – everyone is coming in from high. Something to remember for the future.

Fighters select a manoeuvre to show where the are heading after they pass, being either a dive or a climb that passes straight ahead, or with a roll veer either left or right. They also choose a mode, whether they are determined or evasive (the former typically causing more damage, the latter avoiding return fire). Since this one pass is all that can be achieved this mission, everyone goes in determined. Attacks are resolved by drawing a card and reading a table that compares the lethality of bomber defensive fire, the height of the fighter, and their mode. Ehlers fails to cause any damage at all, and is forced to breakaway due to an unlucky draw, whilst Ahrens hits the bomber, but fails to cause any catastrophic damage. Bar likewise punches some holes along the bomber’s fuselage, but hits nothing vital, and there is not enough accumulated damage to destroy the bomber either. So it appears to have been a very ineffective mission as the fighters pass over their targets.

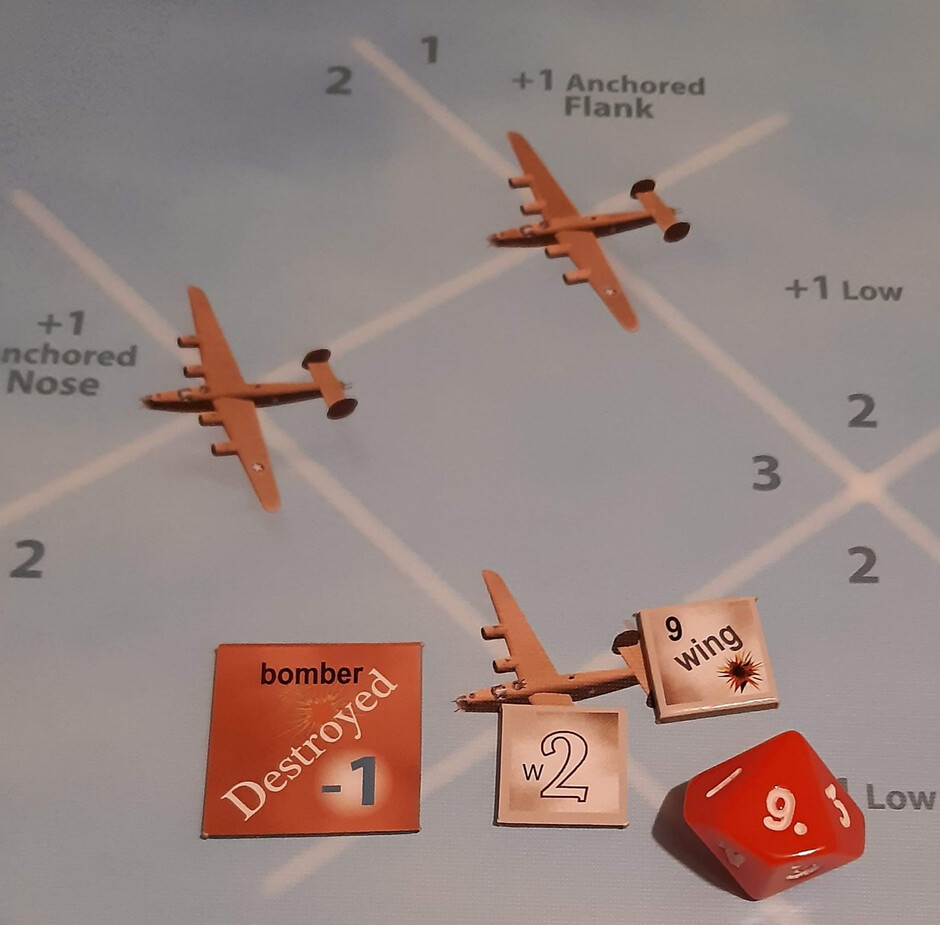
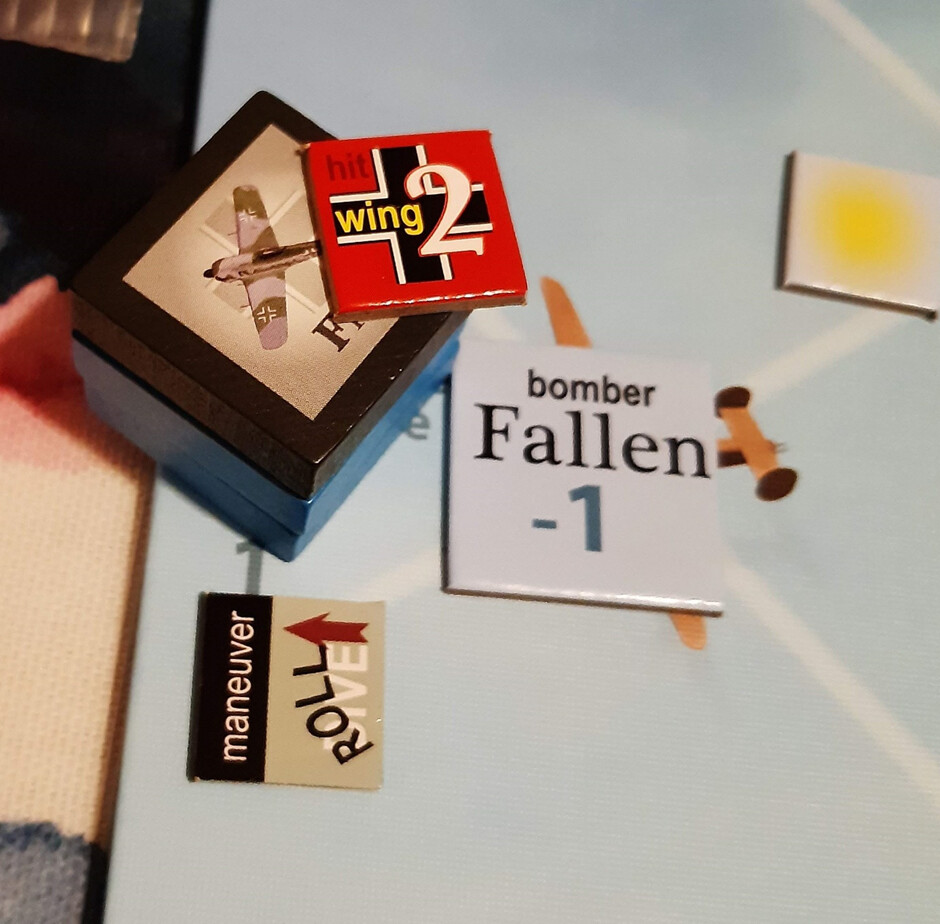
However, once an attack runs have been resolved, Continuing Fire cards are drawn. These represent some random events and the defensive fire tracking after the fighters as they break away after their approach. I get some lucky draws – Bar pulls a card with a Debris event; there something in the air that collides with either the fighter or the nearest bomber depending on a dice roll. Fortunately, it is the bomber that is battered by debris, and this causes a catastrophic hit, destroying the bomber. Bar sneakily claims the kill. Ahrens gets a ‘Strafing’ event, which allows an ace to potentially add more damage to a nearby bomber. He ends up holing the second bomber’s wing, and it falls out of formation.

The three fighters regroup. Bar has some hits as a result of his card draws, but they are found to be trivial damage. There’s not enough flight time left for the fighters to swing around for another approach, so the mission ends with 1 bomber destroyed, and 1 bomber fallen, to the cost of a lost MC202.

As the bombers were near target, I score 1 VP for the fallen bomber and 1 VP for the destroyed bomber. 2 VPs in total, which doesn’t seem like much. Ahrens and Bar gain some experience for their kills, as does the Staffel as a whole. Unfortunately the lost MC202 means I lose some Staffel experience, and 1 OP for the next mission. My roster of Fw-190 pilots is still full though, which is definitely a good thing. I get the sense I may have to balance up risk and reward more frequently as the season progresses - keeping pilots alive is all well and good, but not if I fail to take down more bombers.

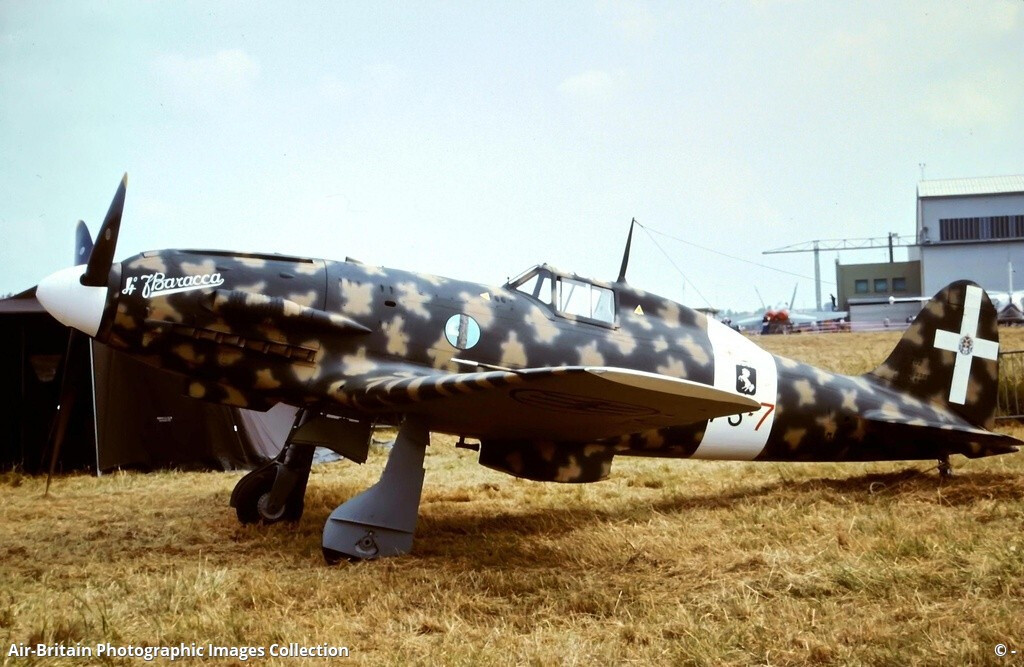
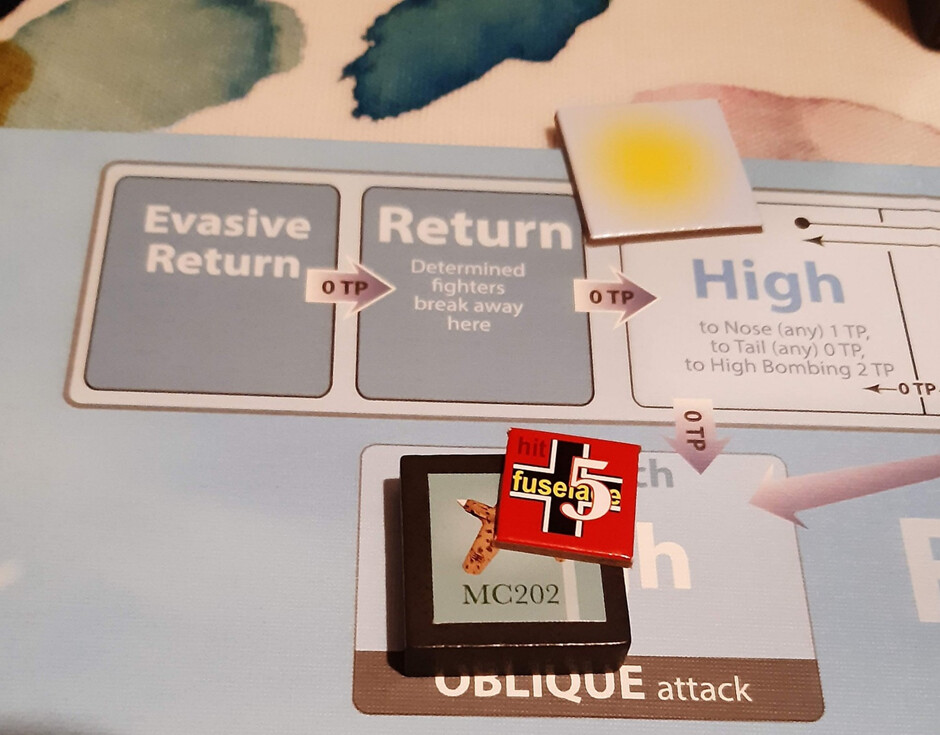
(Completely forgot to take any pictures during this mission – there will be some next time around! Here’s a MC202 to look at alongside the wall of text.)

2 Likes

I don’t know what the German rules were, but on the Allied side, if you fired at an aircraft and it later exploded/crashed/etc., you got credit for the kill. But you did have to fire the gun.

2 Likes

For game EP purposes, it is only the pilot that lands the killing blow that gets the credit. But I figured thematically Bar would take the credit, as his attack run would likely have caused the pilot to collide with the debris.

2 Likes

Early 1943 – Mission 2.

The situation for the second mission is somewhat similar to the first. This time the bomber formation is to be intercepted inbound to the target, so there will be no flak fire, and the escorts will likely linger for longer. I have a Flight Time of 7 turns, and 4 OPs to spend. However, that is reduced to 3 OPs due to the lost MC202 from the last mission. I order Ahrens, Bar and Ehlers aloft again.

This formation of bombers is accompanied by a light escort of P-38 Lightnings, who start split, a pair trailing above the formation, whilst three trail below. They are due to exit on turn 7, so will be a complicating presence for the duration of the mission. I have a single TP again, and the day is overcast, with no sun to take advantage of on approach. I split my fighters, Ehlers tailing the formation, Ahrens coming from the nose, and Bar from the 8-10 O’clock flank.

Before I can decide a course of action, the escorts start to immediately interfere. The pair of P-38s trailing above the bombers spot Ehlers, and dive down to engage. Ehlers is unharmed but is forced to break away, taking an escort with him. The other P-38s move from their station to the nose of the formation at the level altitude. This effectively blocks Bar from trying to gain altitude at the nose, as it would mean he has to engage the escorts. Tackling the escorts is not the prime responsibility of my Staffel, my orders being to concentrate on the bombers. If Bar remains in place the escorts will move to engage him next turn, and I can ill afford another fighter to be forced to break off.

Turn two therefore starts with a re-think. Down to two fighters, and with escorts blocking movement, I decide to send both Ahrens and Bar into the attack, approaching low from the nose and flank respectively. The bomber formation has full cohesion, so there’s no modifiers to the defensive fire. This could get dicey for the fighters. They target different bombers at the edge of the formation, Ahrens going for the lead bomber, Bar the tailing bomber on his flank. Both fly in determined mode, Ahrens planning to climb to the tail after his pass, whilst Bar rolls left and climbs to also head to the tail of the formation.

Ahrens flies in first, hitting his target in one engine, and the dice roll gives a catastrophic hit – the engine explodes, and the lead bomber falls out of the formation.

(Above is the attack card. The right has the different heights of the fighter. The cover of the rows indicates the mode of the pilot, blue being evasive, brown being determined. The numbers indicate the lethality of the square. Ahrens has come in low, determined, and the square has a lethality of 1. That’s a hit, and Ahrens passes over the bomber one square. The hit means I get a draw a damage token – the Fw-190 has stitched a line of bullets into one of the bomber’s engines. A dice is then rolled against the number on the token – if I beat a 6, that is a catastrophic hit. I roll an 8, meaning the arrow takes effect. The bomber falls from the formation. If I failed to beat the 6, the damage token would be flipped to show a number of damage points. This would stay on the bomber, with damage accumulating until it reaches 10 points).

A very successful attack by Ahrens is followed by Bar’s approach run on the flank. Bar also scores a hit on his target’s engines, causing it to also fall from the formation. Unfortunately his guns click empty – Bar has used up all his ammo, so won’t be much use for the rest of this mission!

The Continuing Fire cards put some holes in Bar’s fuselage, and Ahrens uses his ‘Quick’ ace skill to switch his mode from determined to evasive, thus avoiding the fire coming from the remaining bombers. Bar rolls right and climbs over the formation to above the tail, whilst Ahrens also goes high, but has to take a wider turn due to his evasive mode; it will take him another turn compared to Bar to be ready to re-engage.

The hit suffered by Bar needs to be resolved. Again, the damage token has a number that has to be rolled against, but this time rolling above or equal to the number means it is a trivial bit of damage. Such is the case for Bar, his Fw-190 still fully functional. However, with escorts still in play and no ammo remaining, he decides there is no point in remaining in the action, so he exits the battle.

Ahrens is still in play, with no damage sustained, and just enough time to make a second pass with the use of my 1 TP. However, the escorts have spotted him, and one flies in to engage. This proves to be a costly decision for the P-38, as Ahrens manages to turn the tables, and shoots down the escort. The pilot has done his duty though - his actions have forced Ahrens to break away from the formation, and the mission ends with no fighters left on the map, despite a few Flight Turns remaining.

Both Ahrens and Bar add a fallen bomber to their tallies, and all three pilots make in back to base safely. Ahrens also proudly talks about how he bested the P-38 that thought it had the better of him. As the formation was inbound to the target, the two fallen bombers score 2 VPs apiece, netting 4 VPs for the mission, and brining me to 6 VPs total. Without the flak, the inbound formations are more daunting prospects to attack, but each downed bomber is one less that can drop their payload, so counts more towards overall success.

It felt like I had some fairly lucky rolls to knock out the two bombers, but on reflection it was two successful 50/50 rolls, and I had some pretty low rolls when establishing the mission situation, so on reflection the odds pretty much balanced out.

3 Likes

Early 1943 – Mission 3.

Mission 3 is my first experience of one of the more advanced bomber formations. The bombers are formed within a proto-box called “javelin down”, with four elements each formed of three bombers arranged in relation to another to extend their overlapping fields of defensive fire. Much more dangerous to approach than the nascent formation previously encountered.

The mission situation is not looking very appealing. The formation is near target, and I have a miserly 2 OPs to spend, and a Flight Limit of 5 turns. Clearly there has been some oversight at a higher command level, or we are struggling for supplies and being forced into making a token effort. I decide to call on a pair of Italian MC202s again, and order one of my Fw-190s into the air. Despite their previous successful missions, Ahrens and Bar stay grounded, and another one of my aces, Frey, flies off to join the err… fray…

The good news is that this bomber formation is without escorts, and that I have 3 TPs to play with. I should be able to get a couple of approaches on the formation within the 5 turn Flight Limit, and without having to worry about my fighters being mobbed by escorts.

Frey starts low at the 8-10 O’clock flank. The sun is high to the other flank, and both MC202s form up there.

Mission 3 however quickly became a story about flak. For some reason the barrage of fire from the ground proved to be very intense and deadly this mission. Near target formations start with some damage in the board to represent their inbound tussles. One bomber in the leading element of the formation was carrying some damage as it entered the flak, perhaps causing her to be flying lower or making her less responsive? Whatever the cause, she was hit by flak in the wing, which proved to be a catastrophic hit that destroyed the bomber.


(Scratch one bomber on a 20% chance)

The destroyed bomber caused this element of the formation to lose some cohesion, and created a gap in the supporting fields of fire. Frey took the chance to launch an early approach from low altitude, aiming for the lead bomber. He went in determined mode, looking to climb past the group to disappear into the sun after his attack. The attack was successful, scoring a hit across the bomber’s fuselage, but failing to cause any critical damage.

Whilst Frey banked around for a second run, the flak fire intensified, striking a second bomber in the engine, and causing it to fall from the formation.


(I couldn’t believe my luck to have a second bomber fall to the flak barrage. Now I had to try and capitalise on the gaps created with my fighter attacks).

Frey swooped down determined from the sun to re-target the lead bomber that he had previously damaged, looking to roll and dive to the nose of formation as he passed. This time his attack was a complete success, exploding an engine, and sending the bomber to fall from the sky.

Despite this success, Frey caught a burst of Continuing Fire, which punched a hole in his wing, despite his advantage from attacking out of the sun. I failed to roll over a 2, meaning that this was not a trivial hit. What seemed to be an innocuous hit was anything but, with Frey’s Fw-190 wobbling alarmingly in the air, and the pilot had to abort the mission to try and nurse his fighter home.

Frey was removed from the game and placed onto the Fate table. As you might expect from the name, these tables are where the fate of pilots in severely damaged planes are decided post-mission. Definitely not a result you want to see, even if another bomber had been accounted for.

I’ve mostly ignored the two MC202s within this narrative so far, as they were largely ineffectual. On their first approach towards the second element with a bomber fallen due to flak fire, one MC202 had a break away due to a proximity collision. The remaining MC202 was unable to cause any damage, but formed back up for a second pass, again seeking to use the advantage from the glare of the sun.

There was another round of furious flak fire, which put paid to the final bomber in the lead element. However, flak fire can also be indiscriminate, and the MC202 was unfortunate enough to catch part of the flak burst as he lined his approach, taking a hit to the fuselage. Whilst he was able to finish his attack (which scored a minor hit on a bomber), the damage was significant and the fighter was also removed to join Frey on the Fate tables.


(Another lucky roll for flak damage, destroying the third bomber in the lead bomber element).


(But the volume of flak fire was clearly very dangerous for everyone, as evidenced by the MC202 who took hit to the fuselage that proved serious).

Mission 3 ended there. 4 bombers accounted for, 2 destroyed by flak, one fallen to flak, and Frey causing one to fall. That still gave me 4 VPs, but there were no experience points for the bombers taken out by flak. More worryingly, I had two fighters awaiting rolls on their Fate tables.

There’s a table for each locational area (e.g. wing, fuselage, cockpit etc.), with a line for each type of aircraft. A dice roll decides what happens, from pilot death, to being wounded or making a successful landing. Fortune was kind, as both Frey and the unnamed Italian were both able to land their damaged fighters and walk away safely, both a little wiser for the experience.

Half-way through the first season, I’m at 10 VPs total, which is exactly on track for a successful campaign. Still no pilot deaths, but I had my first scare with Frey dicing off against the fates. It would be nice to have a bigger pool of OPs for a mission at some stage, but the dice rolls do seem to balance out with some very lucky hits on the bombers from flak fire. The flak fire in this mission was a bit ridiculous, accounting for three bombers and one of my MC202s. Clearly this formation had come in on the wrong altitude, flying too low and was getting punished for it.

Looking forward to getting this back to the table sometime soon to see if I can maintain the momentum of my early successes.

3 Likes